How to Add Your Credit Card
- Navigate to the Workspace Billing page.
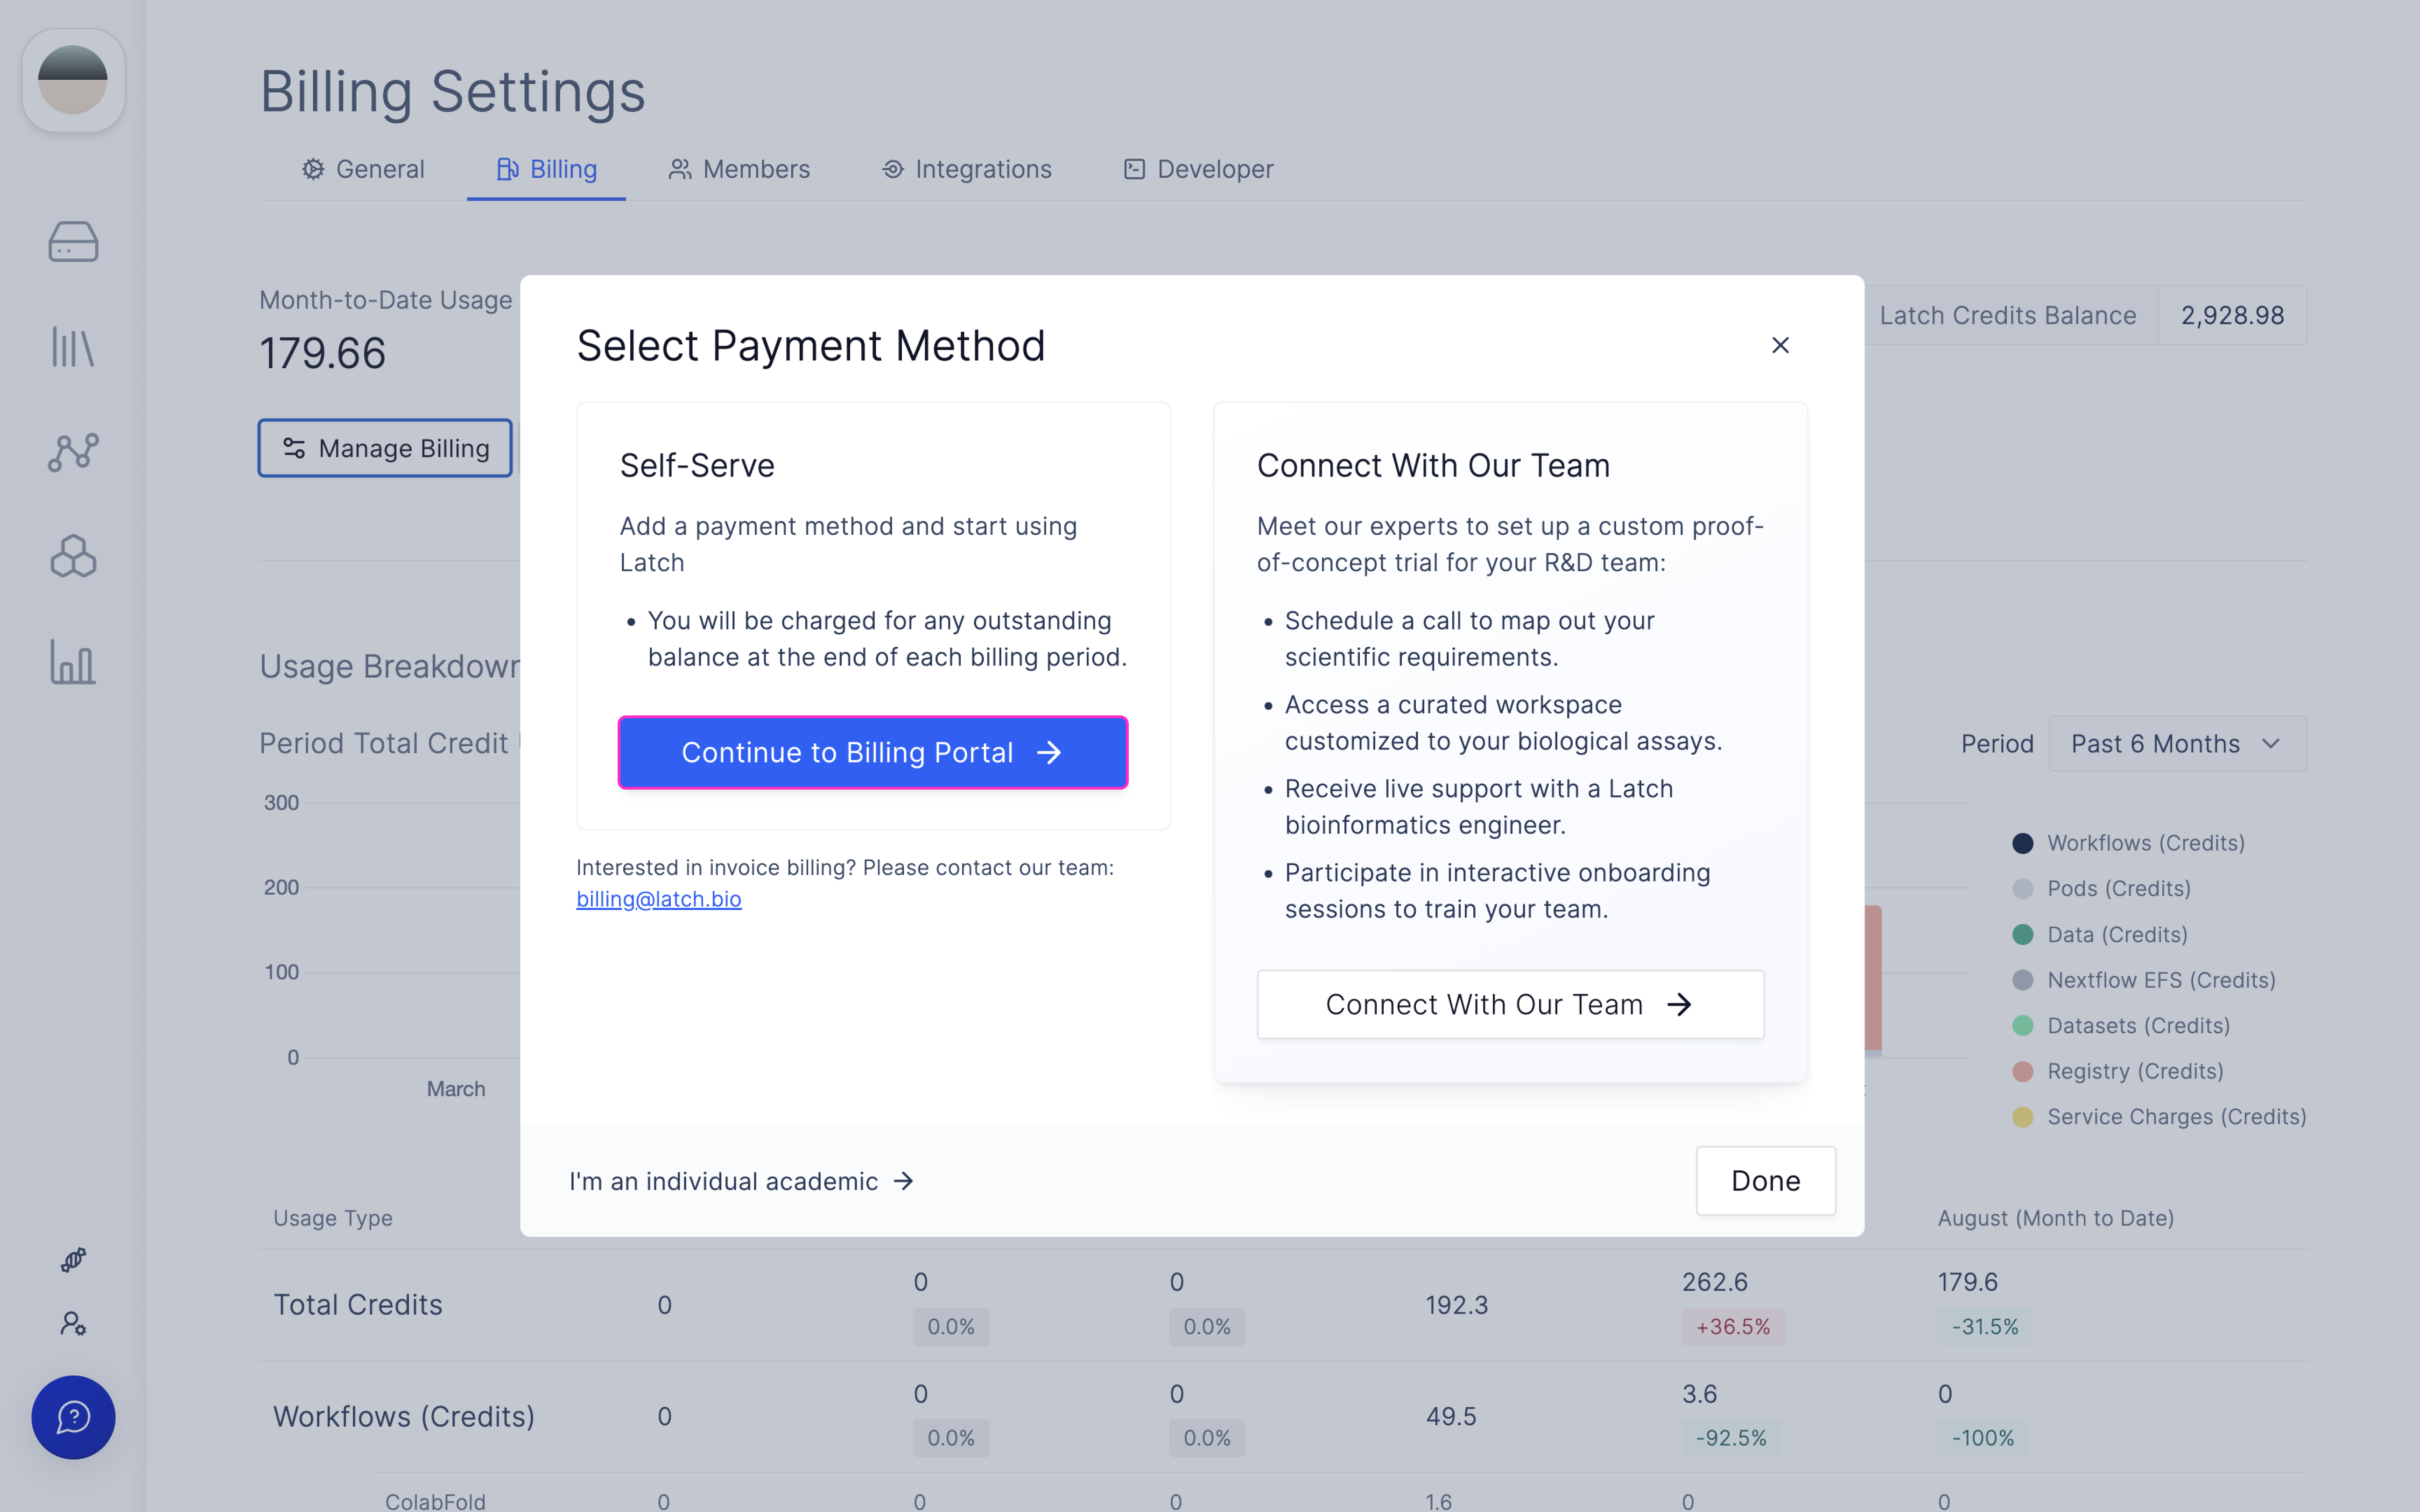
- Select Self-Serve → Continue to Stripe. You will be directed to the Stripe billing page where you can enter your credit card information.

- At the end of each month, you will be billed for any outstanding balance.
Understanding your Billing page

- Month-to-Date Usage refers to the number of Latch credits incurred that month across all Latch products. 1 Latch credit equals 1 USD.
- Outstanding Balance refers to how much you will pay at the end of the month. If the payment method for the previous month fails, it will be added to the outstanding balance.
- Latch Credits Balance refers to prepaid credits that your team can use on the Latch platform. If your organization has purchased these credits in bulk, you will observe your outstanding balance as zero or ”-” on the billing page. This indicates that instead of incurring additional costs each month, you are utilizing the credits already bought, thus drawing down from your pre-established credit balance.
Configuring Usage Limits and Billing Alerts
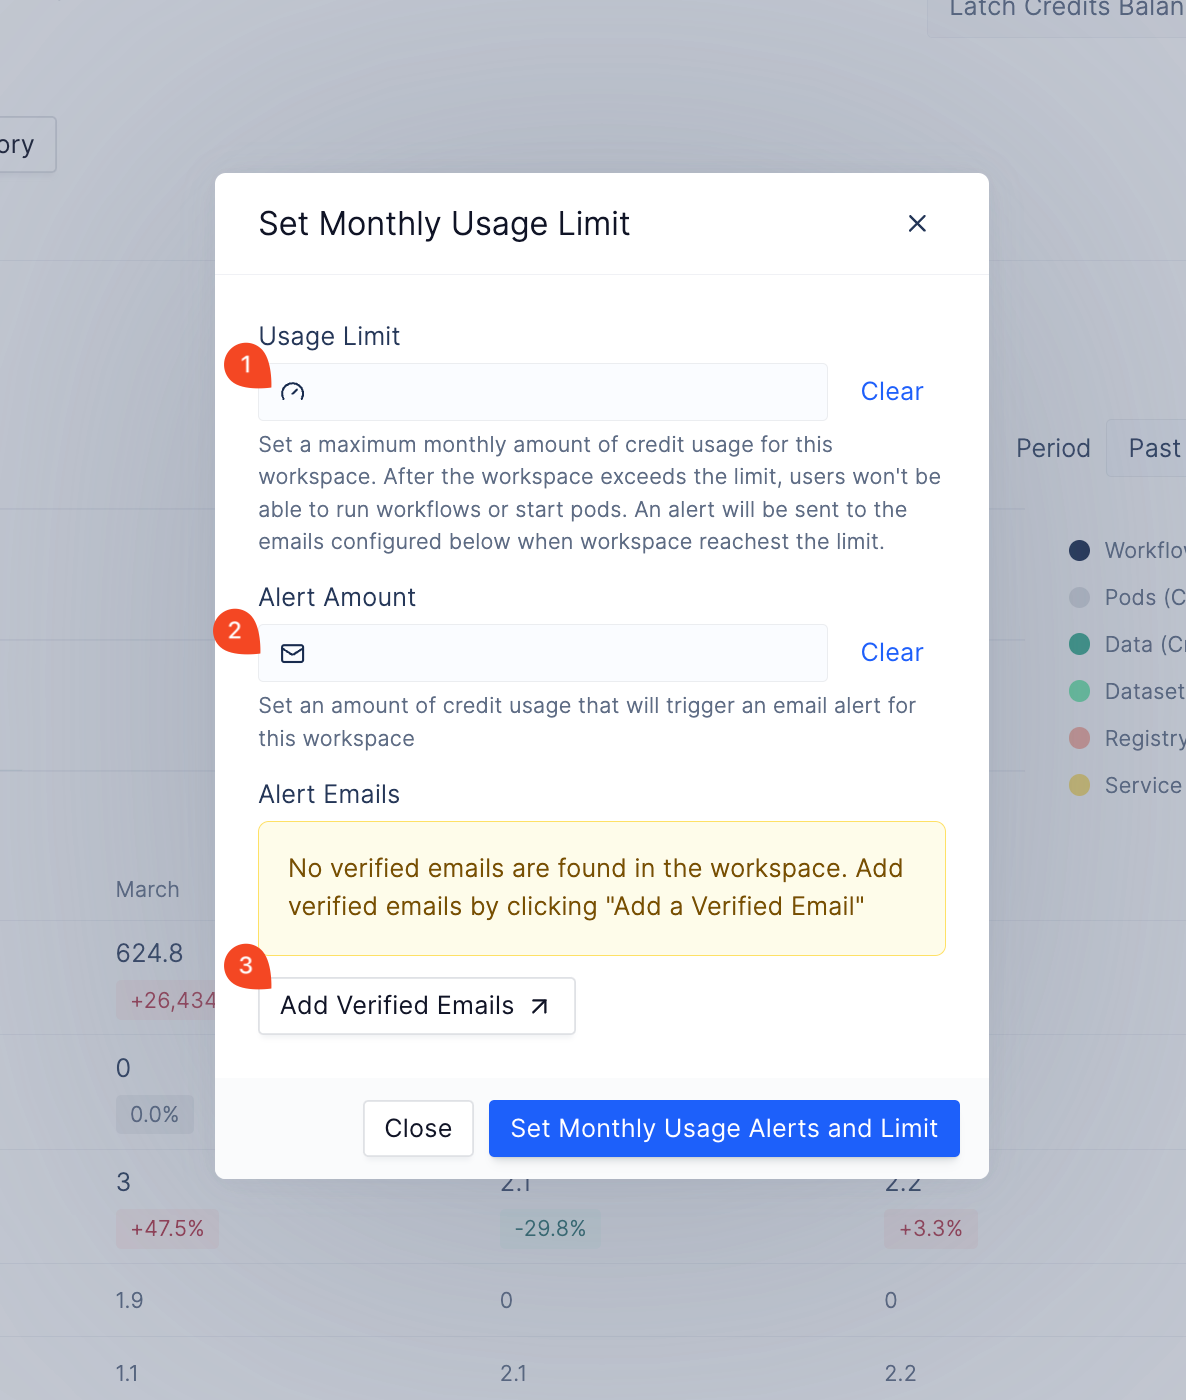
You can set usage limits for your workspace to prevent unexpected charges. Additionally, you can set up email alerts to notify you when your workspace reaches a certain credit usage threshold.- Navigate to the Workspace Billing page and click on Set Monthly Usage Limits.

- Set the credit usage limits for your workspace.
- Set Usage Limit to the maximum number of credits you want to allow your workspace to use each month. After the workspace reaches this limit, users no longer will be able to start pods or launch workflows. You will also receive an email notification when the workspace reaches this limit.
- Set Alert Amount to the number of credits at which you want to receive an email alert. This will help you keep track of your workspace’s credit usage.
- To receive email alerts, you need to have emails verified in your workspace. Click on Add Verified Emails to verify your email on the workspace settings page.

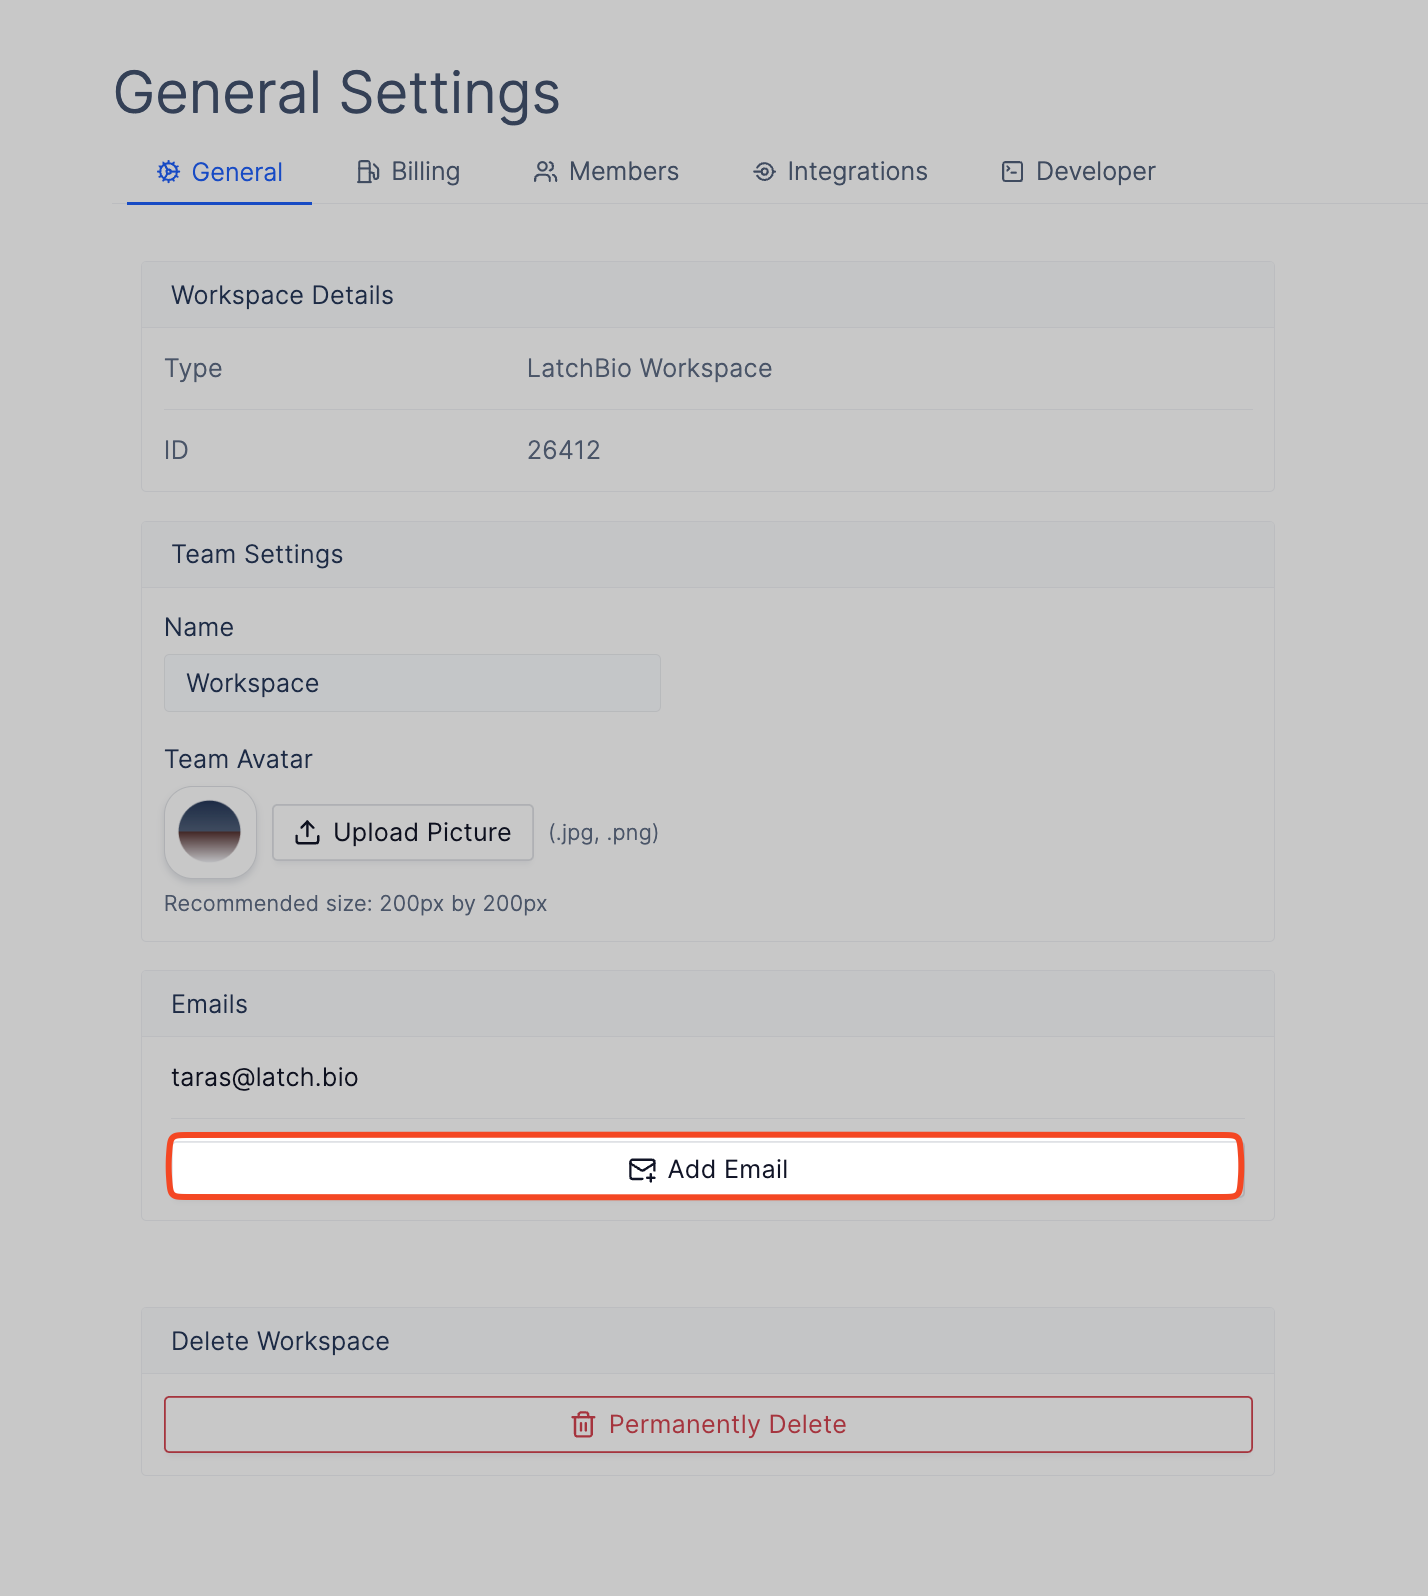
- (Optional) Verify your email address by clicking on Add Verified Emails. Alternatively, you can also go to the Workspace Settings page and click on Add Email.

- Select the email addresses that you want to receive alerts on and click on Save.
FAQ
What happens when I have an outstanding balance?
What happens when I have an outstanding balance?
You will still be able to view and download data. However, you won’t be able to launch a workflow or start a pod.