- Complete the Quickstart guide.
How to write a task and create a workflow
How to define compute and storage requirements
How to manage third-party dependencies
How to customize a user-friendly interface
How to test your workflow from the Latch Console
1. Initialize Workflow Directory
Bootstrap a new workflow directory by runninglatch init from the command line. In this tutorial, we will be using the covid-wf template.
covid-wf.
2. Build your Workflow
Define Individual Tasks
A task is a Python function that:- Takes typed inputs (e.g., LatchFile, LatchDir)
- Runs code inside the workflow container
- Returns outputs to the Latch platform or to another task
covid-wf/wf/assemble.py: This task ingests two sequencing reads and outputs an assembled SAM file.
Considerations when splitting up tasks
Considerations when splitting up tasks
When building a workflow with multiple tasks, it can be difficult to decide when to split larger tasks into smaller tasks. Some of the tradeoffs are listed below to guide this decision:Benefits of splitting a task into mulitple smaller tasks:
- It is easier to manage the dependencies and environments of tasks with less code
- Tasks can be reused between different workflows.
- Each task can be assigned different computing resources.
- Task functions define clear boundaries between steps in a workflow, allowing for quicker isolation of problems, especially if the tasks are smaller.
- It is easier to retry workflows from the last failed task if tasks are small. The last succeeded task will be “further along” in the workflow.
- Splitting up tasks creates new nodes in the graph representation of the workflow. If each node has one function, may be easier to interpret for biologists.
- File I/O overhead - files passed between tasks are uploaded to S3 by the first task and then downloaded by the second task. with the appropriate resources to be present before it can run and this can take time.
- Scheduling overhead - each task in a workflow waits for an available machine with the appropriate resources to be ready before it begins executing. While this process usually takes under a minute, it can be a significant fraction of the total runtime for fast-running workflows.
Chain Tasks Together into a Workflow
Once tasks are defined, chain them in a workflow function. You can do this by:- Calling each task in sequence
- Passing task outputs as inputs to downstream tasks
assembly_task first, then passes its output to sort_bam_task.
3. Customize compute and storage requirements for each task
A task decorator can be used to specify compute and storage requirements.4. Define dependencies
Latch uses Dockerfiles for dependency management. You can automatically generate Dockerfiles from existing environment files or create them manually.Automatic Generation
Use thelatch dockerfile command to generate a Dockerfile from your existing environment files:
Python Dependencies
Python Dependencies
System Dependencies
System Dependencies
R Dependencies
R Dependencies
Conda Dependencies
Conda Dependencies
Injecting Environment Variables
Injecting Environment Variables
Manual Creation
You can create Dockerfiles manually following standard Docker best practices. However, certain Latch-specific elements are required for your workflow to function properly. These elements include:- The Latch base image
- Command to install the Latch SDK
- Latch internal tagging system and expected root directory
5. Customize user interface
There are two pages that you can customize: the About page for your workflow and a Parameters page for workflow input parameters. To modify the About page, simply write your description in Markdown in the docstring of the workflow function.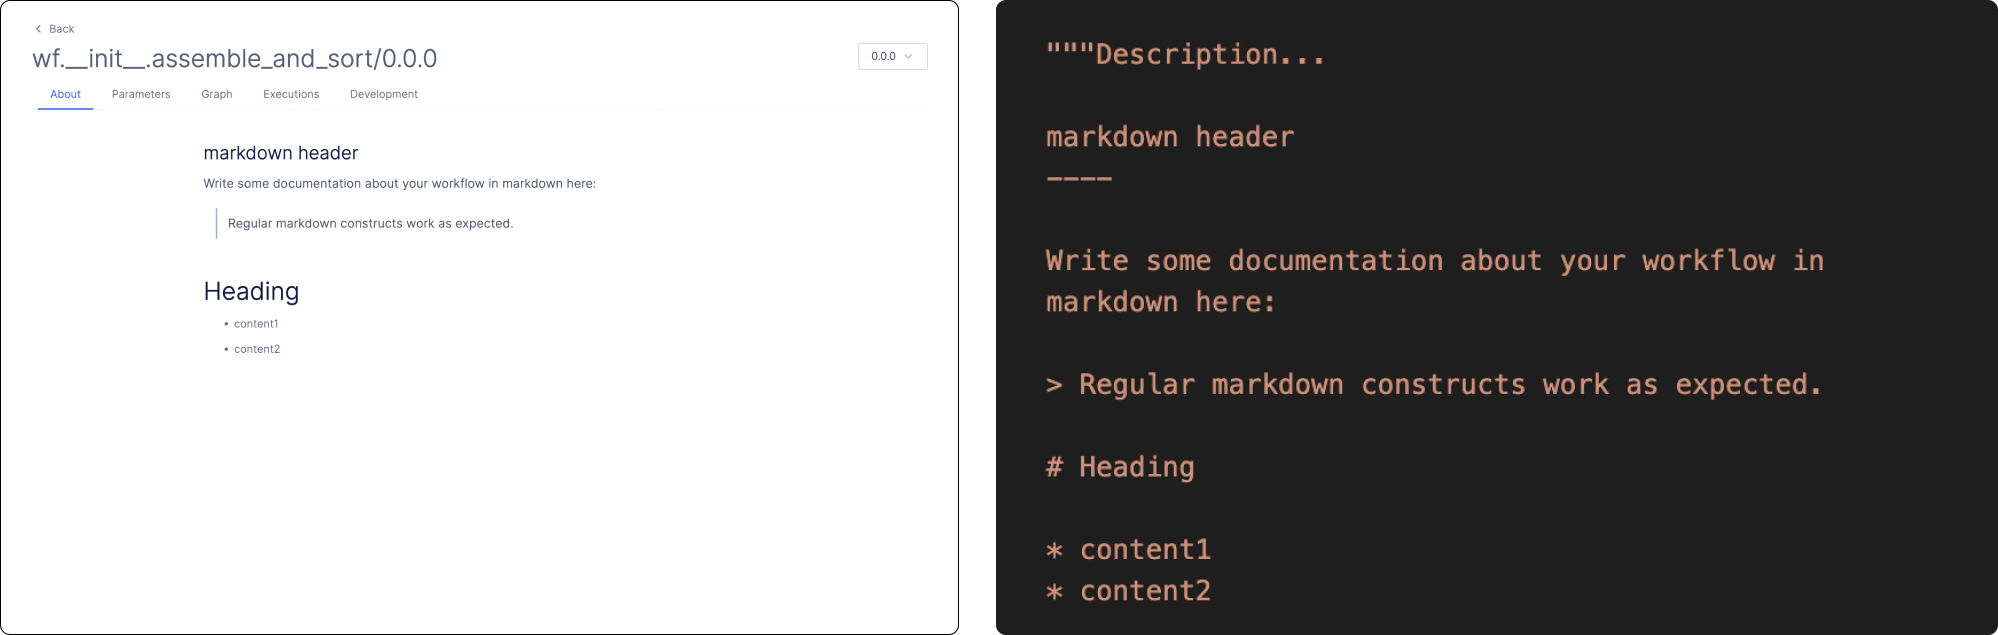
LatchMetadata and LatchParameter:
metadata variable then needs to be passed into the @workflow decorator to apply the interface to the workflow.
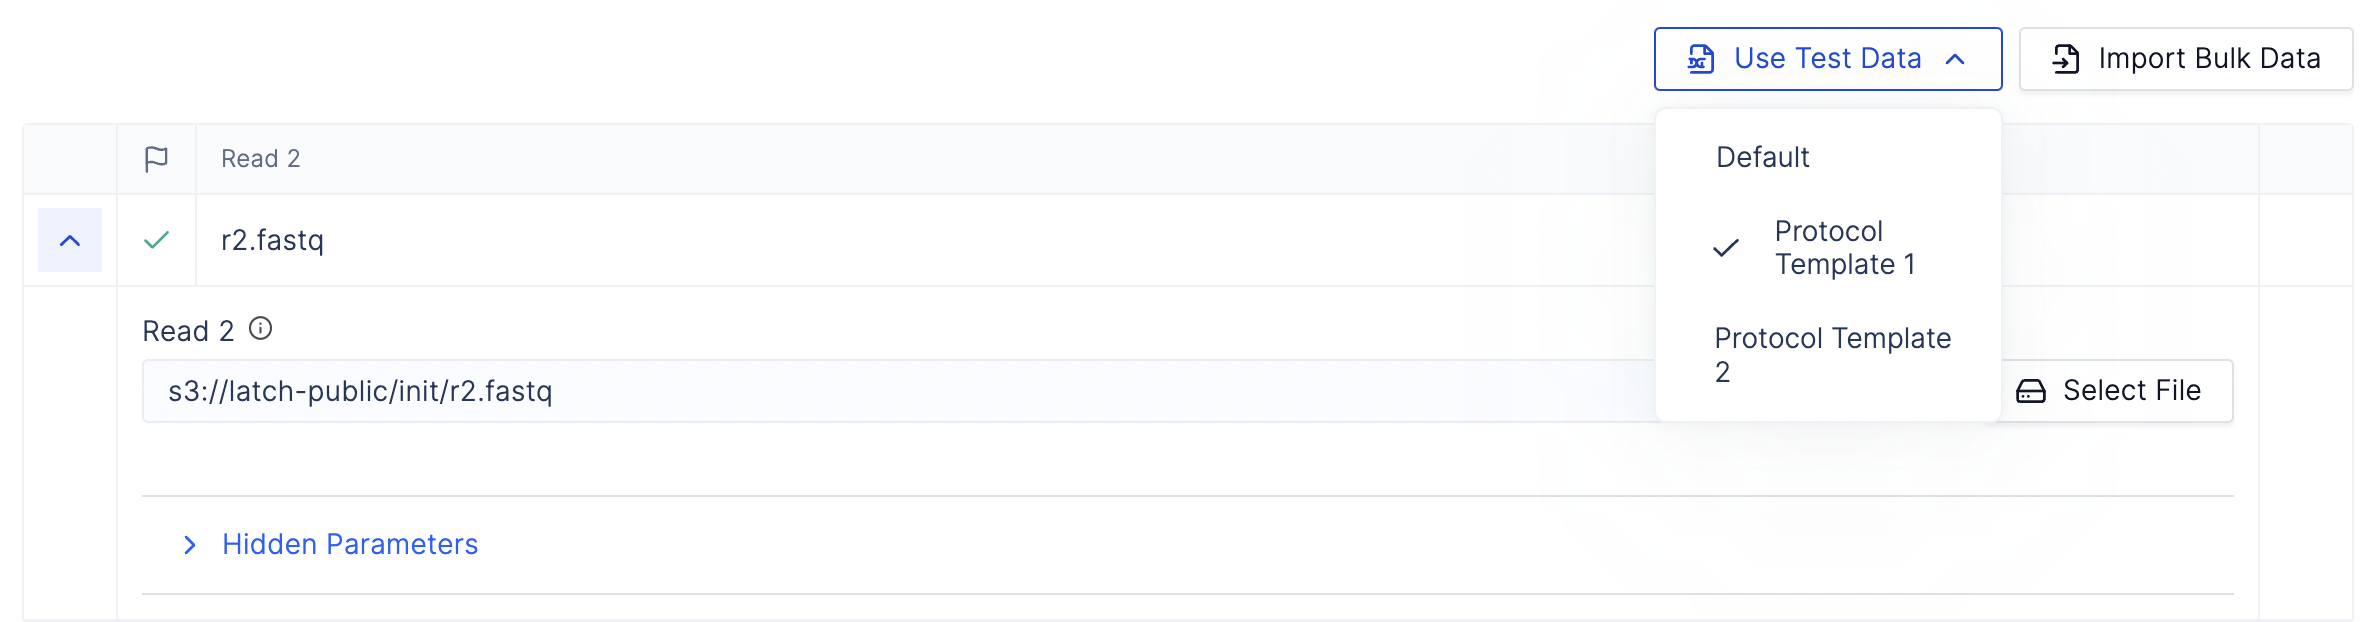
6. Add test data for your workflow
Use LatchLaunchPlan to add test data to your workflow.
7. Register your workflow to Latch
You can release a live version of your workflow by registering it on Latch:- Build a Docker image containing your workflow code
- Serialize your code and register it with your LatchBio account
- Push your docker image to a managed container registry
8. Test your workflow
To test your first workflow on Console, select the Test Data and click Launch. Statuses of workflows can be monitored under the Executions tab.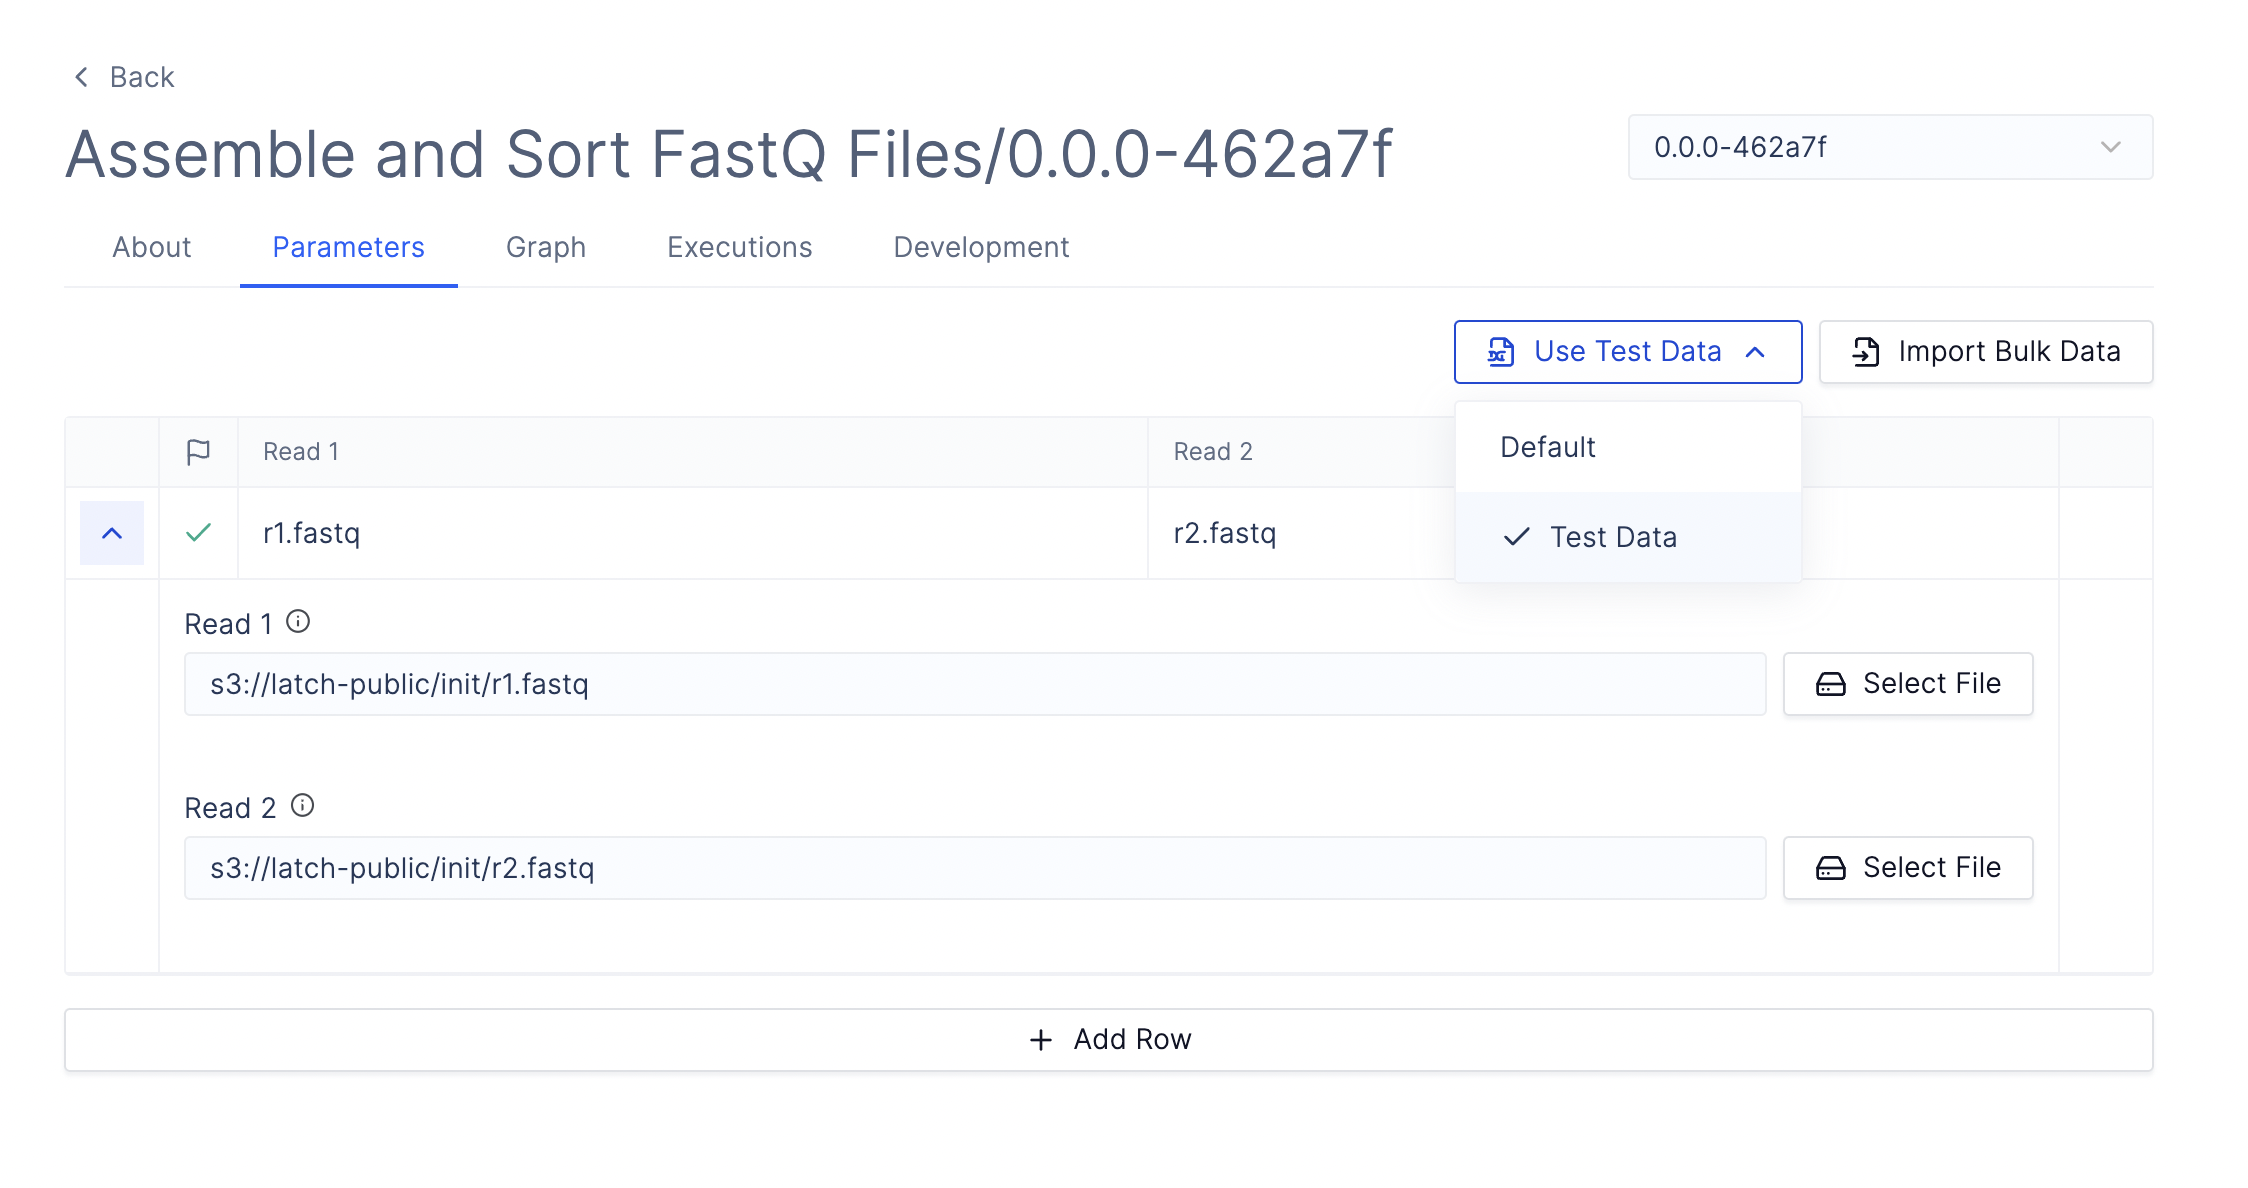
9. Iterative Development: Local Testing before Registration
You can test workflows locally during development to catch errors before registering. Uselatch develop to build your workflow’s Docker image and start an interactive shell in the same container environment it will run in on Latch. Inside the shell, you can write mock test code and run tasks to verify workflow behavior in a production-like environment.aviour in an environment as close to the production one as possible.
See the Development and Debugging to learn more.
What You’ve Learned
Core Concepts:- Tasks are Python functions that process inputs and return outputs
- Workflows chain multiple tasks together to create complex pipelines
- LatchFile/LatchDir types handle remote file operations automatically
- Initialize with
latch initto create boilerplate code - Build individual tasks, then chain them into workflows
- Configure compute resources using task decorators
- Manage dependencies with automatic or manual Dockerfile creation
- Customize the user interface with metadata and parameters
- Test locally with
latch developbefore registration - Register with
latch register --remoteto deploy
Next Steps
- Customize your workflow interface
- Learn about testing and debugging.
- Explore advanced workflow features such as caching, retries, and parallelization