Step 1: Clone the example Snakemake workflow
First, clone the example Snakemake workflow:Step 2: Add Latch Metadata
All Latch workflows require a metadata file specifying the input parameters and metadata the Snakemake workflow needs to run in the Latch Console. You can automatically generate the required metadata files from an existingconfig.yaml by typing:
latch_metadata folder in your workflow directory:
latch_metadata/__init__.py file instantiates a SnakemakeMetadata object, which contains the Latch-specific metadata displayed on the Latch Console when executing a workflow. Feel free to update the output_dir, display_name, or author fields.
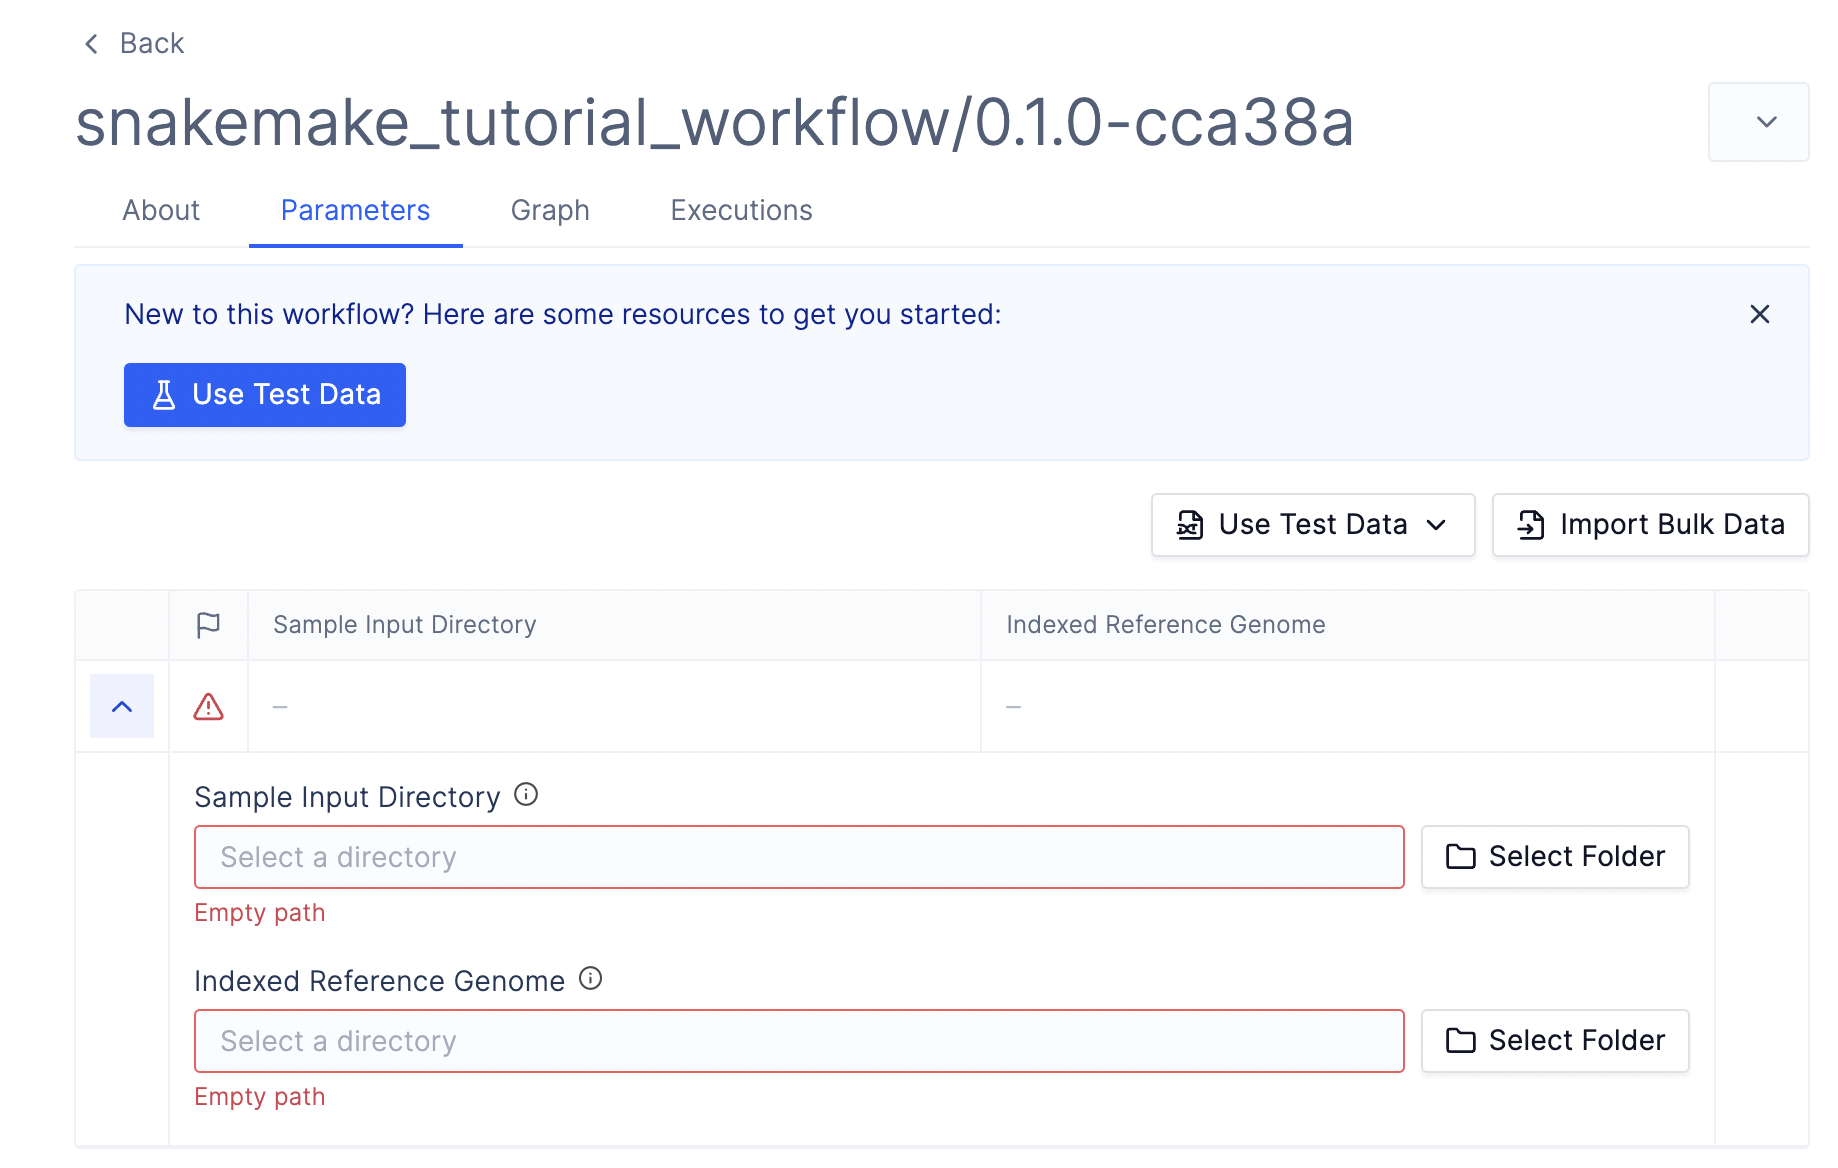
The SnakemakeMetadata object also contains parameters and file_metadata fields specifying the workflow’s input parameters.
LatchDir (which is a pointer to a directory hosted on Latch Data). When we register this workflow, these parameters will be exposed to the user on the Latch UI. Upon execution, the workflow orchestrator will download these directories to the local machine before executing the task.
How does the orchestrator know which local path to download the remote files? For each SnakemakeParameter of type LatchFile or LatchDir, we use SnakemakeFileMetadata object to specify the local path to copy files to before the Snakemake job runs.
Step 3: Define Workflow Environment
To execute Snakemake workflows in a cloud environment, we must define a single Docker container to run each task in. This container must contain both the runtime dependencies for the Snakemake tasks and Latch-specific dependencies (such as the Latch SDK). Fortunately, the Latch SDK provides a convenient command to generate a Dockerfile with the required Latch dependencies. Run the following in your workflow directory:Dockerfile in your root directory. Let’s analyze each relevant section of the generated Dockerfile:
- The Dockerfile uses the Latch base image and installs the Latch SDK with Snakemake support. These steps are required to execute workflows on the Latch cloud.
-
This section installs the runtime dependencies (
bwa,samtools, etc.) required for the workflow to execute. Thelatch dockerfilecommand will detect the existence of anenvironment.yamlfile in the root directory and create a conda environment from that file. If your workflow doesn’t have anenvironment.yamlfile, you must manually install packages in the Dockerfile. -
Section 3 copies the source code into the container. Use
.dockerignoreto avoid copying any large data files that you do not want in your container. - Copy the auto-generated Snakemake entry point file into the container. This Python file will be executed when the workflow runs. For now, you don’t need to be familiar with the contents of this file.
Step 4: Upload the Workflow to Latch
Finally, type the following commands to log in to your account and register the workflow to Latch:snakemake_jit_entrypoint.py file is generated. Once the registration finishes, stdout provides a link to your workflow on Latch.
Step 5: Upload Data and Run the Workflow
Before running the workflow, we must upload our input data to Latch Data. The skeleton code contains some sample data under thedata/` directory, which you can use for testing.
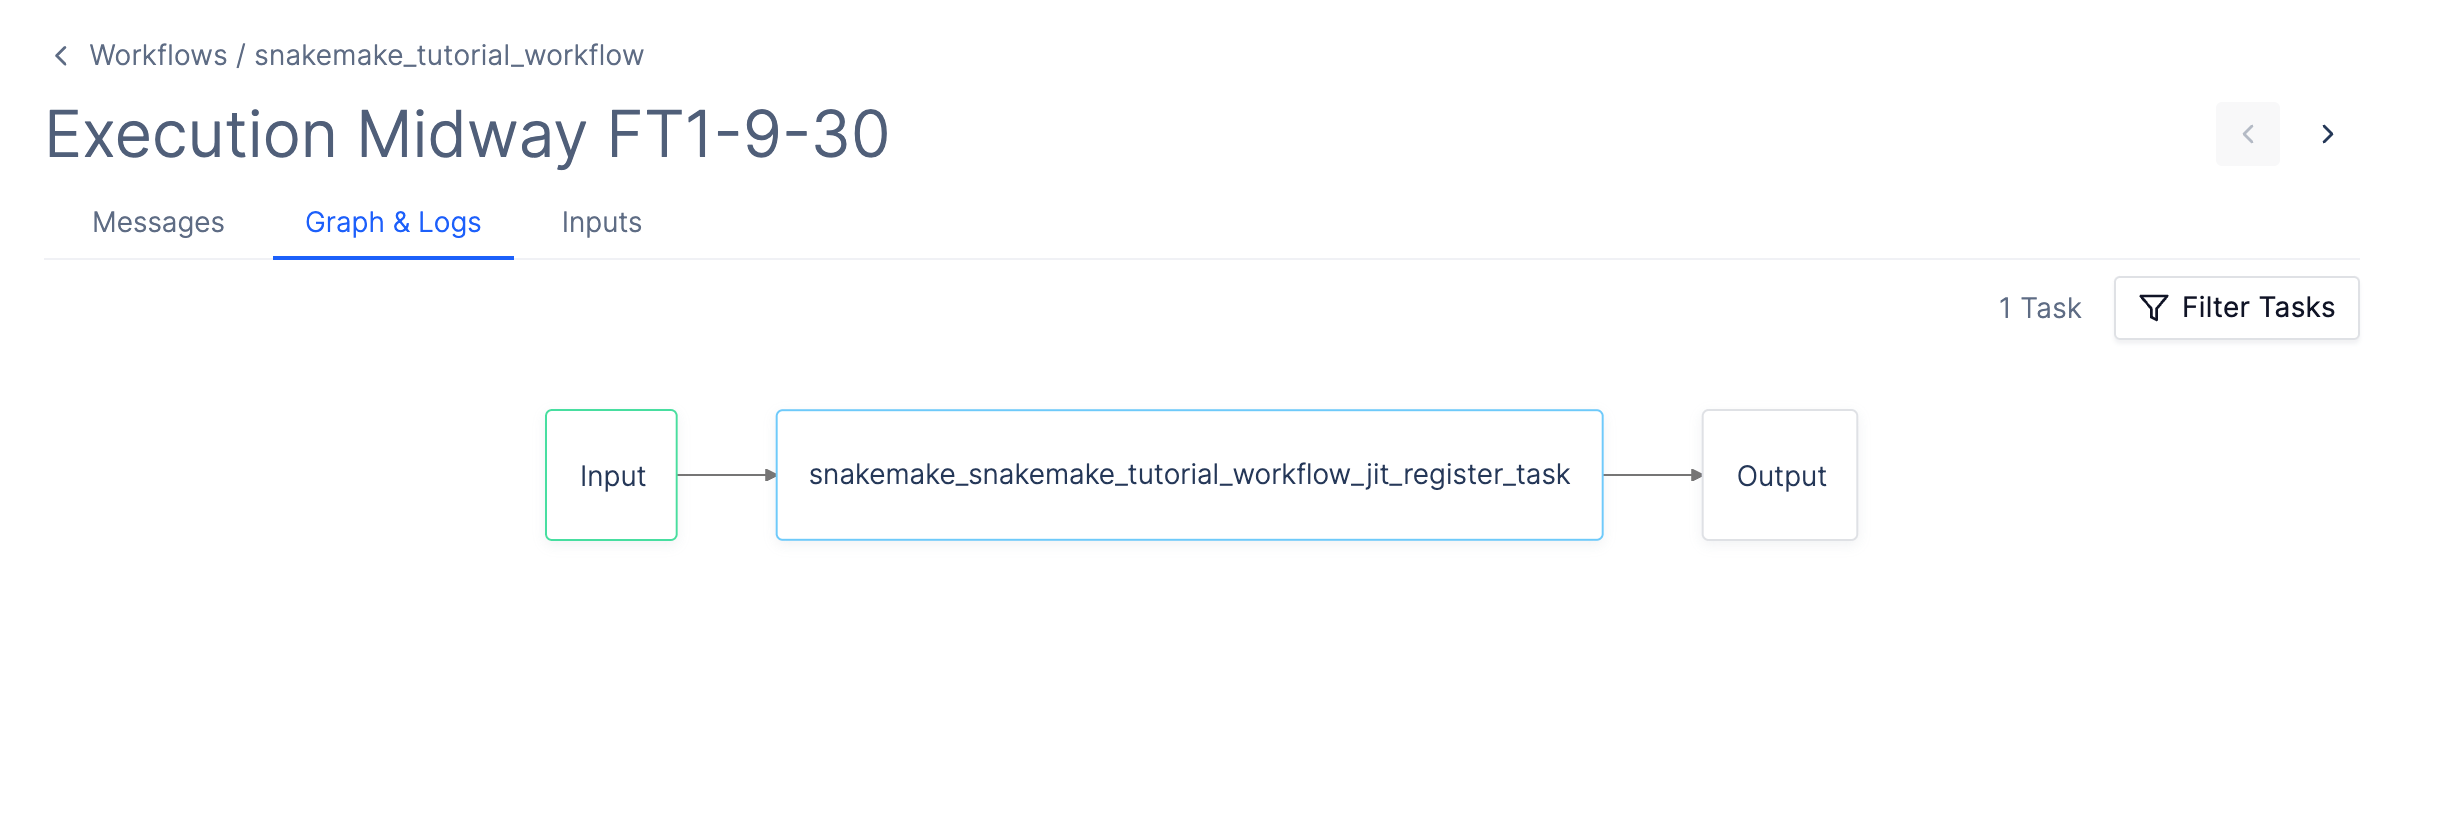
Once you have uploaded the data and selected the appropriate input parameters, click Launch Workflow. You should now see the workflow task executing.
output_dir folder, as defined in your Latch Metadata.
Next Steps
- Learn about how to modify Snakemake workflows to be cloud-compatible here.
- Visit troubleshooting to diagnose and find solutions to common issues.
- Visit the repository of public examples of Snakemake workflows on Latch.