Prerequisites
Before you start, ensure you have an IAM role in your AWS that permits you to create CloudFormation Templates. Latch utilizes CloudFormation Templates to establish an IAM role that enables the configuration and discovery of your S3 buckets.Instructions
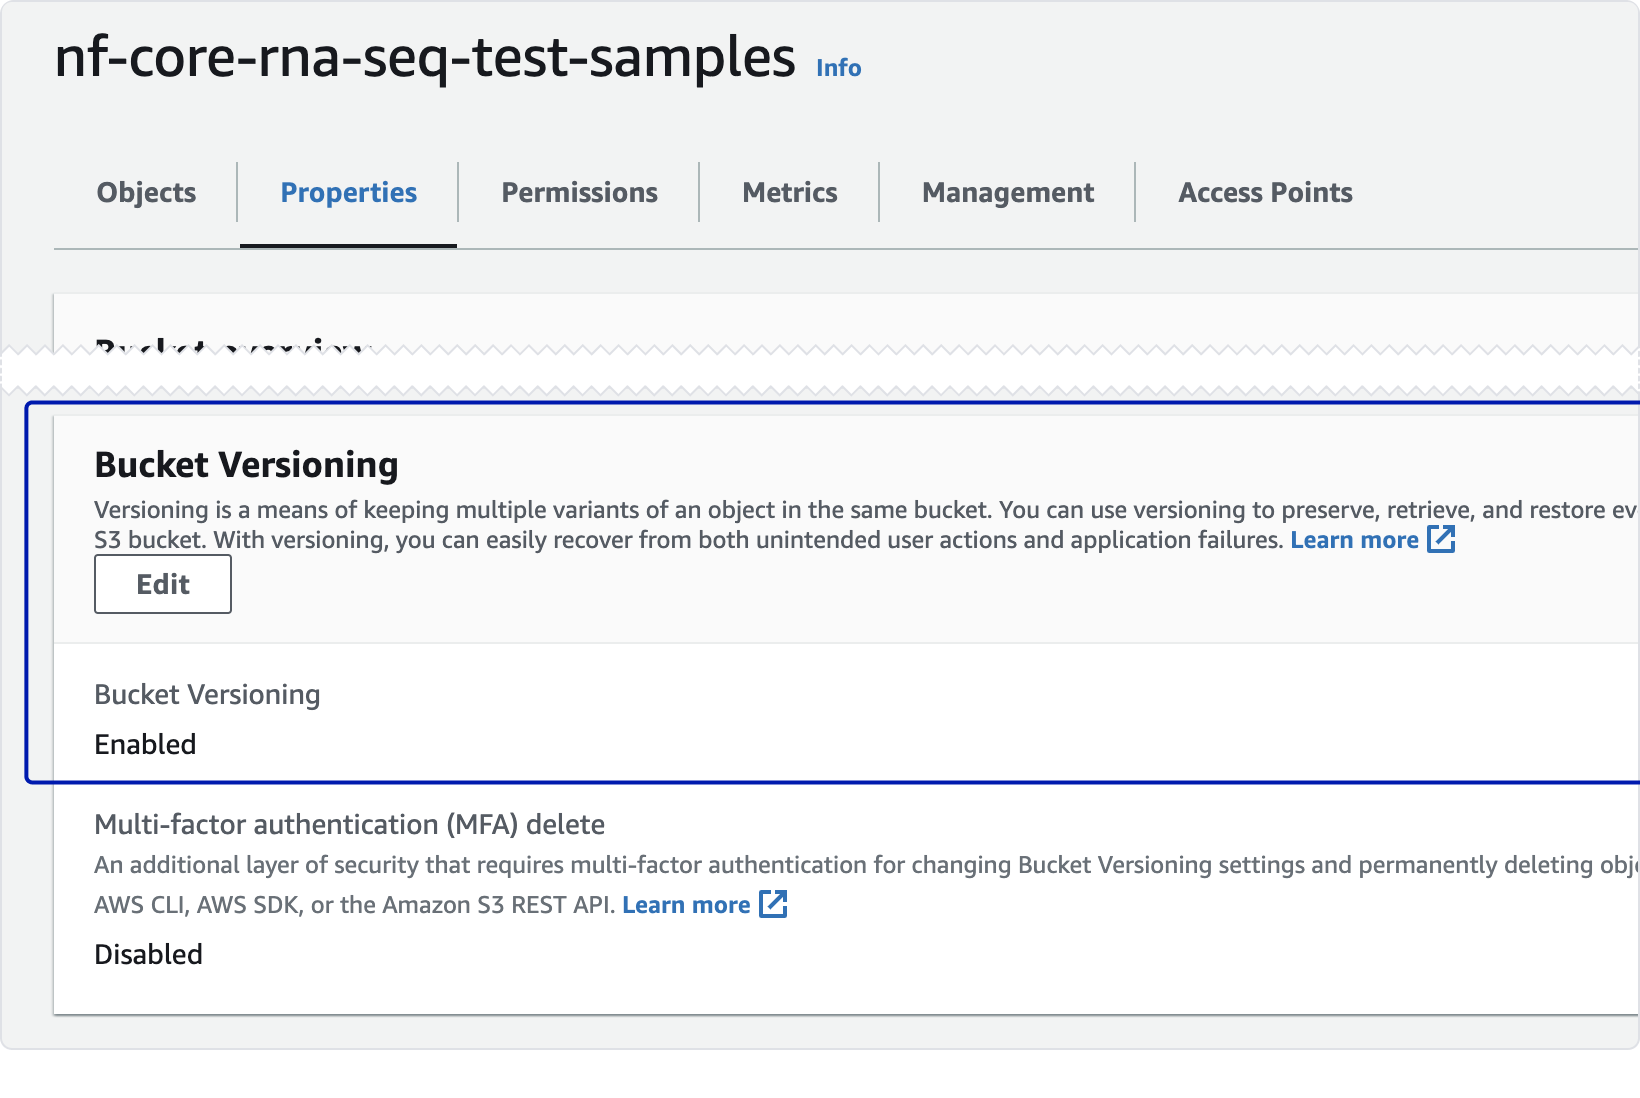
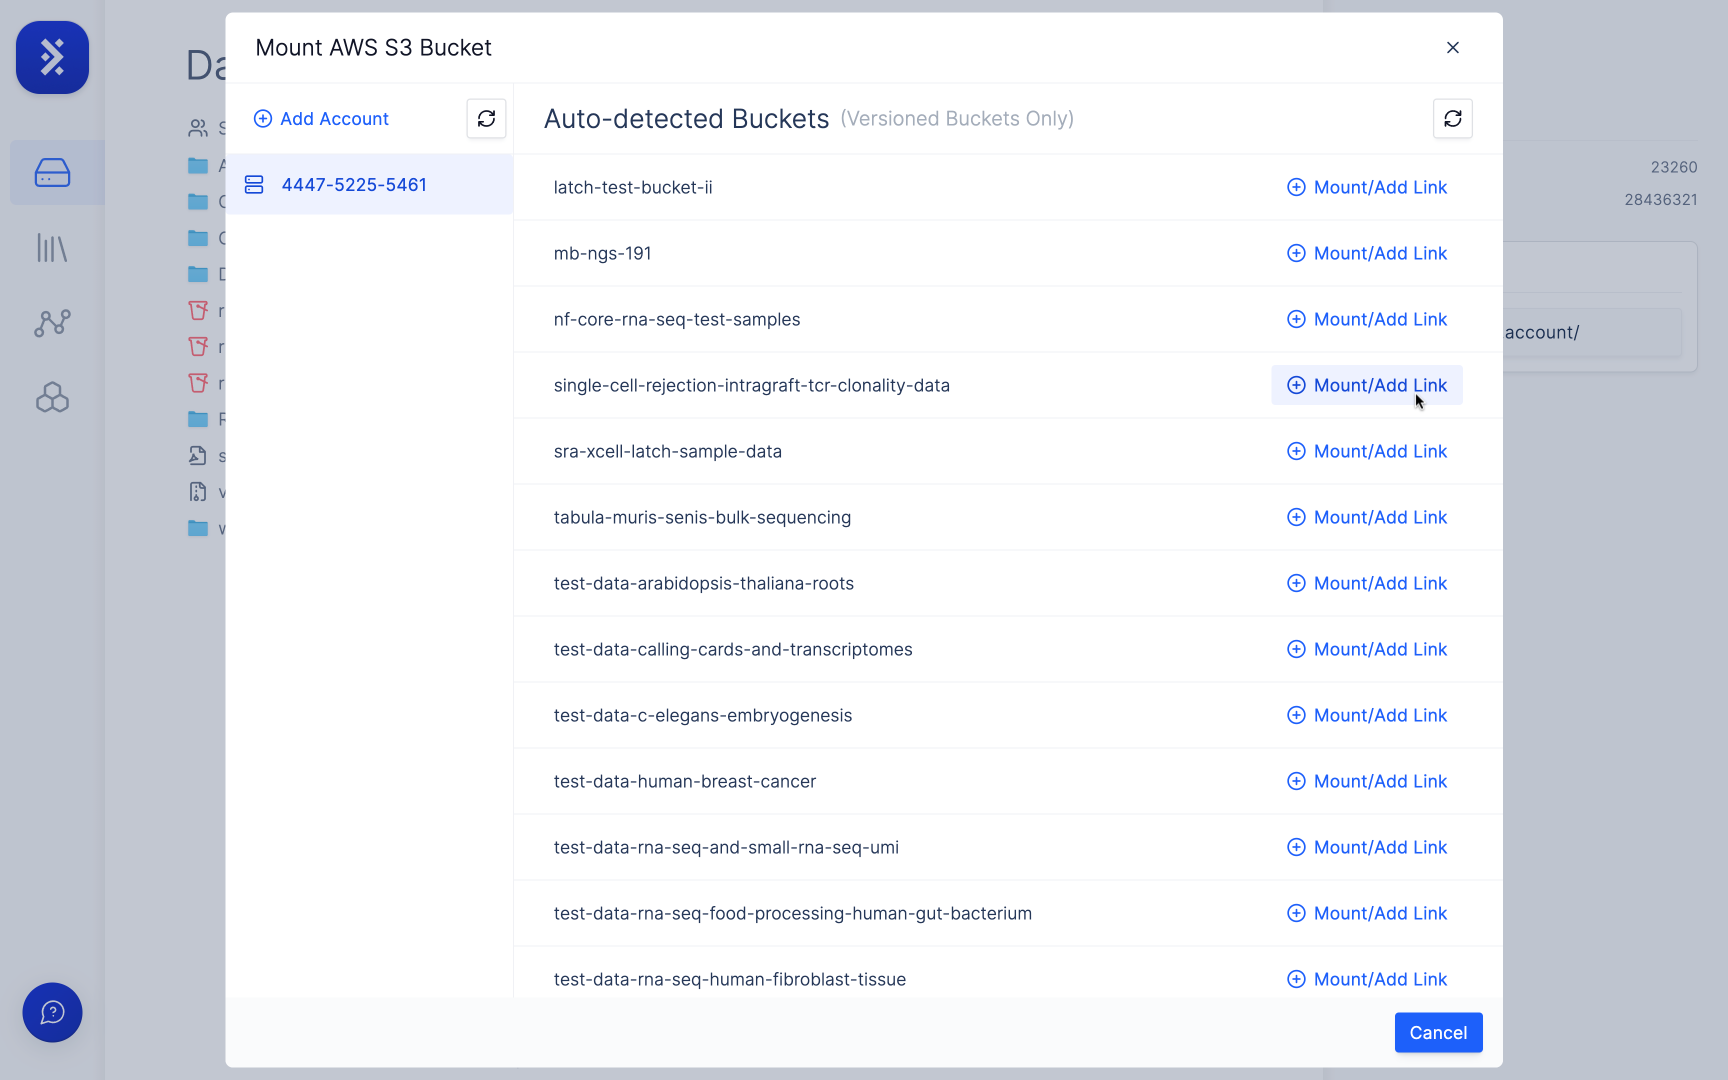
Important: Latch only supports mounting versioned buckets. To check if your bucket is versioned, open the bucket in S3, go to the Properties tab, and check Bucket Versioning.Connecting an AWS Account
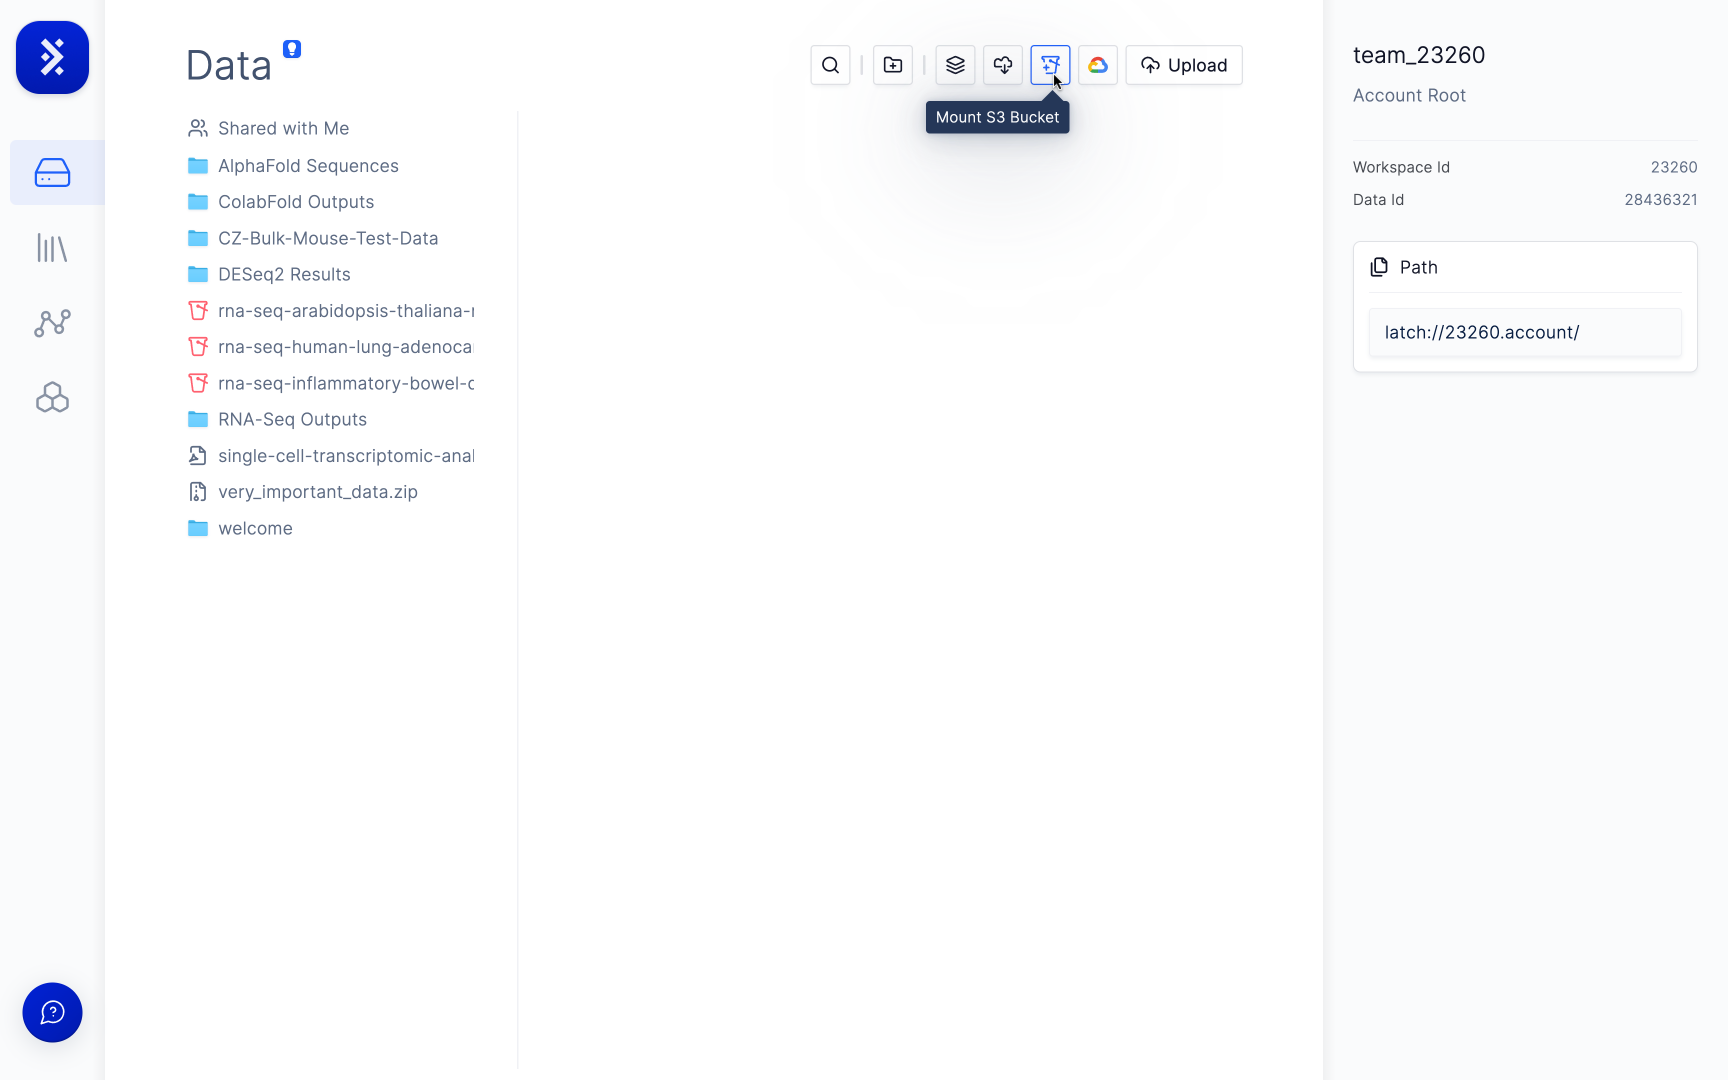
Go to the 'Data Tab' and click the 'Mount S3 Bucket' button.
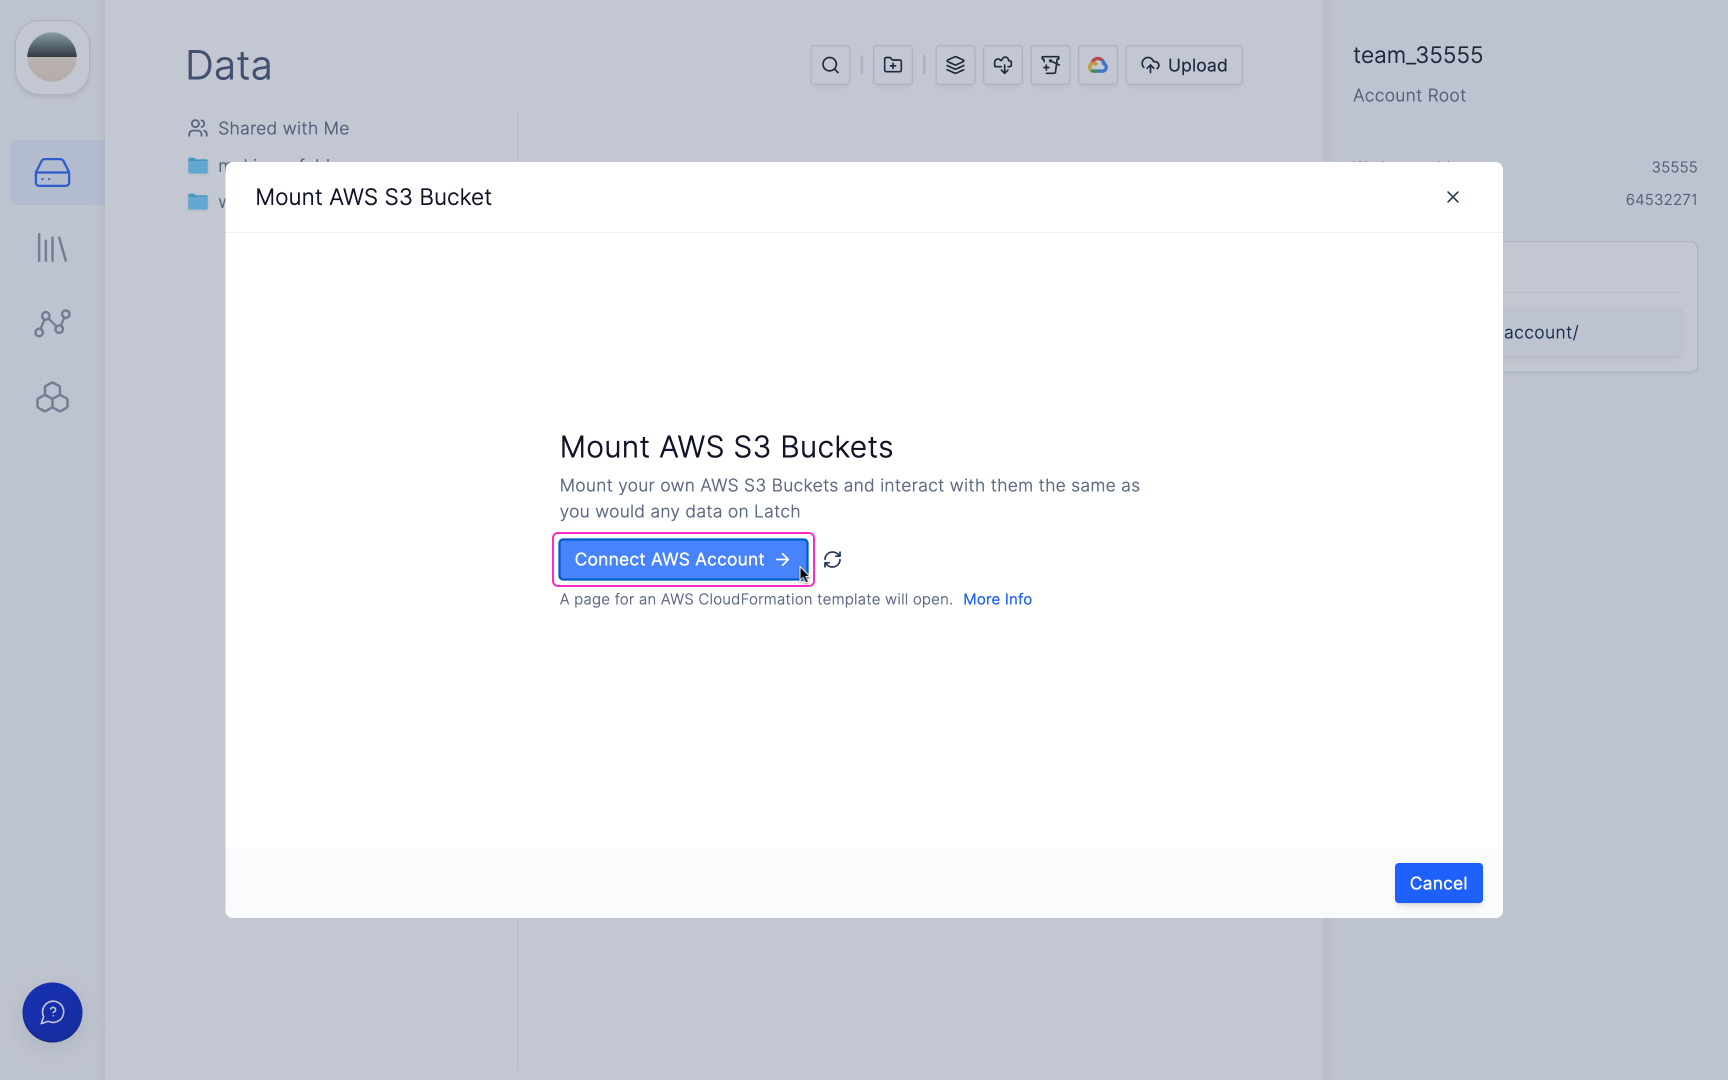
If you have not connected Latch with your AWS account yet, click the 'Connect AWS Account →' button.
Log into the AWS account which contains your buckets.
You will be directed to an AWS CloudFormation 'Quick create stack' template.
- Permission to list all of your buckets,
- Permission to view or update CORS, versioning, policy, and notification settings only on select buckets you specify,
- Permission to create, tag, delete, and permission a
latch-mount-fw-*Lambda in your account (this Lambda is limited to writing its own CloudWatch logs and forwarding incoming S3 events to SNS, SQS, or Lambda targets), and - Permission to execute lambdas and to publish events to LatchBio’s SQS queue (for configuration and bucket notifications, respectively).
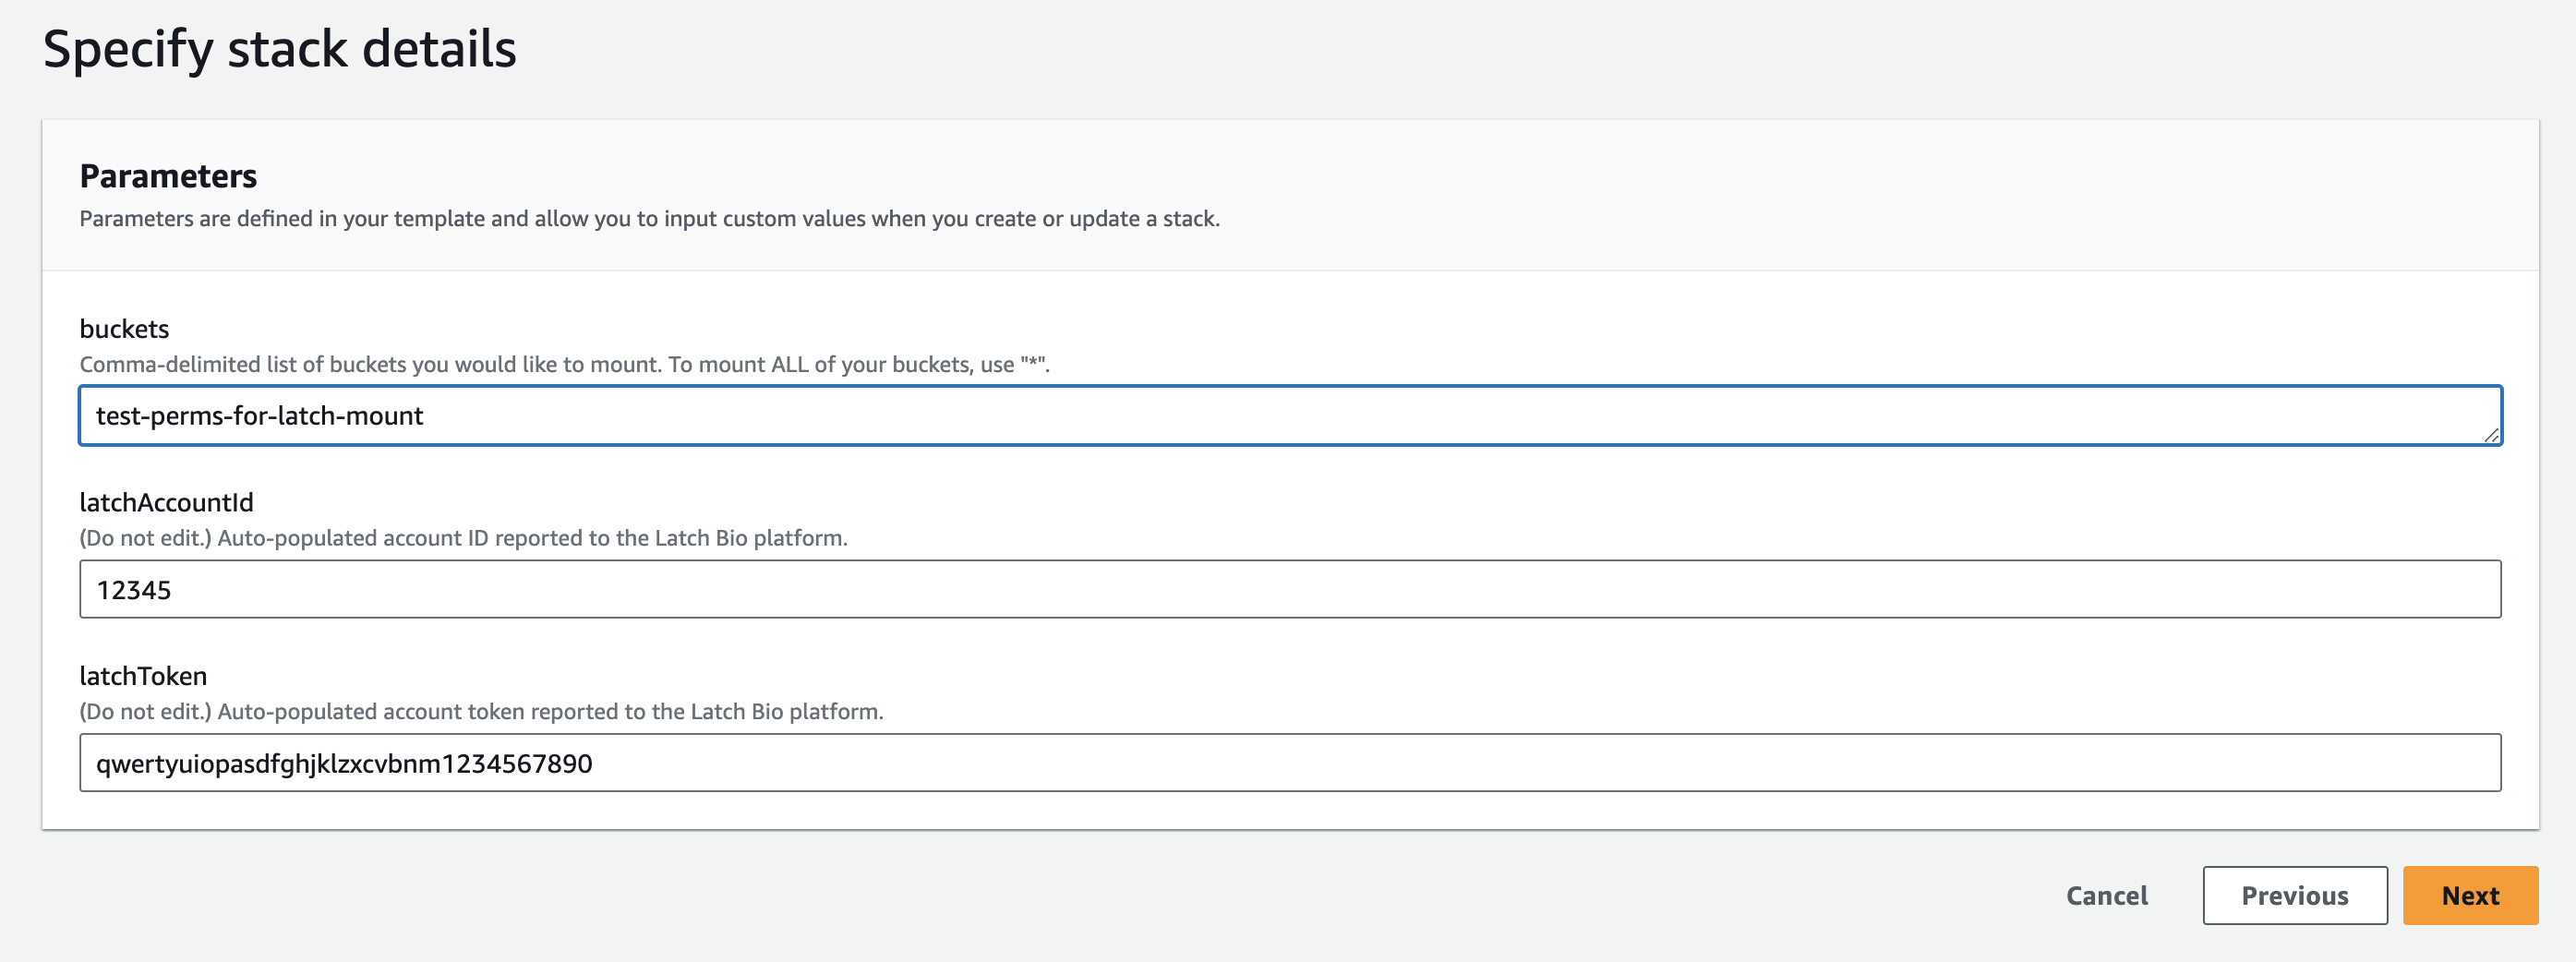
Specify which buckets you want to give LatchBio access to by entering them as a comma (,) delimited list in the field called 'buckets'.
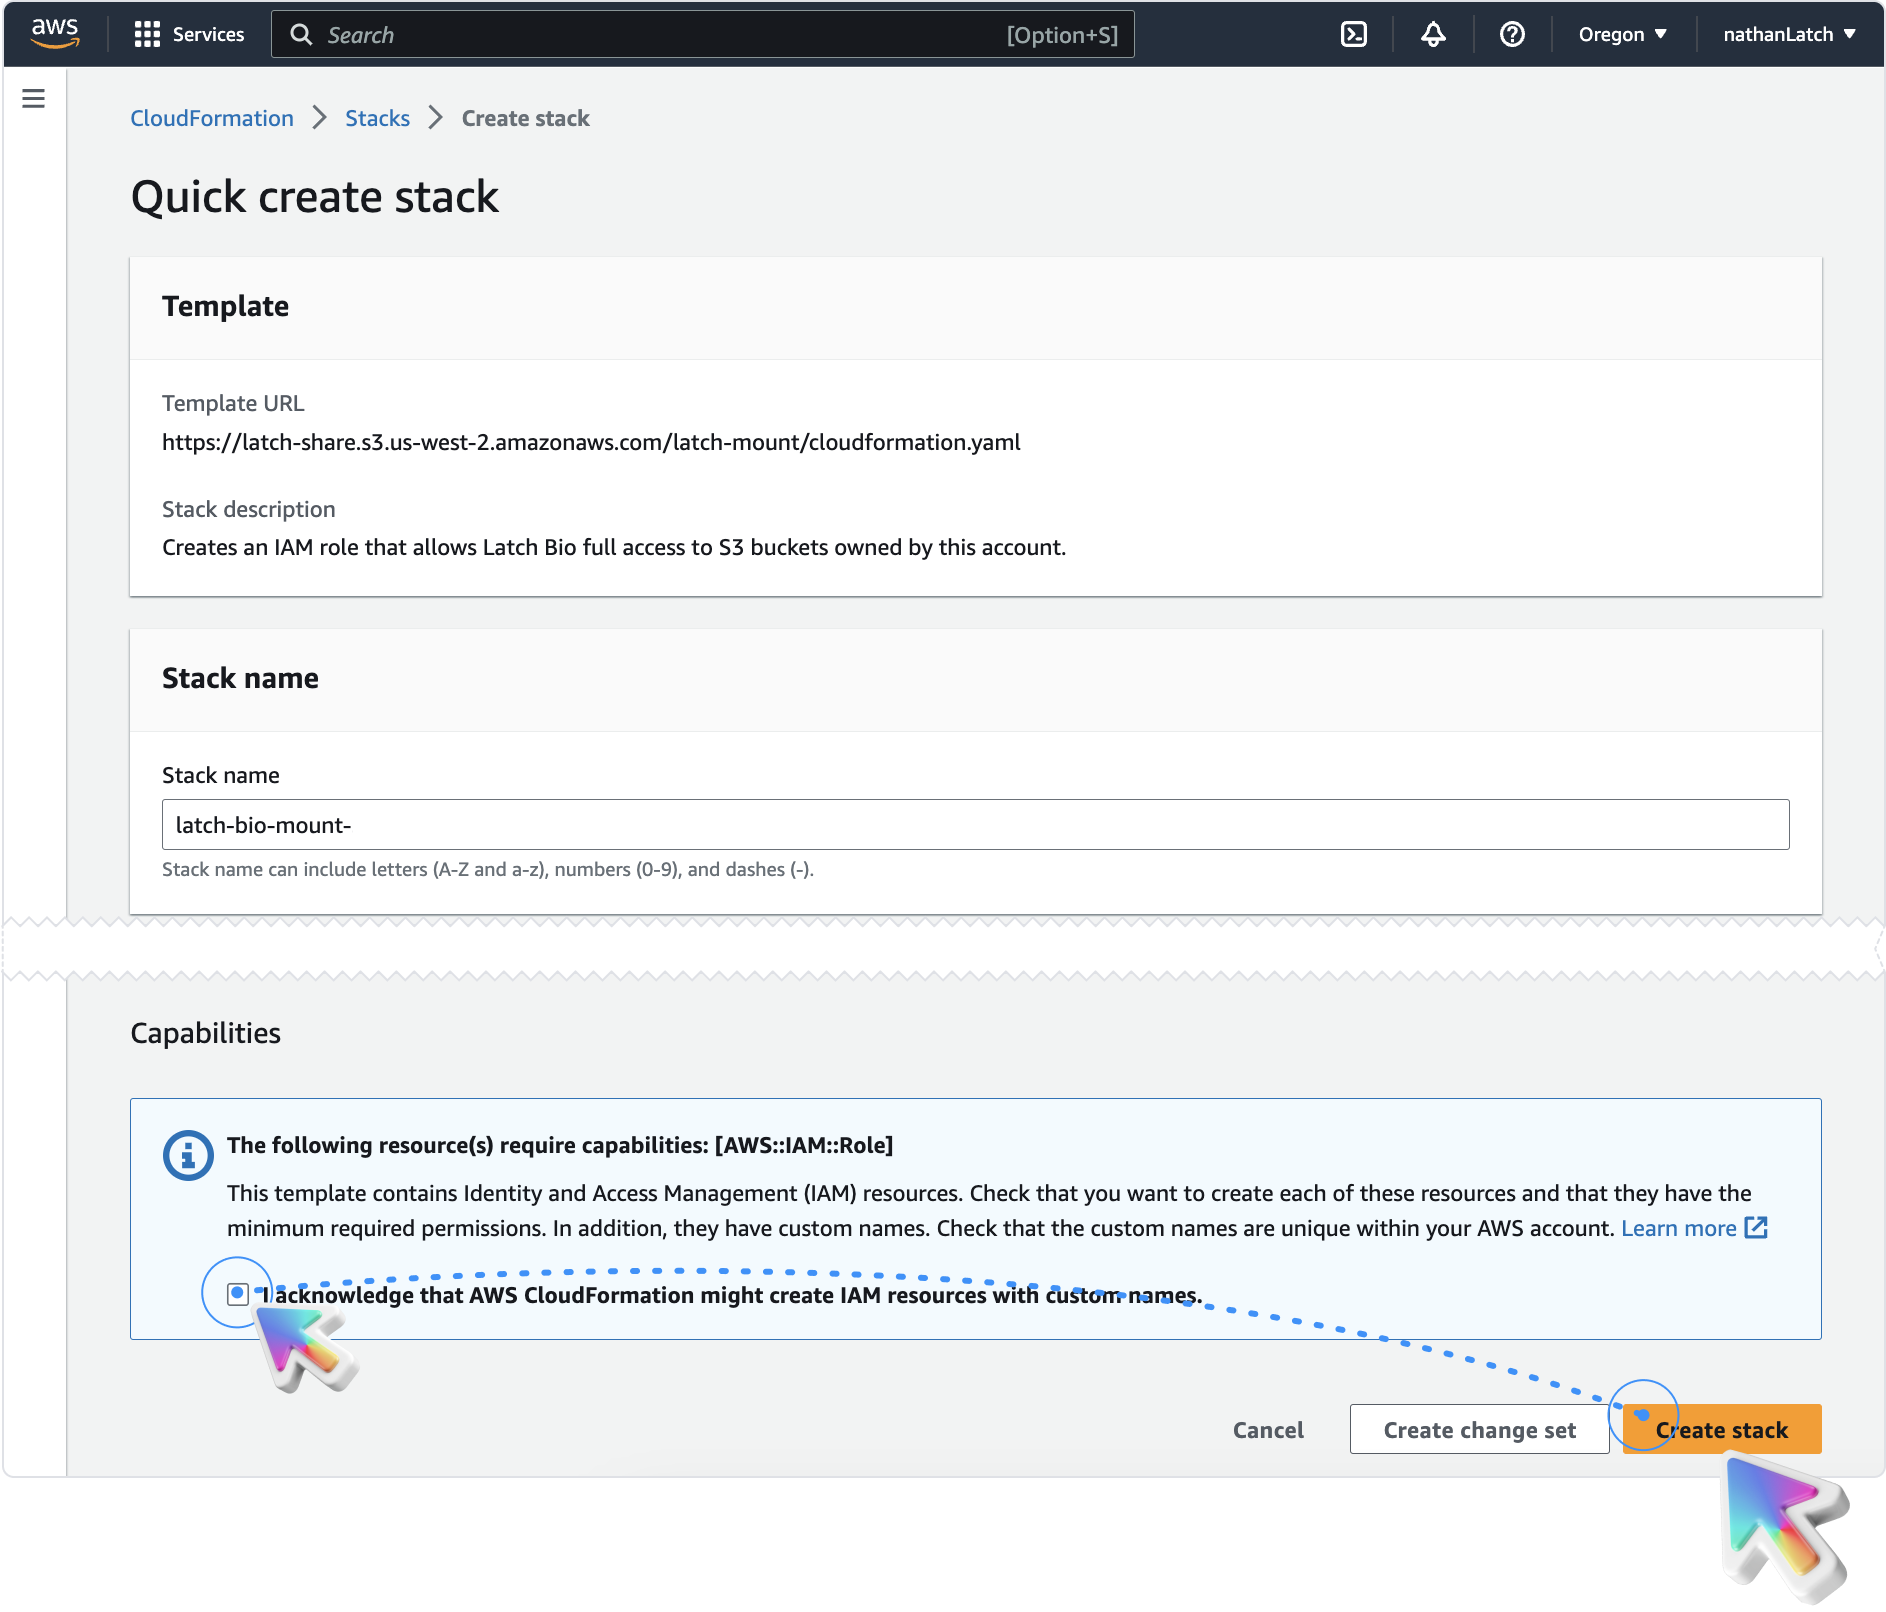
Click 'Create Stack' and wait for it to be created.
Return to Latch Console.
Click the 'Mount/Add Link' button for the bucket you want to mount.
Removing a Bucket
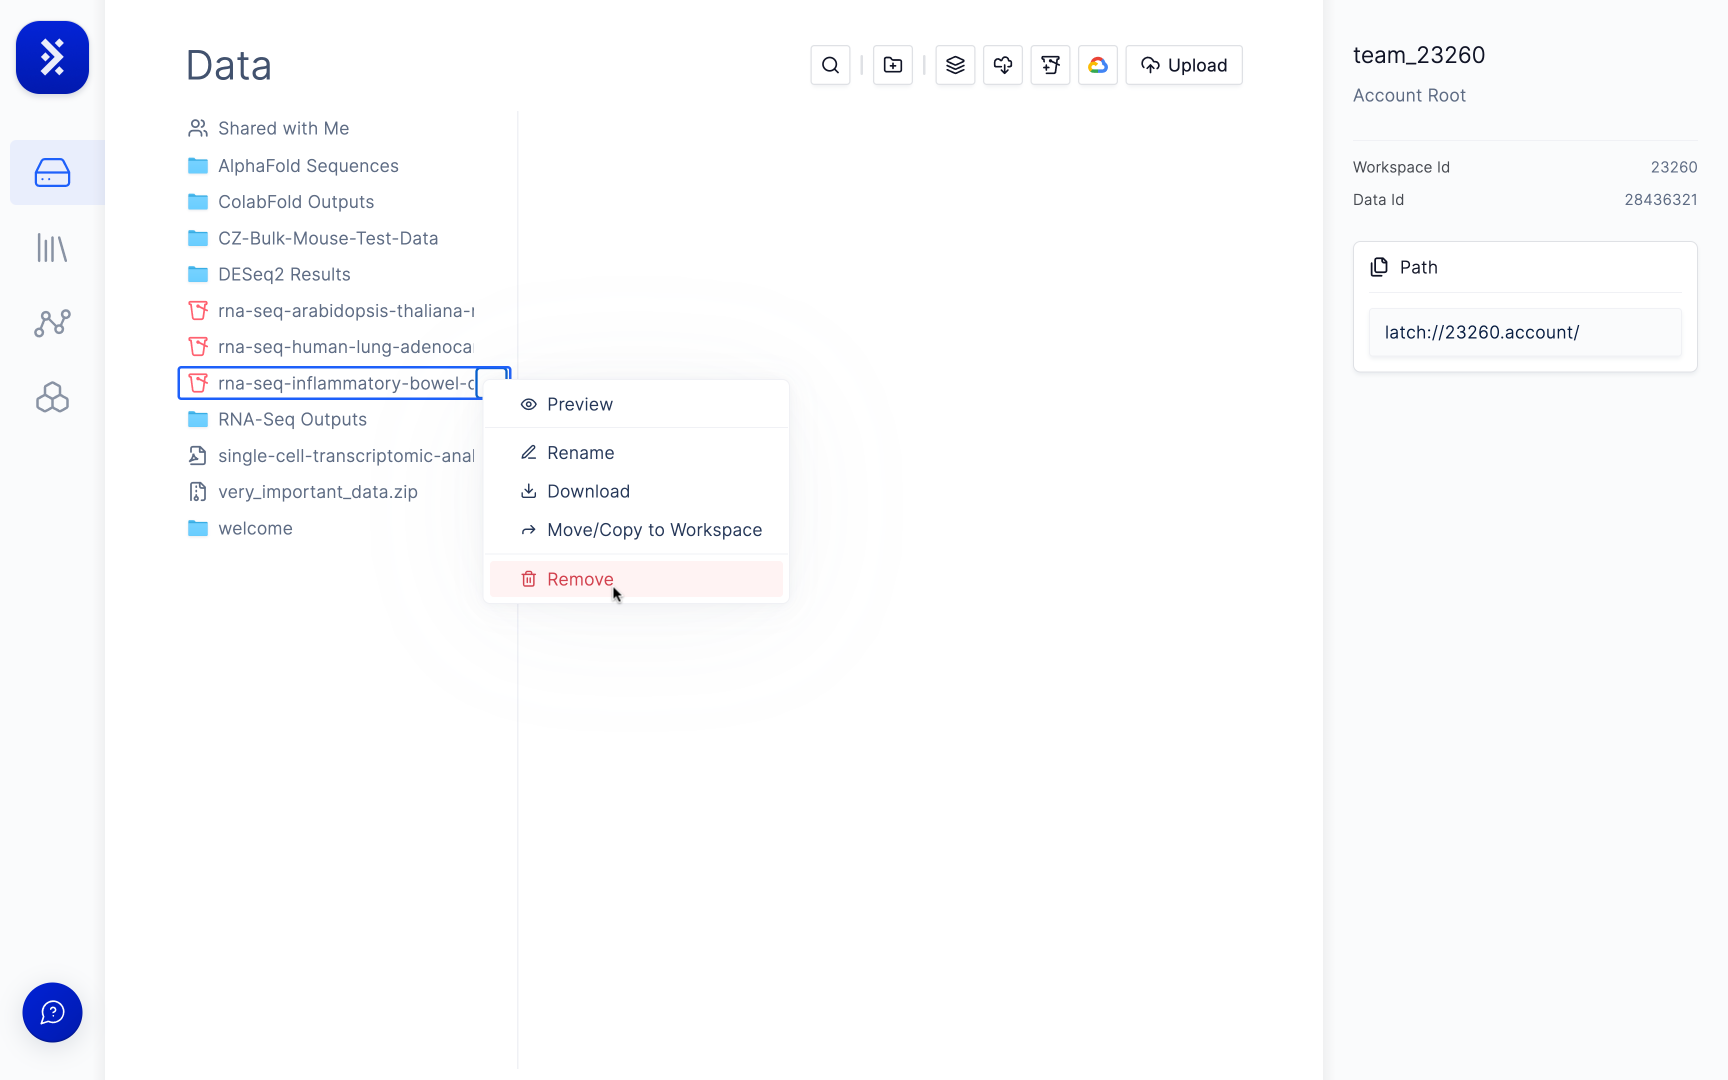
Removing a bucket requires edits both on the LatchBio side and in your AWS account.If you have mounted the bucket, hover over the bucket link in the LData homepage, click the ellipsis (…) and select Delete to remove the link.
Open the S3 Mount Modal and click 'Add Buckets'.
buckets list and update the Cloudformation
stack.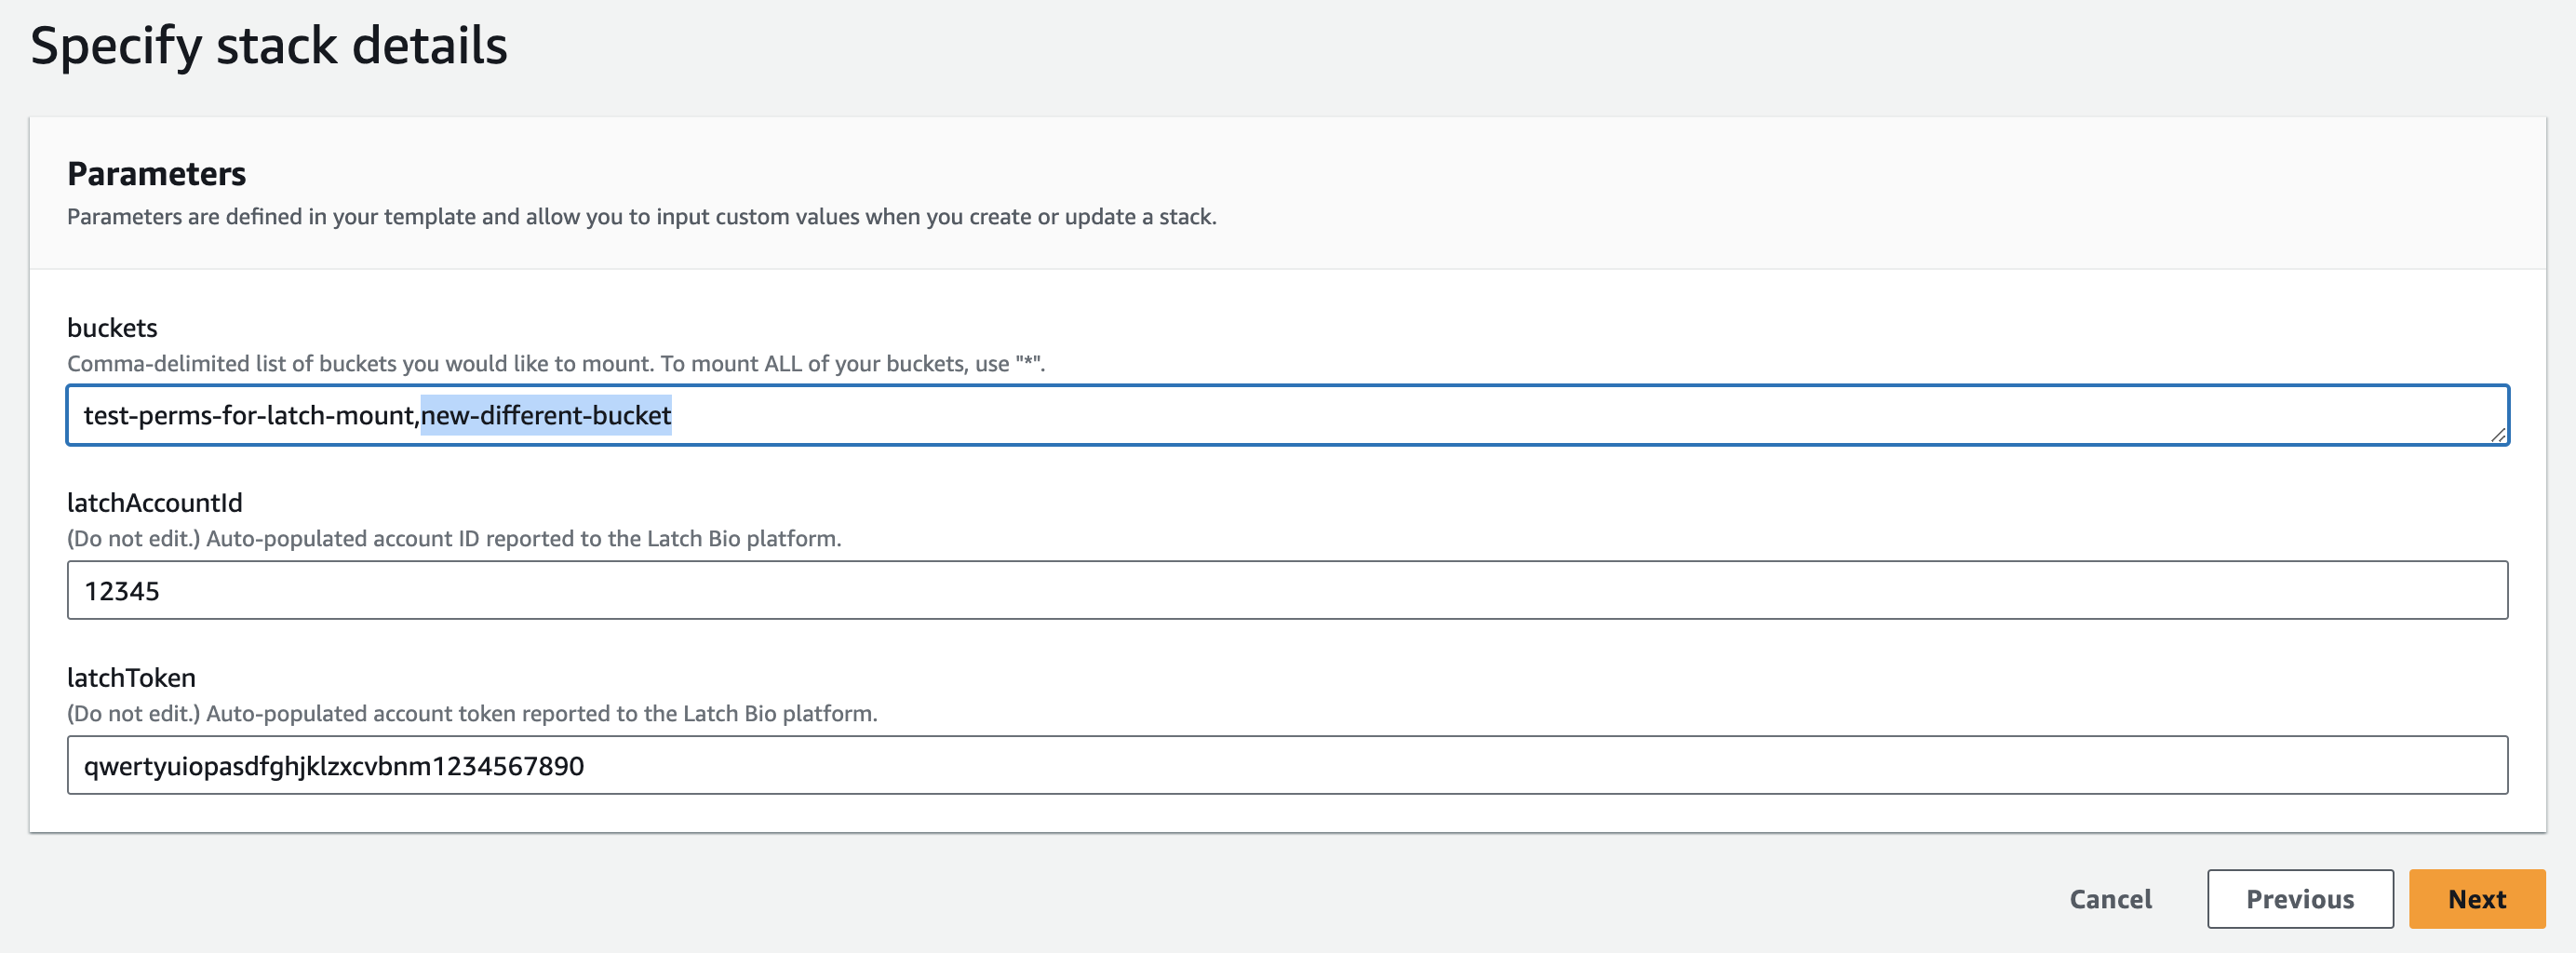
In the S3 Console, navigate to the bucket you want to remove > Permissions > scroll to Bucket Policy and remove the entry in 'Statements' called 'latch-data-mount'.
Statements array, you can just delete
the bucket policy outright.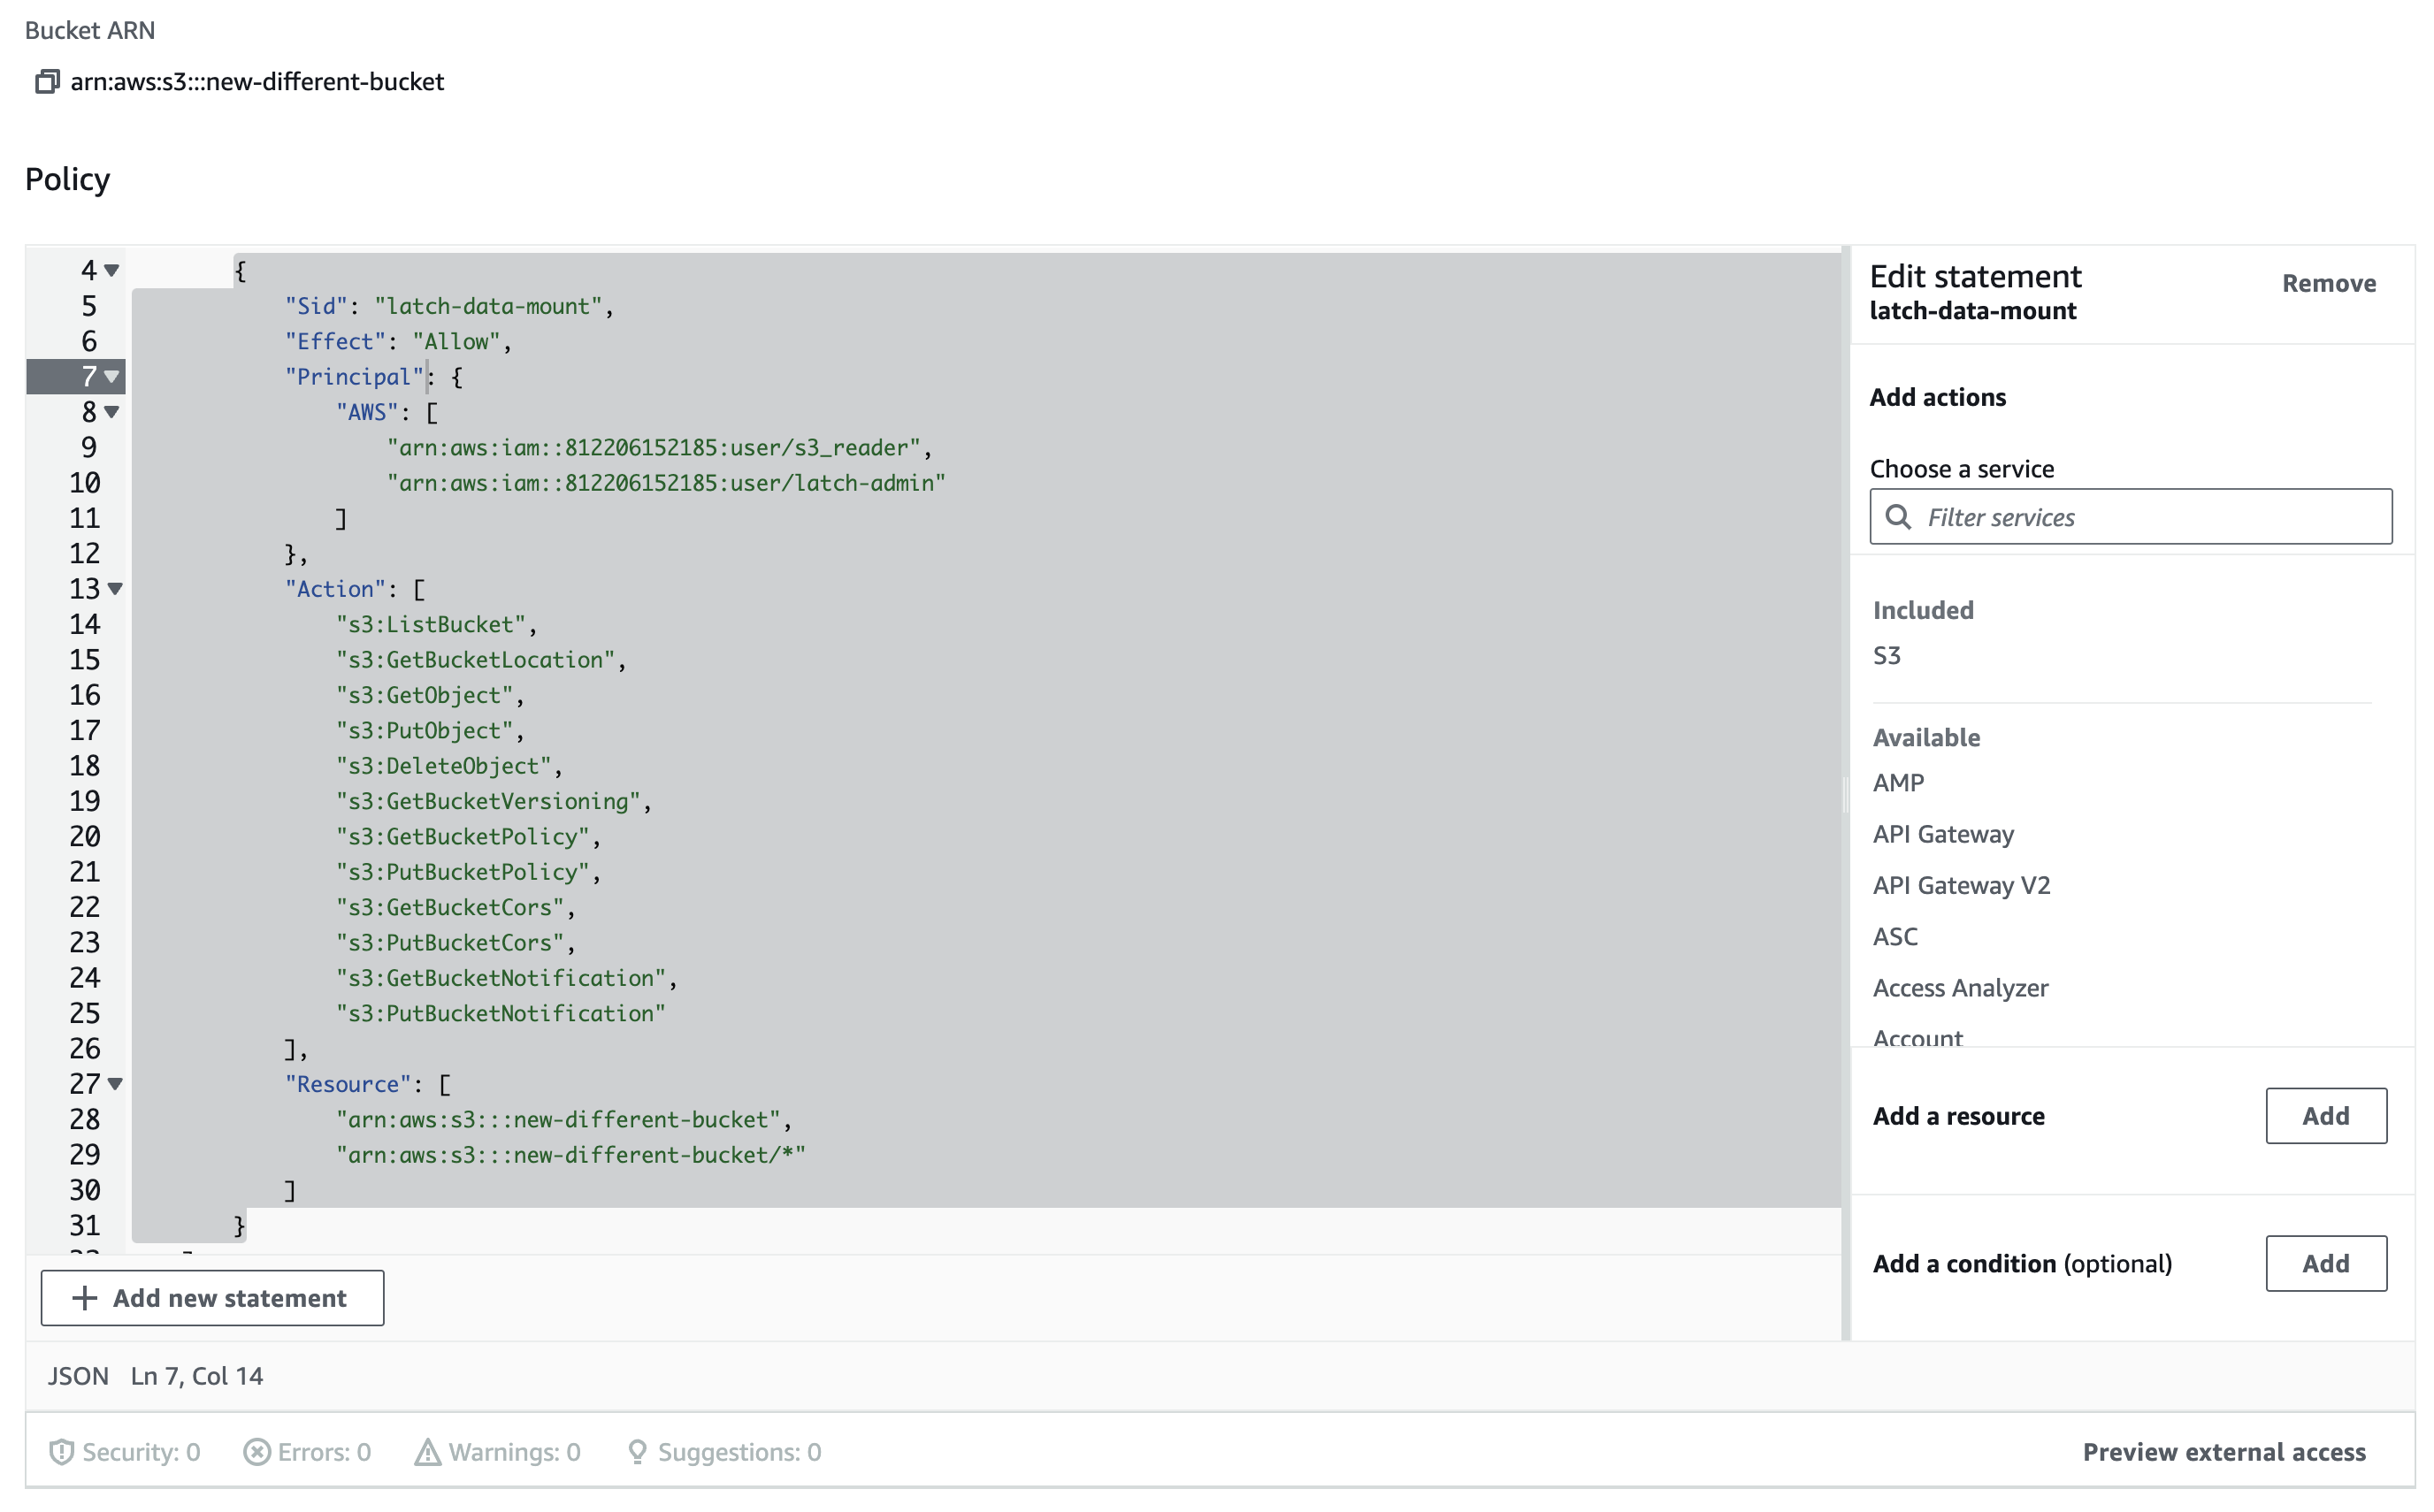
Still in the bucket homepage, navigate to Properties and scroll to 'Event Notifications' - from here, delete the notification called 'latch-s3-mount'.
latch-mount-fw-[BUCKET_NAME].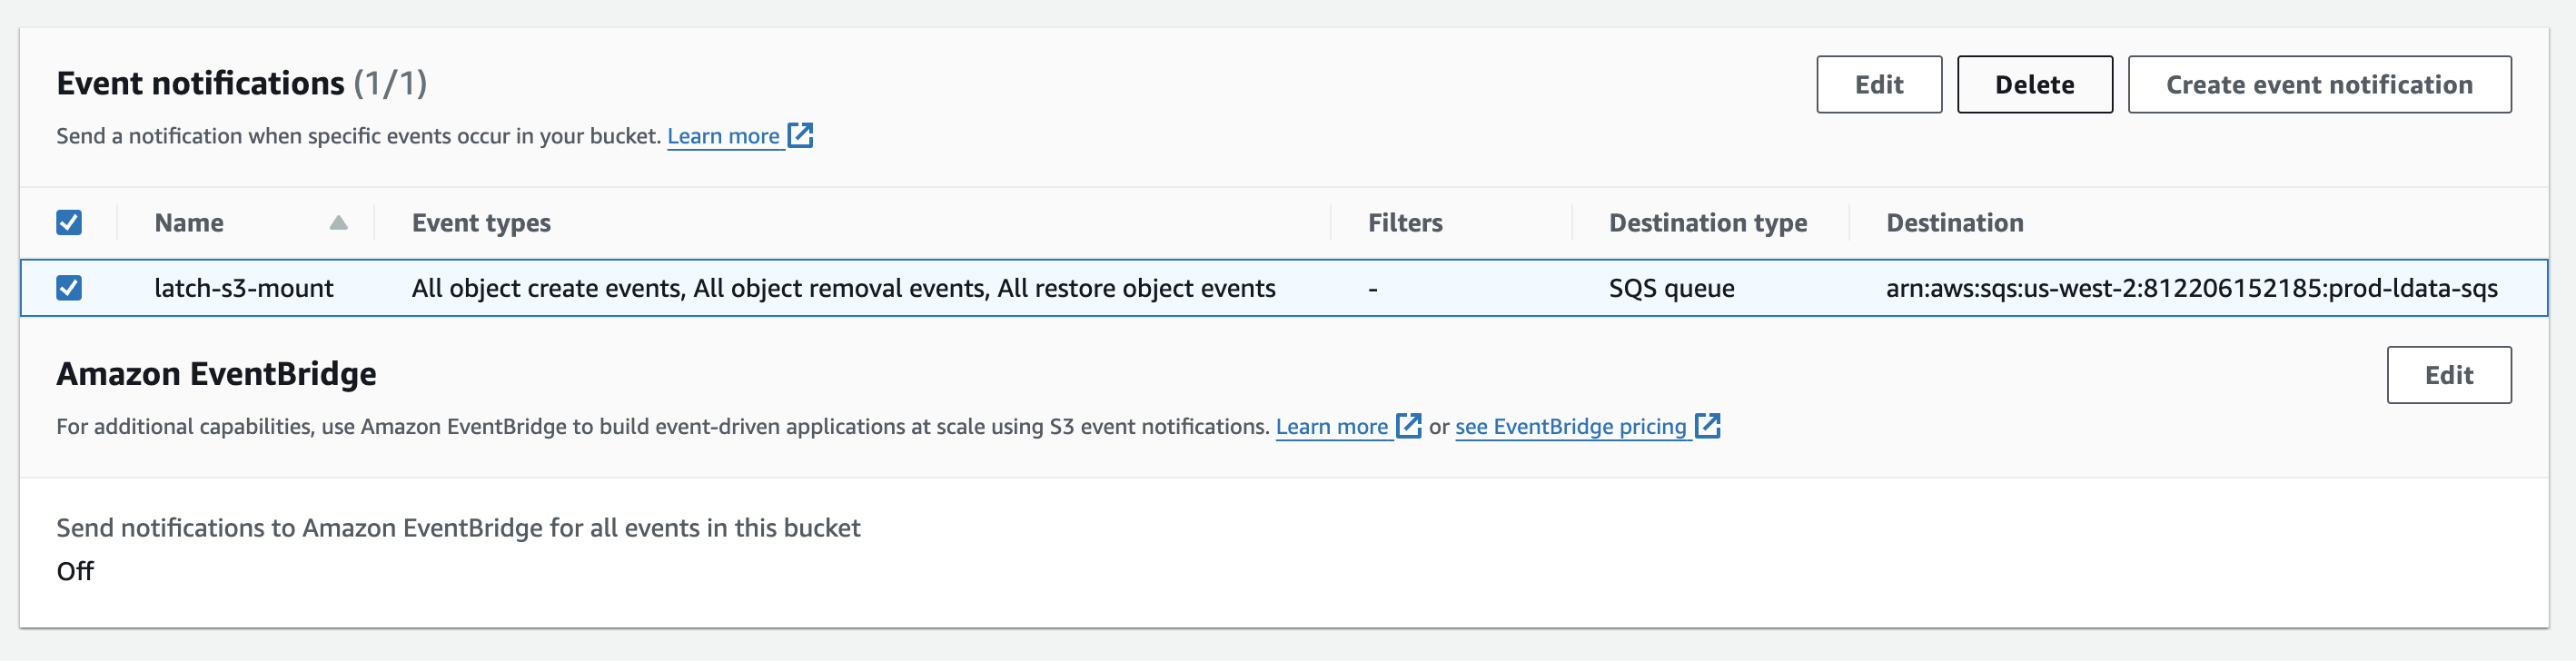
Troubleshooting
My bucket isn’t showing up in the list in the Mount S3 Bucket modal.
This might be because your bucket isn’t versioned. Latch only supports versioned buckets for mounting. To check if your bucket is versioned, open the bucket in S3, go to the Properties tab, and check Bucket Versioning. If your bucket is versioned and is still not showing up, please reach out to support@latch.bio for assistance.