Setting up one RShiny server for a dataset, however, requires a non-trivial amount of effort. The workflow often involves:

  1. Setting up an EC2 instance
  2. Installing R, RShiny, and other required dependencies, or setting up an instance with RStudio Server AMI (Amazon Machine Image).
  3. Upload your app code and data to the instance from your local machine or S3.
  4. Configuring security groups
  5. Starting the Shiny server
  6. Setting up a public IP address for the EC2 instance to make it accessible in a web browser.

…and you may need to repeat the entire process for every new dataset that you want to visualize and share.

Latch Pod makes it easy for you to host RShiny Apps to share with the rest of your company. Let’s dive into how it works!

As an example, we will be setting up ShinyCell, an R package that allows users to create interactive Shiny-based web applications to visualize single-cell data.

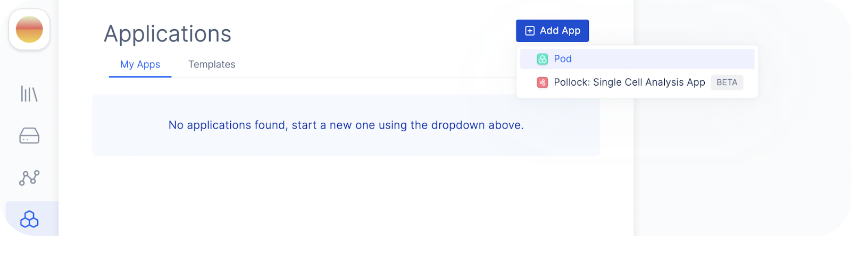
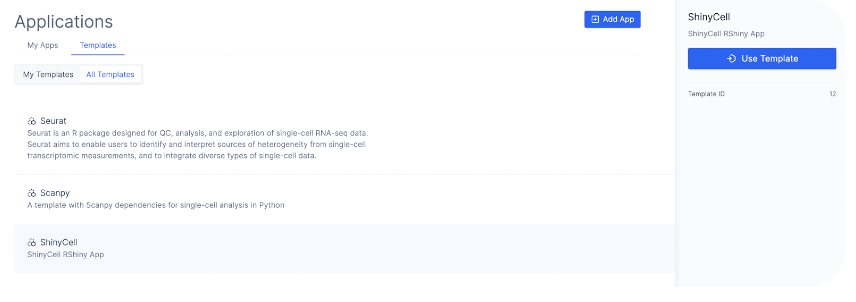
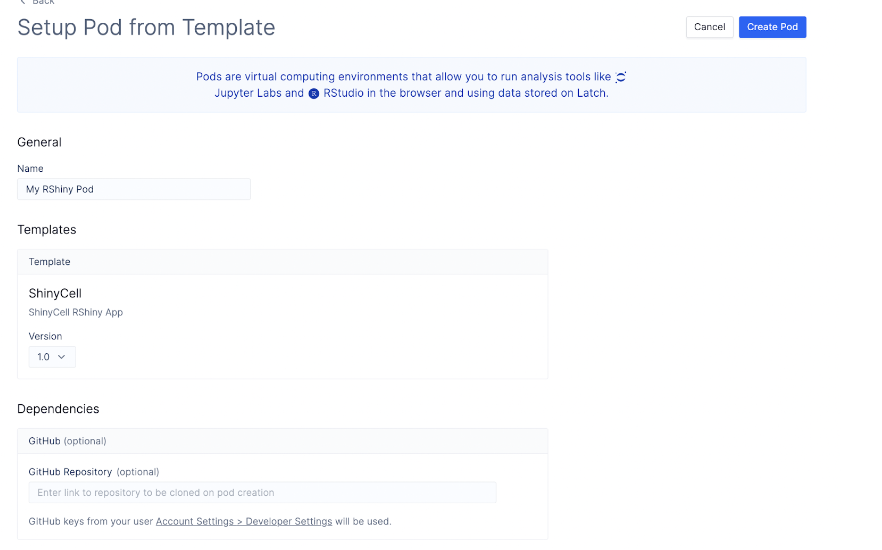
Create an RShiny Pod

First, navigate to the Pod Templates page here. Click “All Templates” to view publicly available Pod Templates that you can copy to your Pod.

Let’s select ShinyCell and click Use Template. This template includes all the R dependencies required to run the RShiny application.

A new Pod settings page will show up. Give your Pod a name and click “Create Pod”.

Navigate to My Apps at https://console.latch.bio/apps to see your newly created Pod.

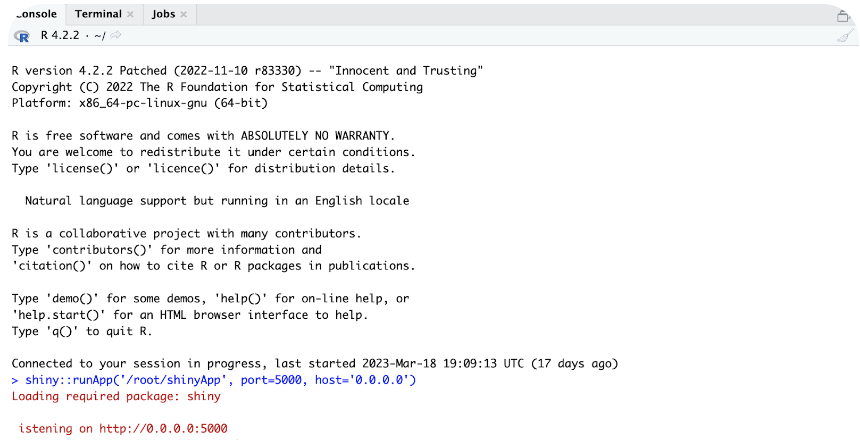
Start the RShiny Server

Click on the RStudio icon to open the Pod. As you can see, the home directory of the Pod contains a RDS object and a shinyApp folder, which comes from the previously selected Pod template.

To start the RShiny App, you can navigate to the R Console and type: 
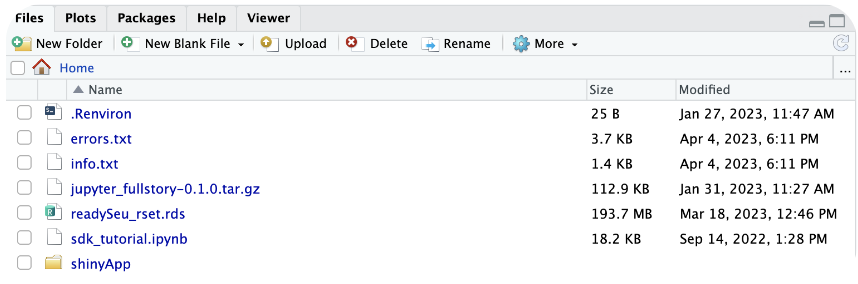
shiny::runApp('/root/shinyApp', port=5000, host='0.0.0.0')

The command starts the Pod at port 5000.

That’s it! You have successfully started the RShiny App. The next step is to share the RShiny App with a teammate.

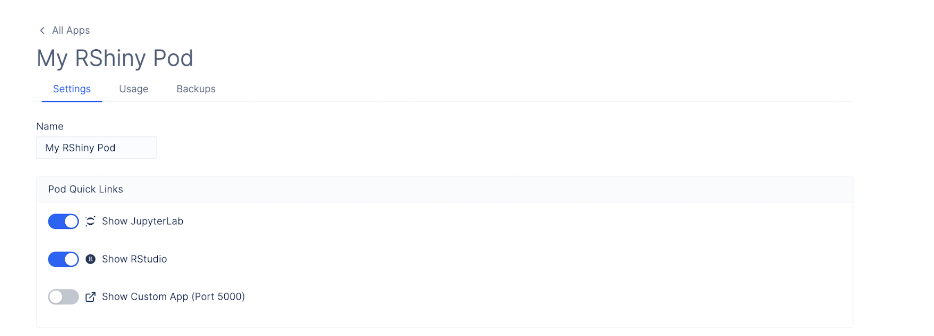
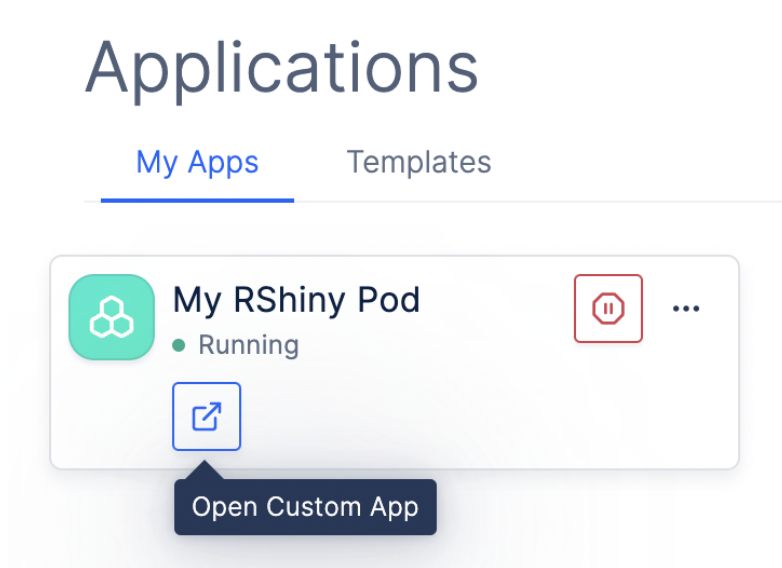
Share the RShiny App

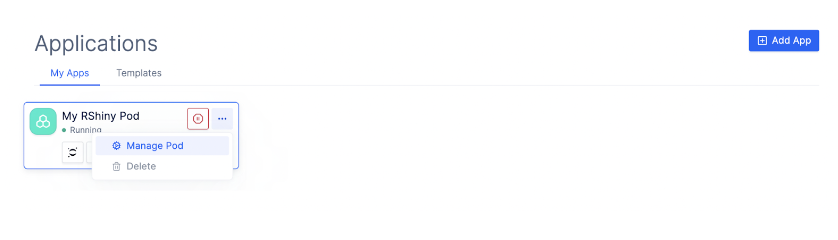
Navigate back to the Pods page, and click “Manage Pod”.

Here, you will see three toggles: “Show JupyterLab”, “Show RStudio”, and “Show Custom App (Port 5000), which will display a JLab, RStudio, and Custom App buttons on the Pods page respectively.

Let’s toggle the “Show JupyterLab” and “Show RStudio” buttons off. Toggle the “Show Custom App” button on.

Once you navigate back to the Pods page, you will see that only one button is displayed for the custom RShiny App that you just created.

Click on the button to open the custom RShiny App.

That’s it! You’ve successfully started an RShiny App for single-cell visualization 🎉

Was this page helpful?