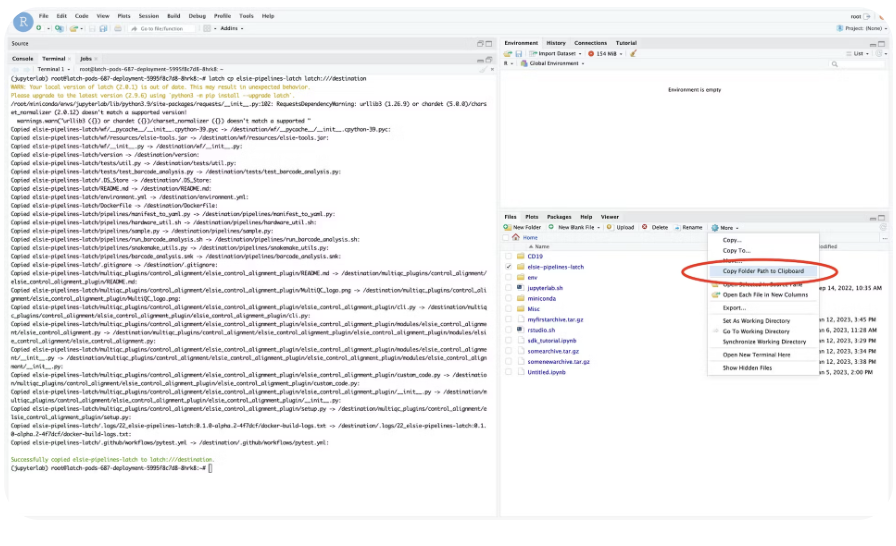
First, select the file on Latch Data that you want to copy. After selecting, you will see a file path displayed on the sidebar. Copy the path.Navigate back to your Latch Pod and type the following in your Pod terminal:
Here, we are copying the folder projects on Latch Data to a folder called pod_projects inside Pod.
Important: When copying from Latch Data, make sure that you prefix the
file or folder path with latch://. The prefix tells the Latch CLI that the
source destination of the file is on Latch. Without the prefix, Latch will
assume that the source file is on your Pod, and you may get a “File not found”
error.
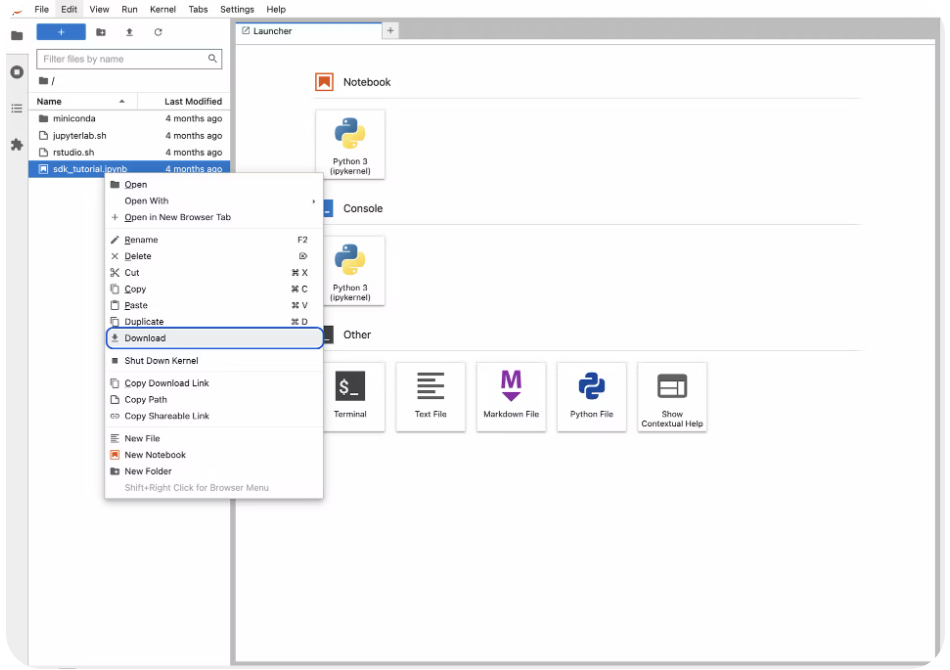
Using the Jupyter Lab or RStudio UI, only files can be directly exported from
Pod. If you have a folder, you have to first zip it before exporting.
If you are planning to download a folder, see how to compress it by opening the toggle here.
To download data in Jupyter Lab, simply right-click on the file or compressed folder you can to export, and click Download.In RStudio, you can toggle the file or compressed folder you want to export. Then, click More and choose Export.Let’s now create a tar.gz archive, which will compress your folder into a smaller .gz file that will be ready to download.To compress your folder, type the command
Copy
Ask AI
tar -czvf myfirstarchive.tar.gz <path_to_folder>
You will soon see a new file called myfirstarchive.tar.gz in your filesystem! Now, your compressed folder is ready to be downloaded.
To download data in Jupyter Lab, simply right-click on the file or compressed folder you can to export, and click Download.In RStudio, you can toggle the file or compressed folder you want to export. Then, click More and choose Export.From Local Computer to Pod
Currently, only files can be uploaded directly using the UI. If you have a
folder, you must compress it first before uploading.
In JupyterLab, you can drag and drop your file and compressed folder directly onto the filesystem on Pod.In RStudio, there is no current way to drag and drop into the server’s filesystem. Because RStudio and JupyterLab both share the same filesystem on Pod, we recommend that you upload the data via JupyterLab for it to be displayed in Pod.
Latch Data serves as the intermediary for data transfer when moving data between Pod and your local computer.For example, to copy data from local to Pod, you can use latch cp to first copy data from local to Latch Data, and use latch cp again to copy data from Latch Data to Pods.Similarly, you can use latch cp to first copy data from Pod to Latch Data, and use latch cp to copy data from Latch Data to your local computer.
Using SFTP
Since Latch Pod is a remote server that allows for SSH access, you can use SFTP to connect and securely transfer data between your local computer and Pod.First, let’s test the SSH command. Click on the Pod you want to access, and copy the SSH end point on the right sidebar.Open up a terminal on your local computer, and paste in the SSH command.If that works, exit out by typing:
Copy
Ask AI
exit b
f that does not work, visit our Troubleshooting section for solutions.Once you have tested that the SSH connection is working properly, you can establish an SFTP session by replacing the ssh in the SSH endpoint above with sftp. For example, if you have the following SSH command:
The command will connect you to the remote system and your prompt will change to an SFTP prompt.All SFTP commands you would use in any remote SFTP session would work the exact same way in Pods. To view a complete guide on how to use SFTP commands, please visit the documentation by DigitalOcean here.