Documentation Index
Fetch the complete documentation index at: https://wiki.latch.bio/llms.txt
Use this file to discover all available pages before exploring further.
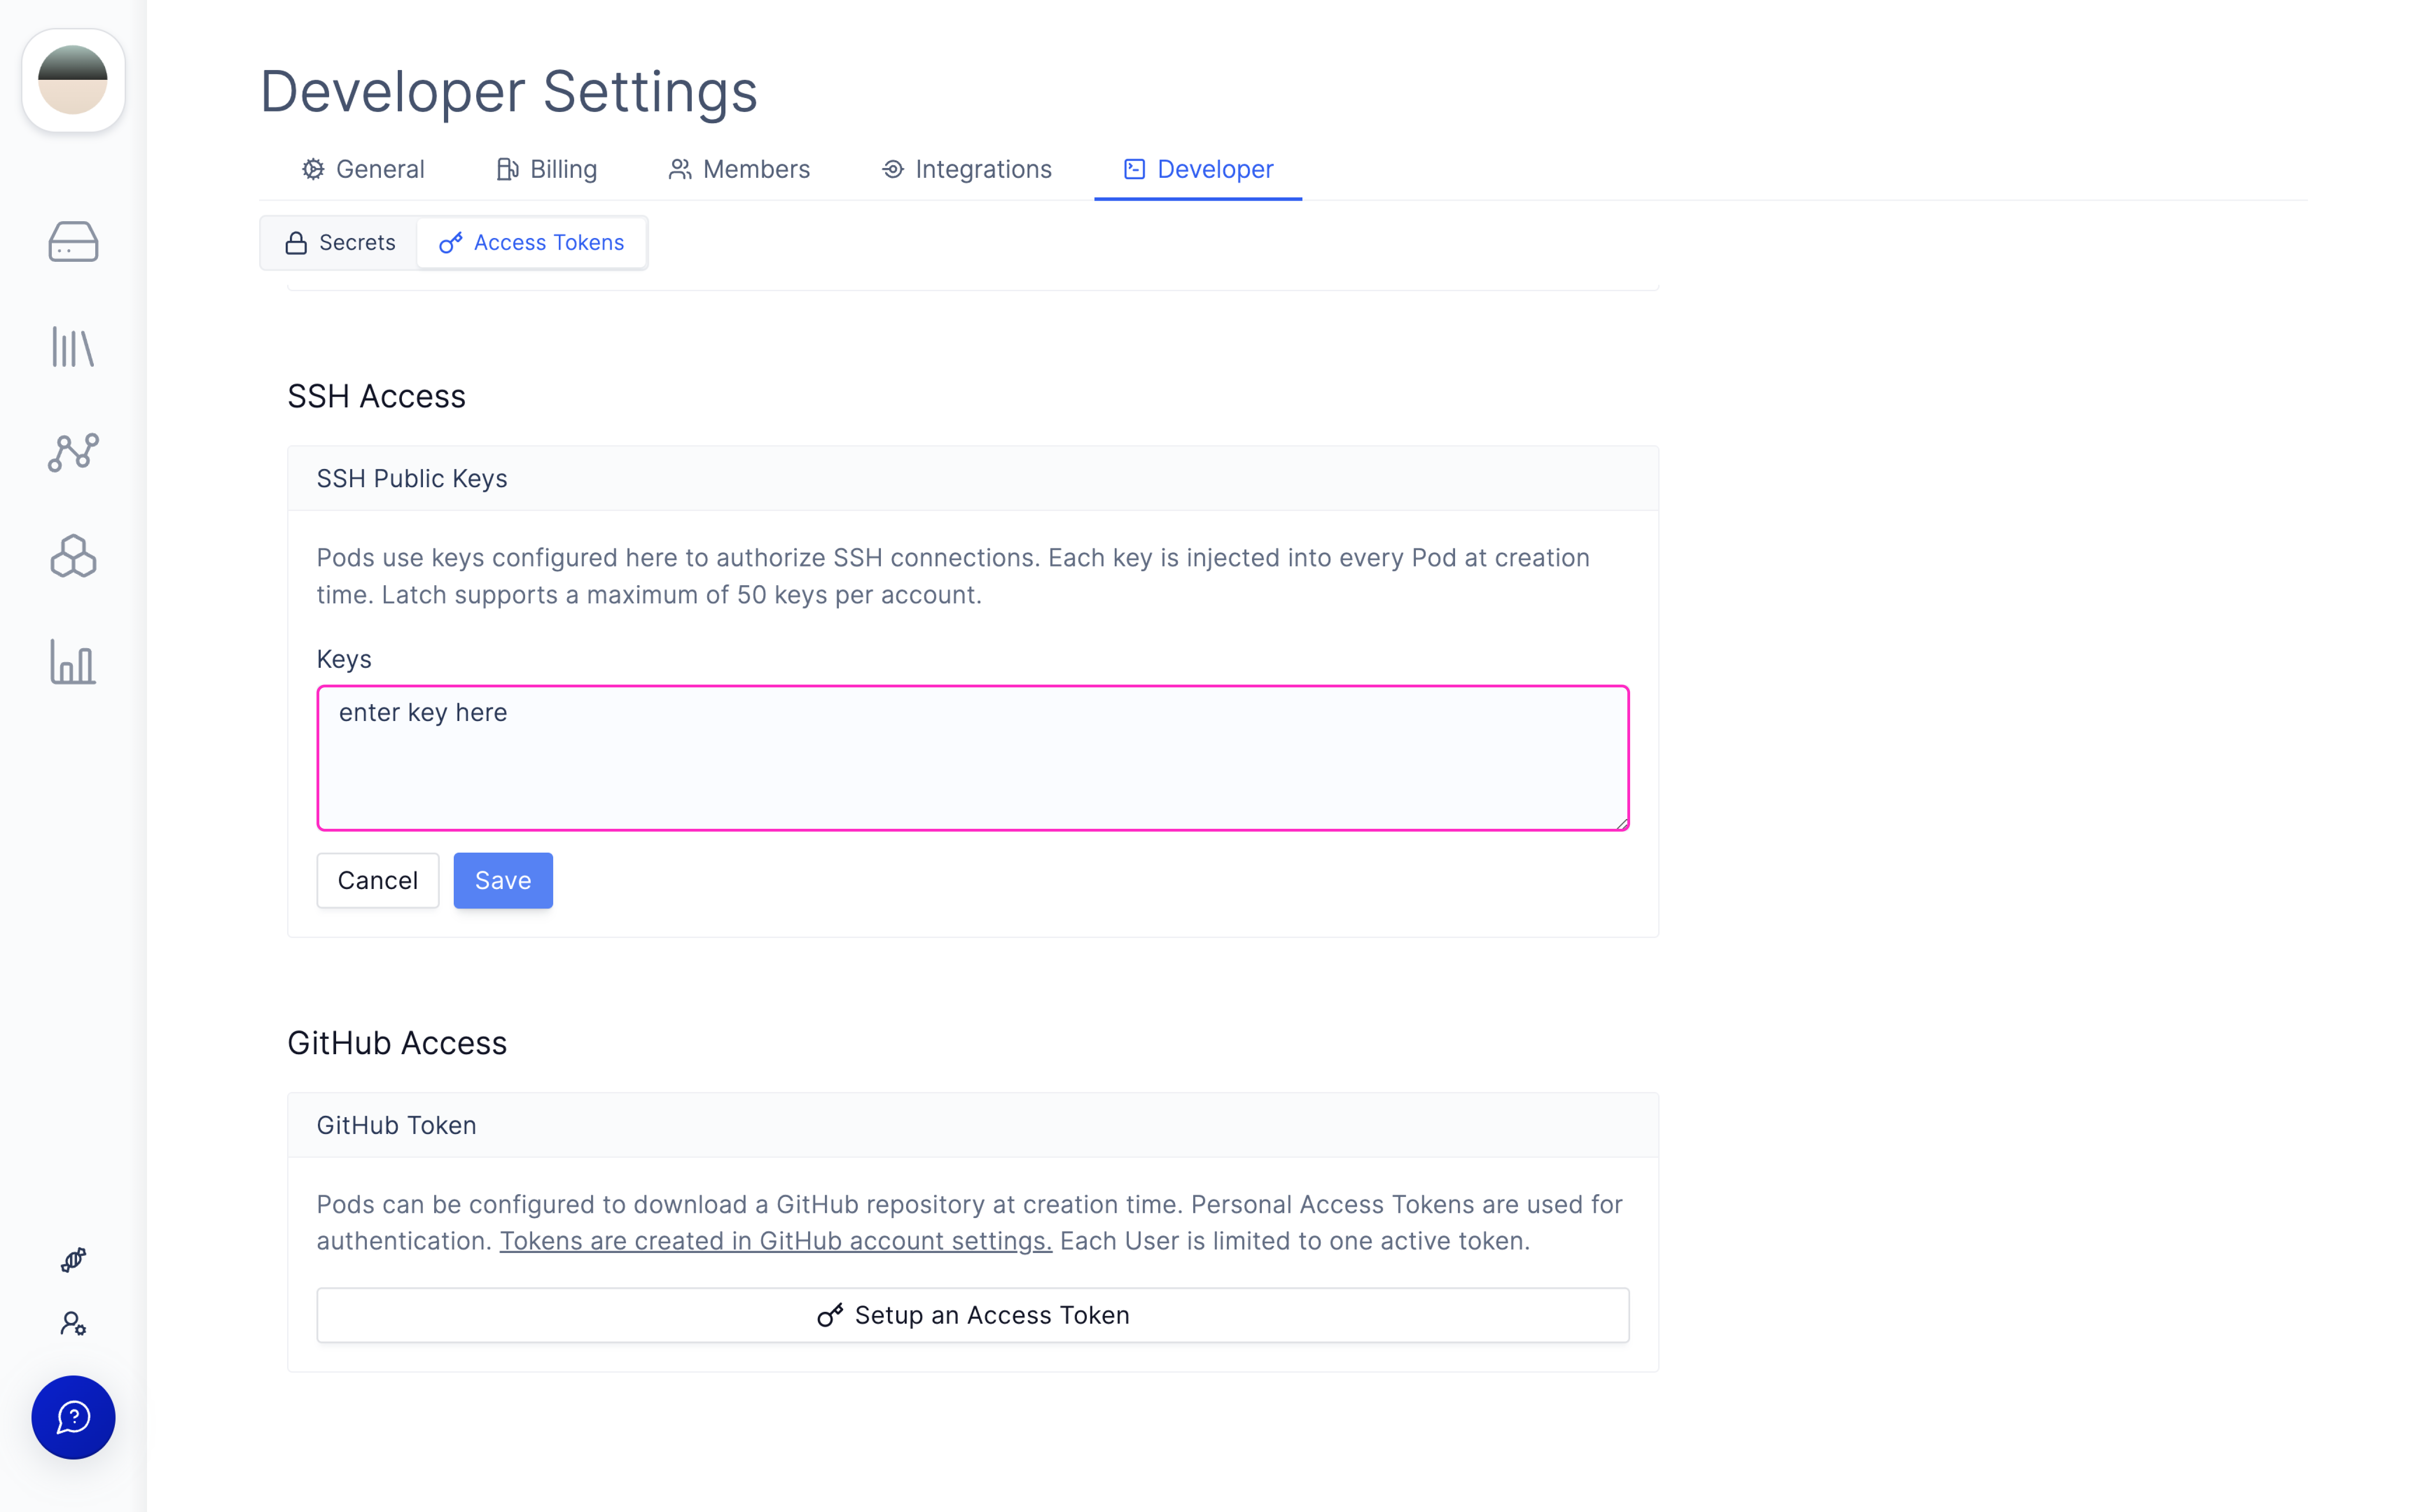
Set up your SSH key
-
Open Terminal & go inside the
~/.sshdirectory: To go into the directory and see if you already have a saved public key, run the following command:This command displays the files within the SSH directory. If you have an SSH key, there will be a file ending with .pub. - If you have no SSH key, follow this tutorial.
-
To get your SSH key, enter this in your terminal:
Don’t worry if there is no output. This automatically copies your key into your clipboard.
Enter the SSH Key in Latch
- Go back to Developer settings to enter the key you just copied.
Test if your SSH Key was added successfully
-
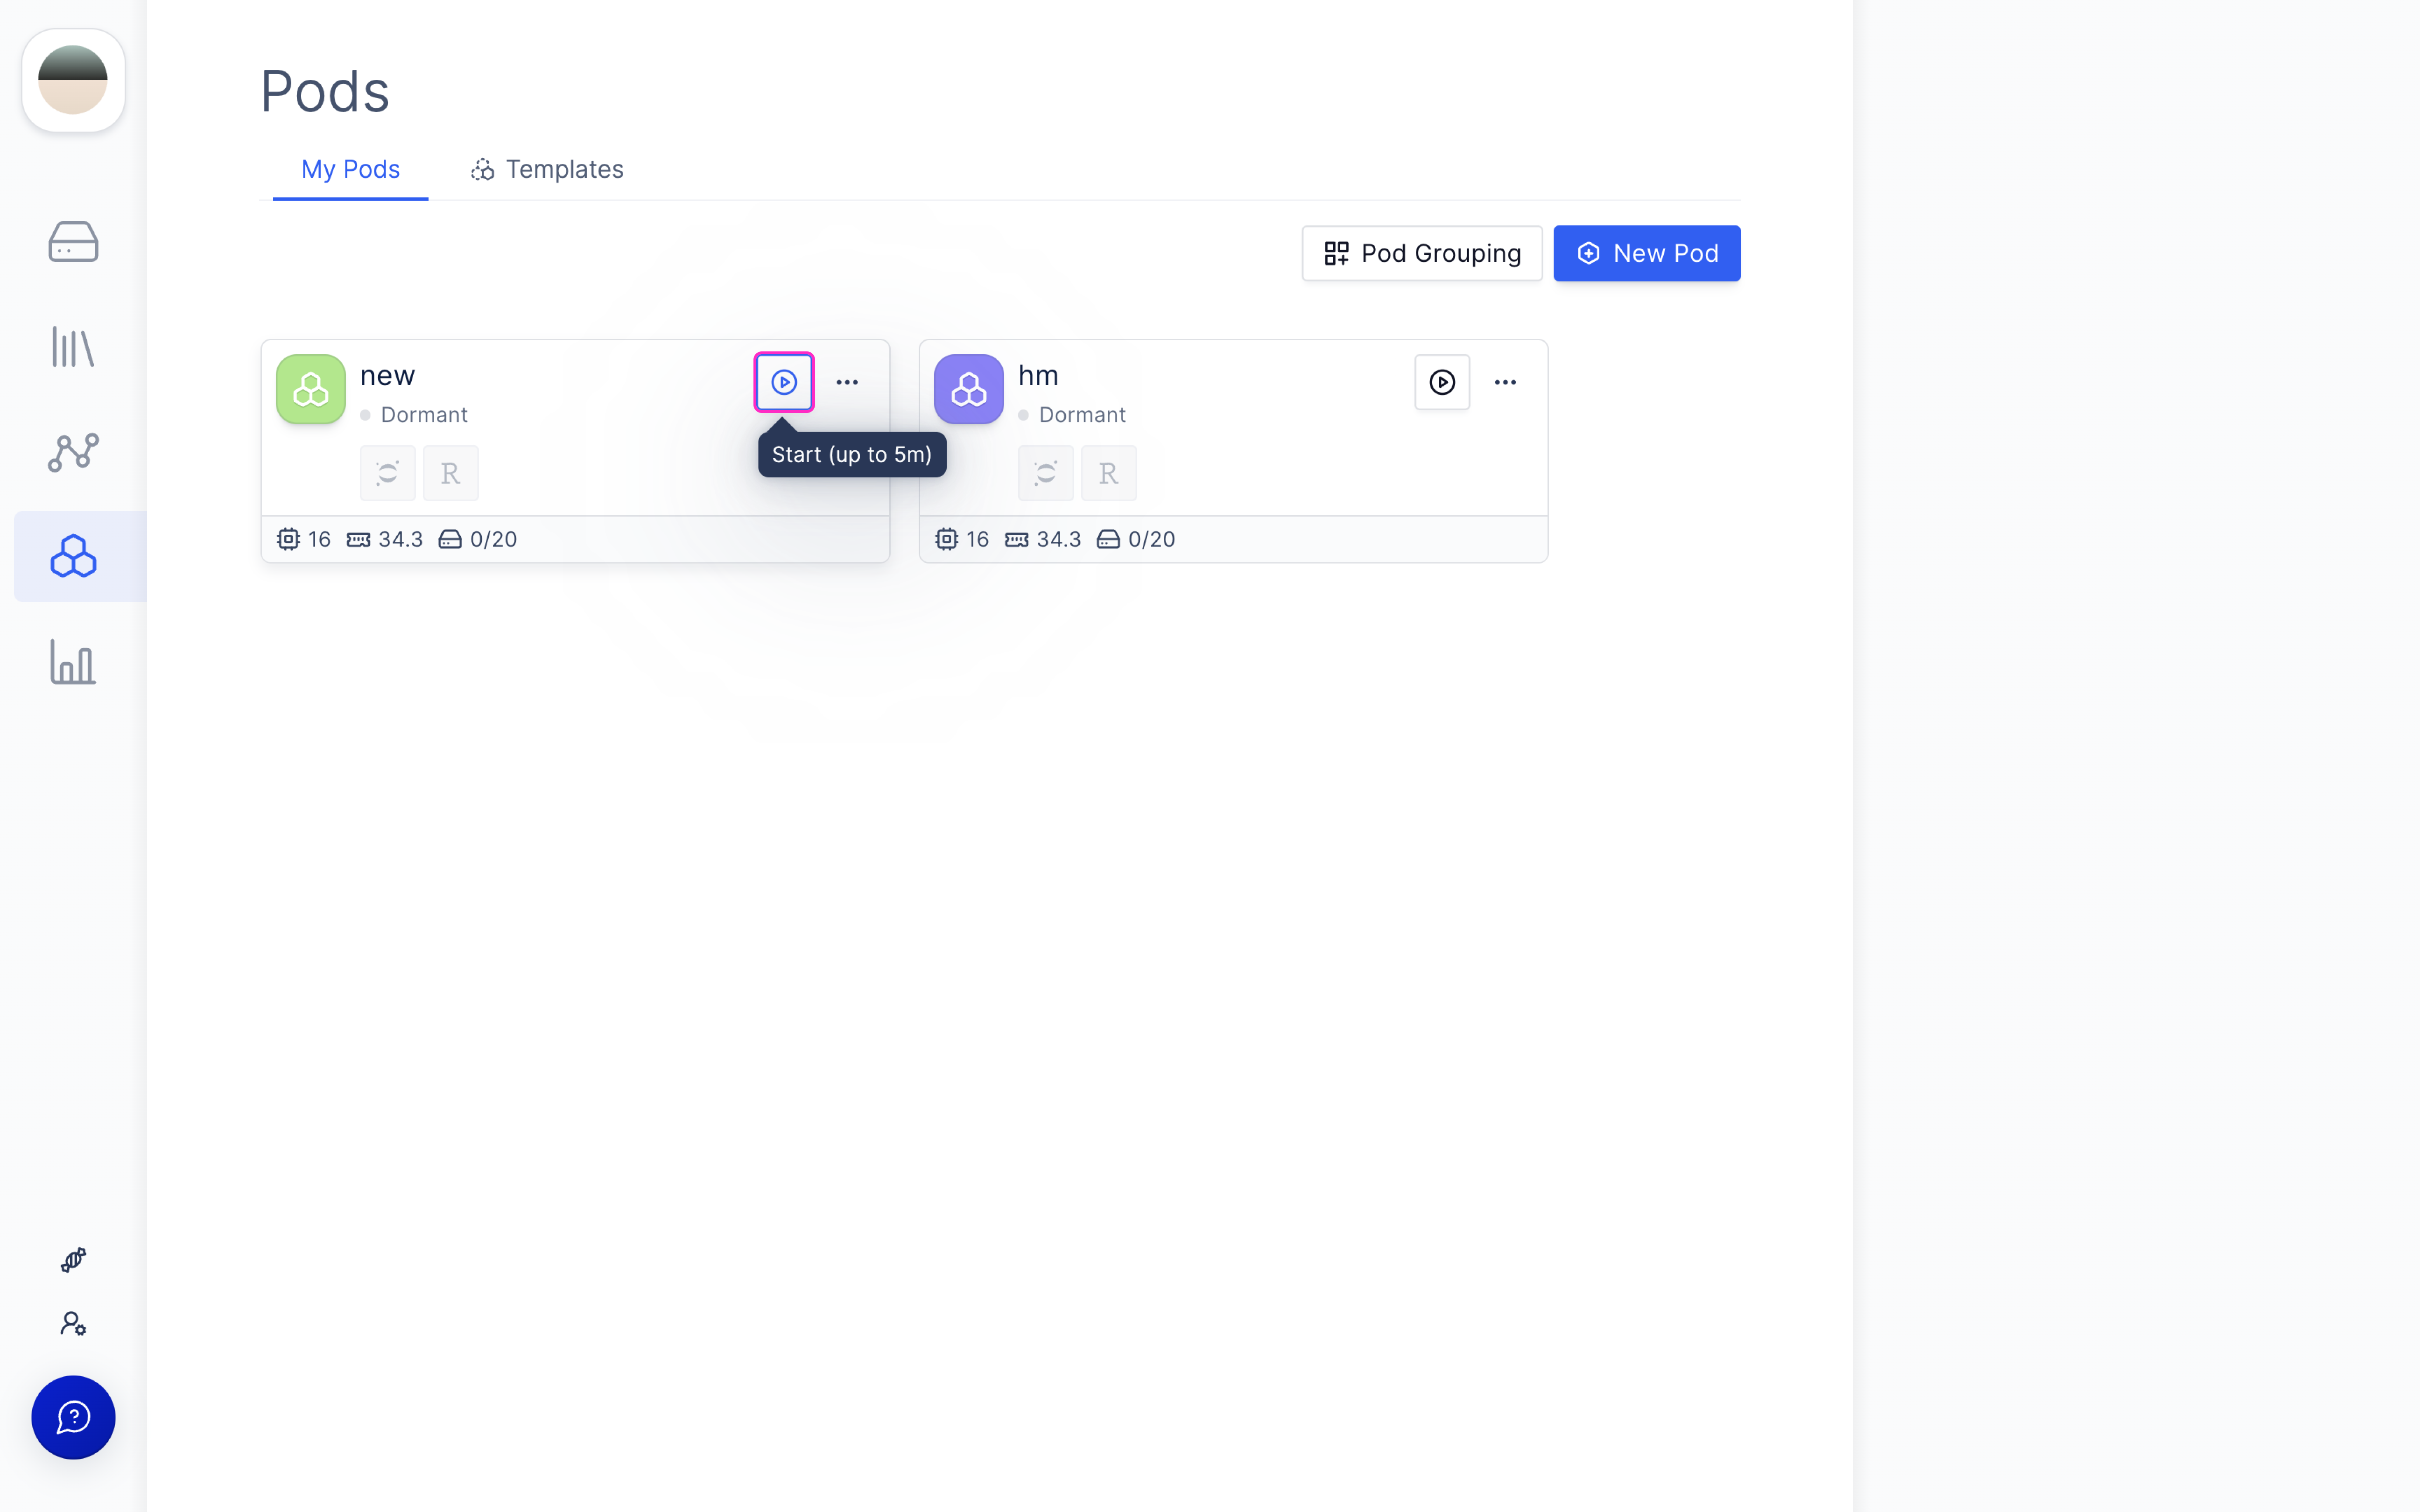
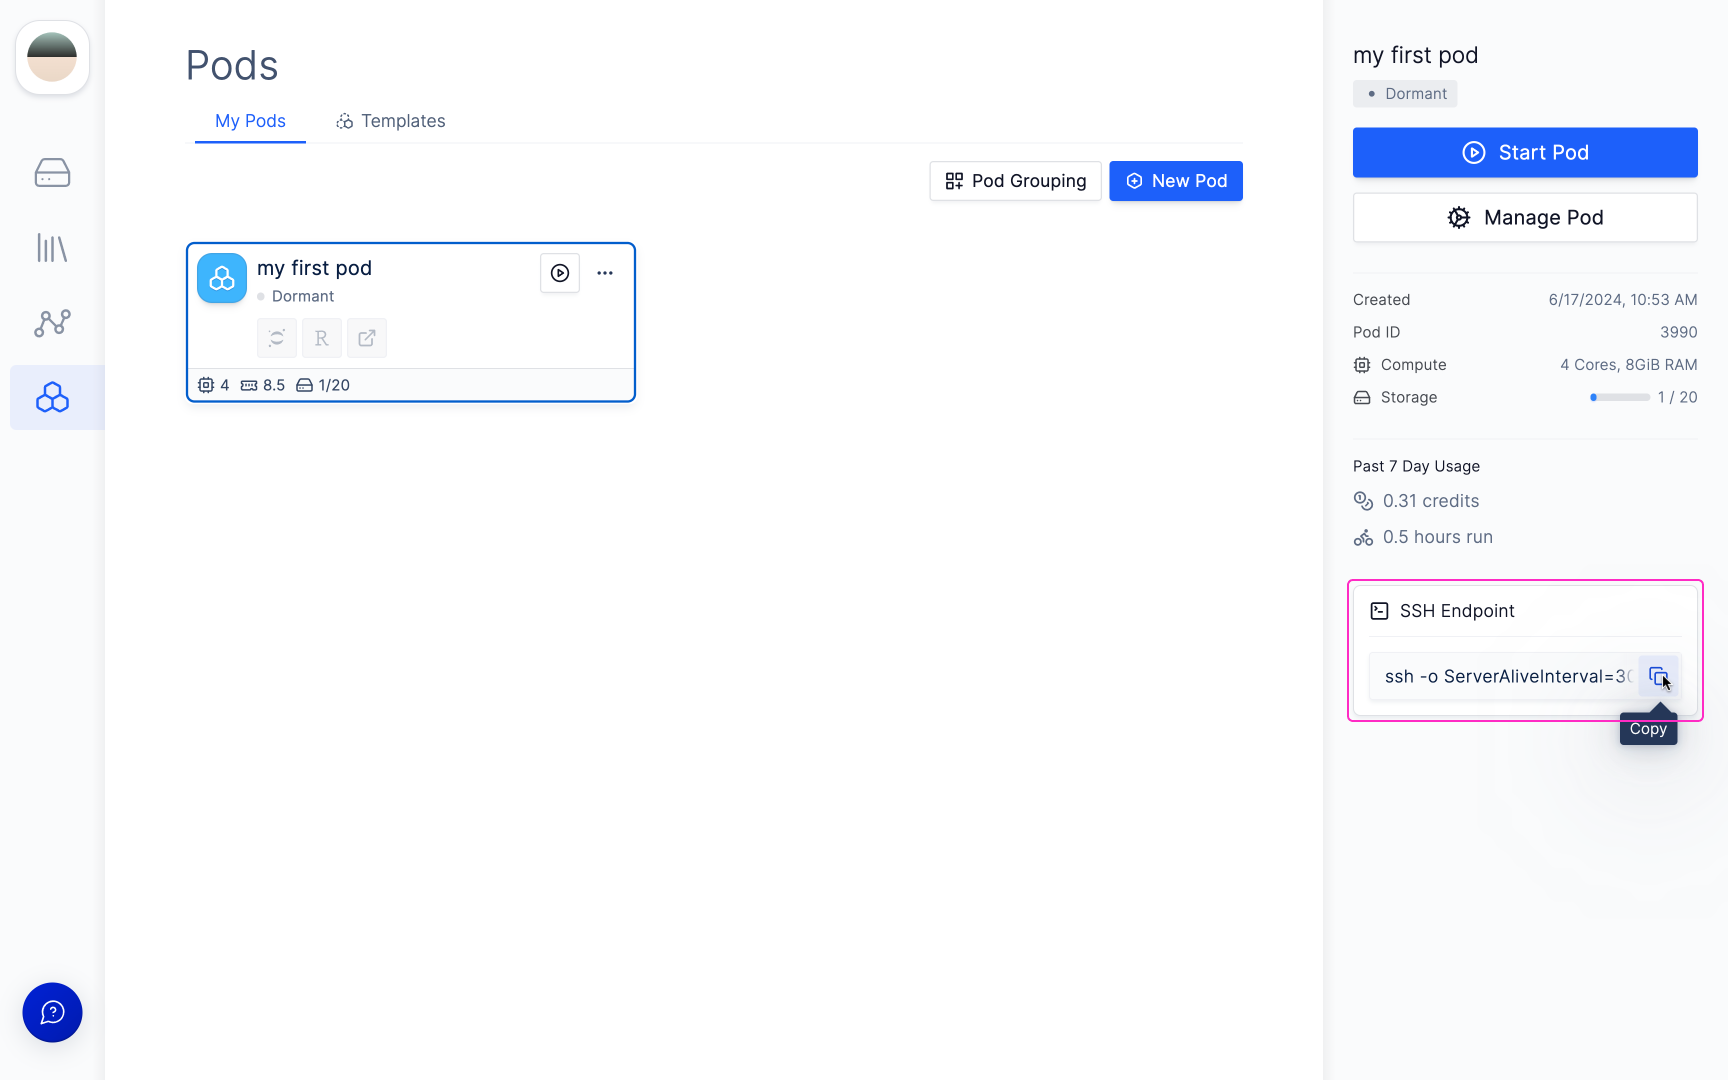
Start your pod.
The Pod needs to say “Running” before you can connect to VSCode.
-
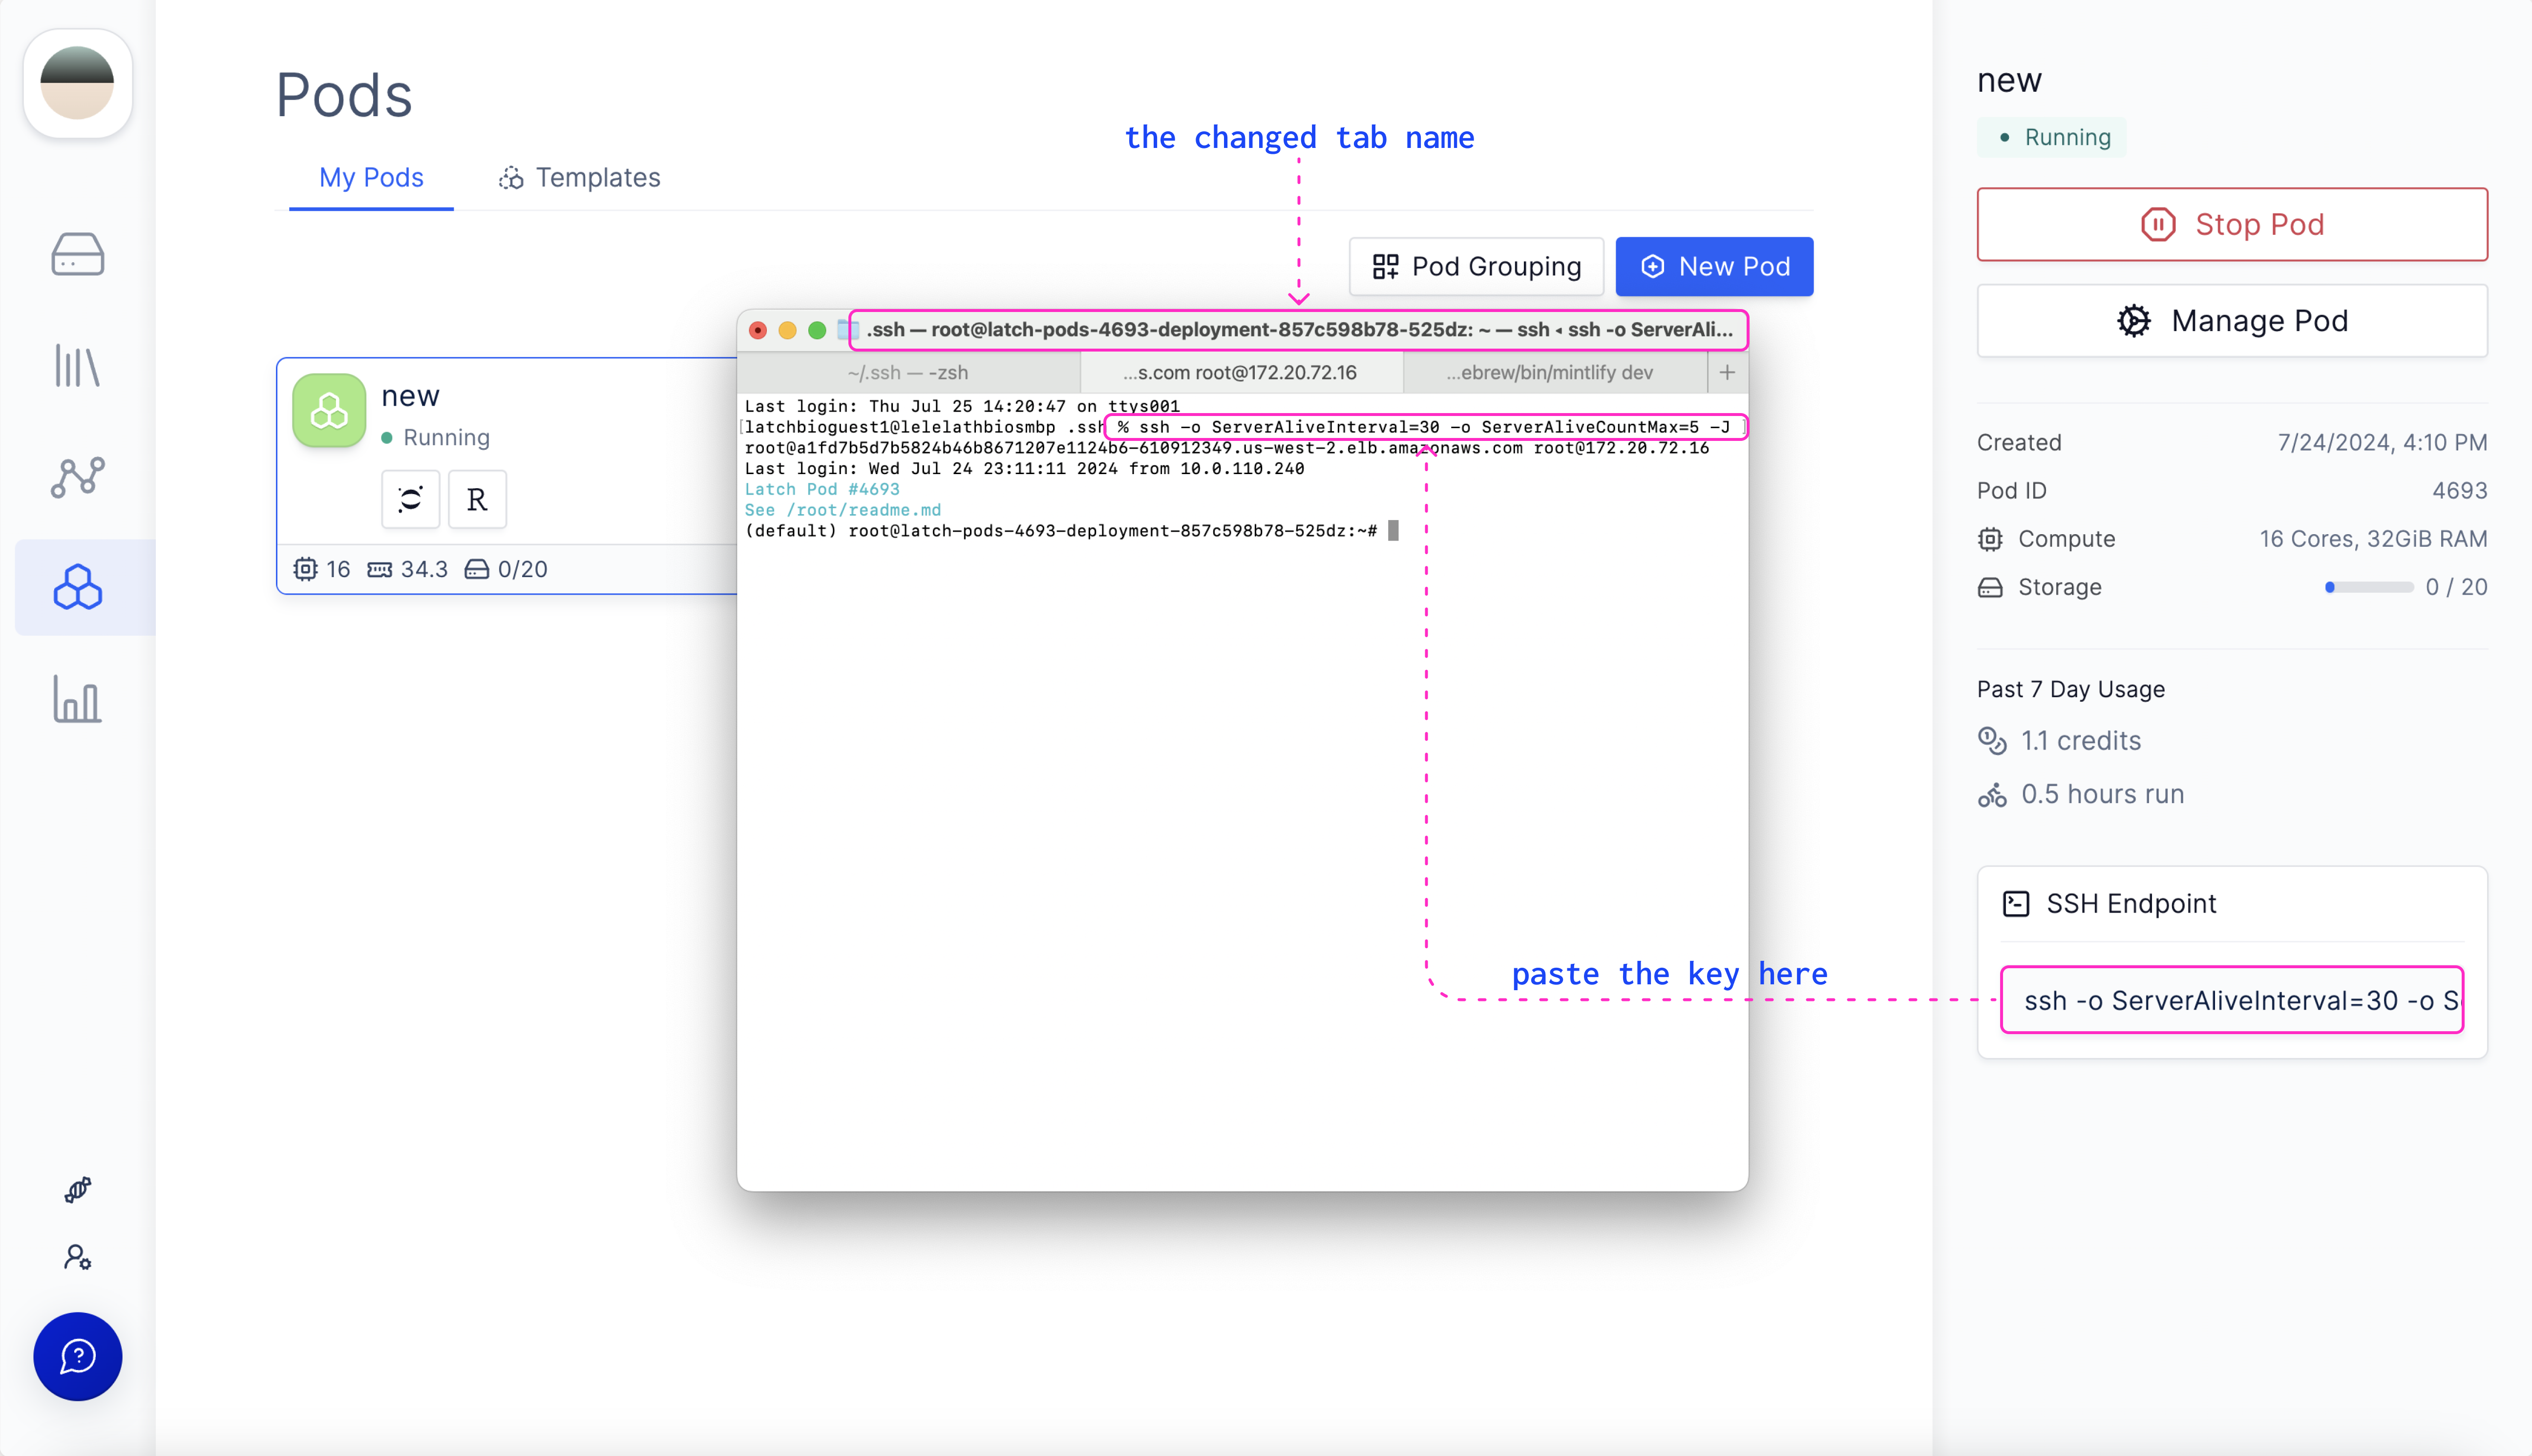
Copy the SSH command from your pod.
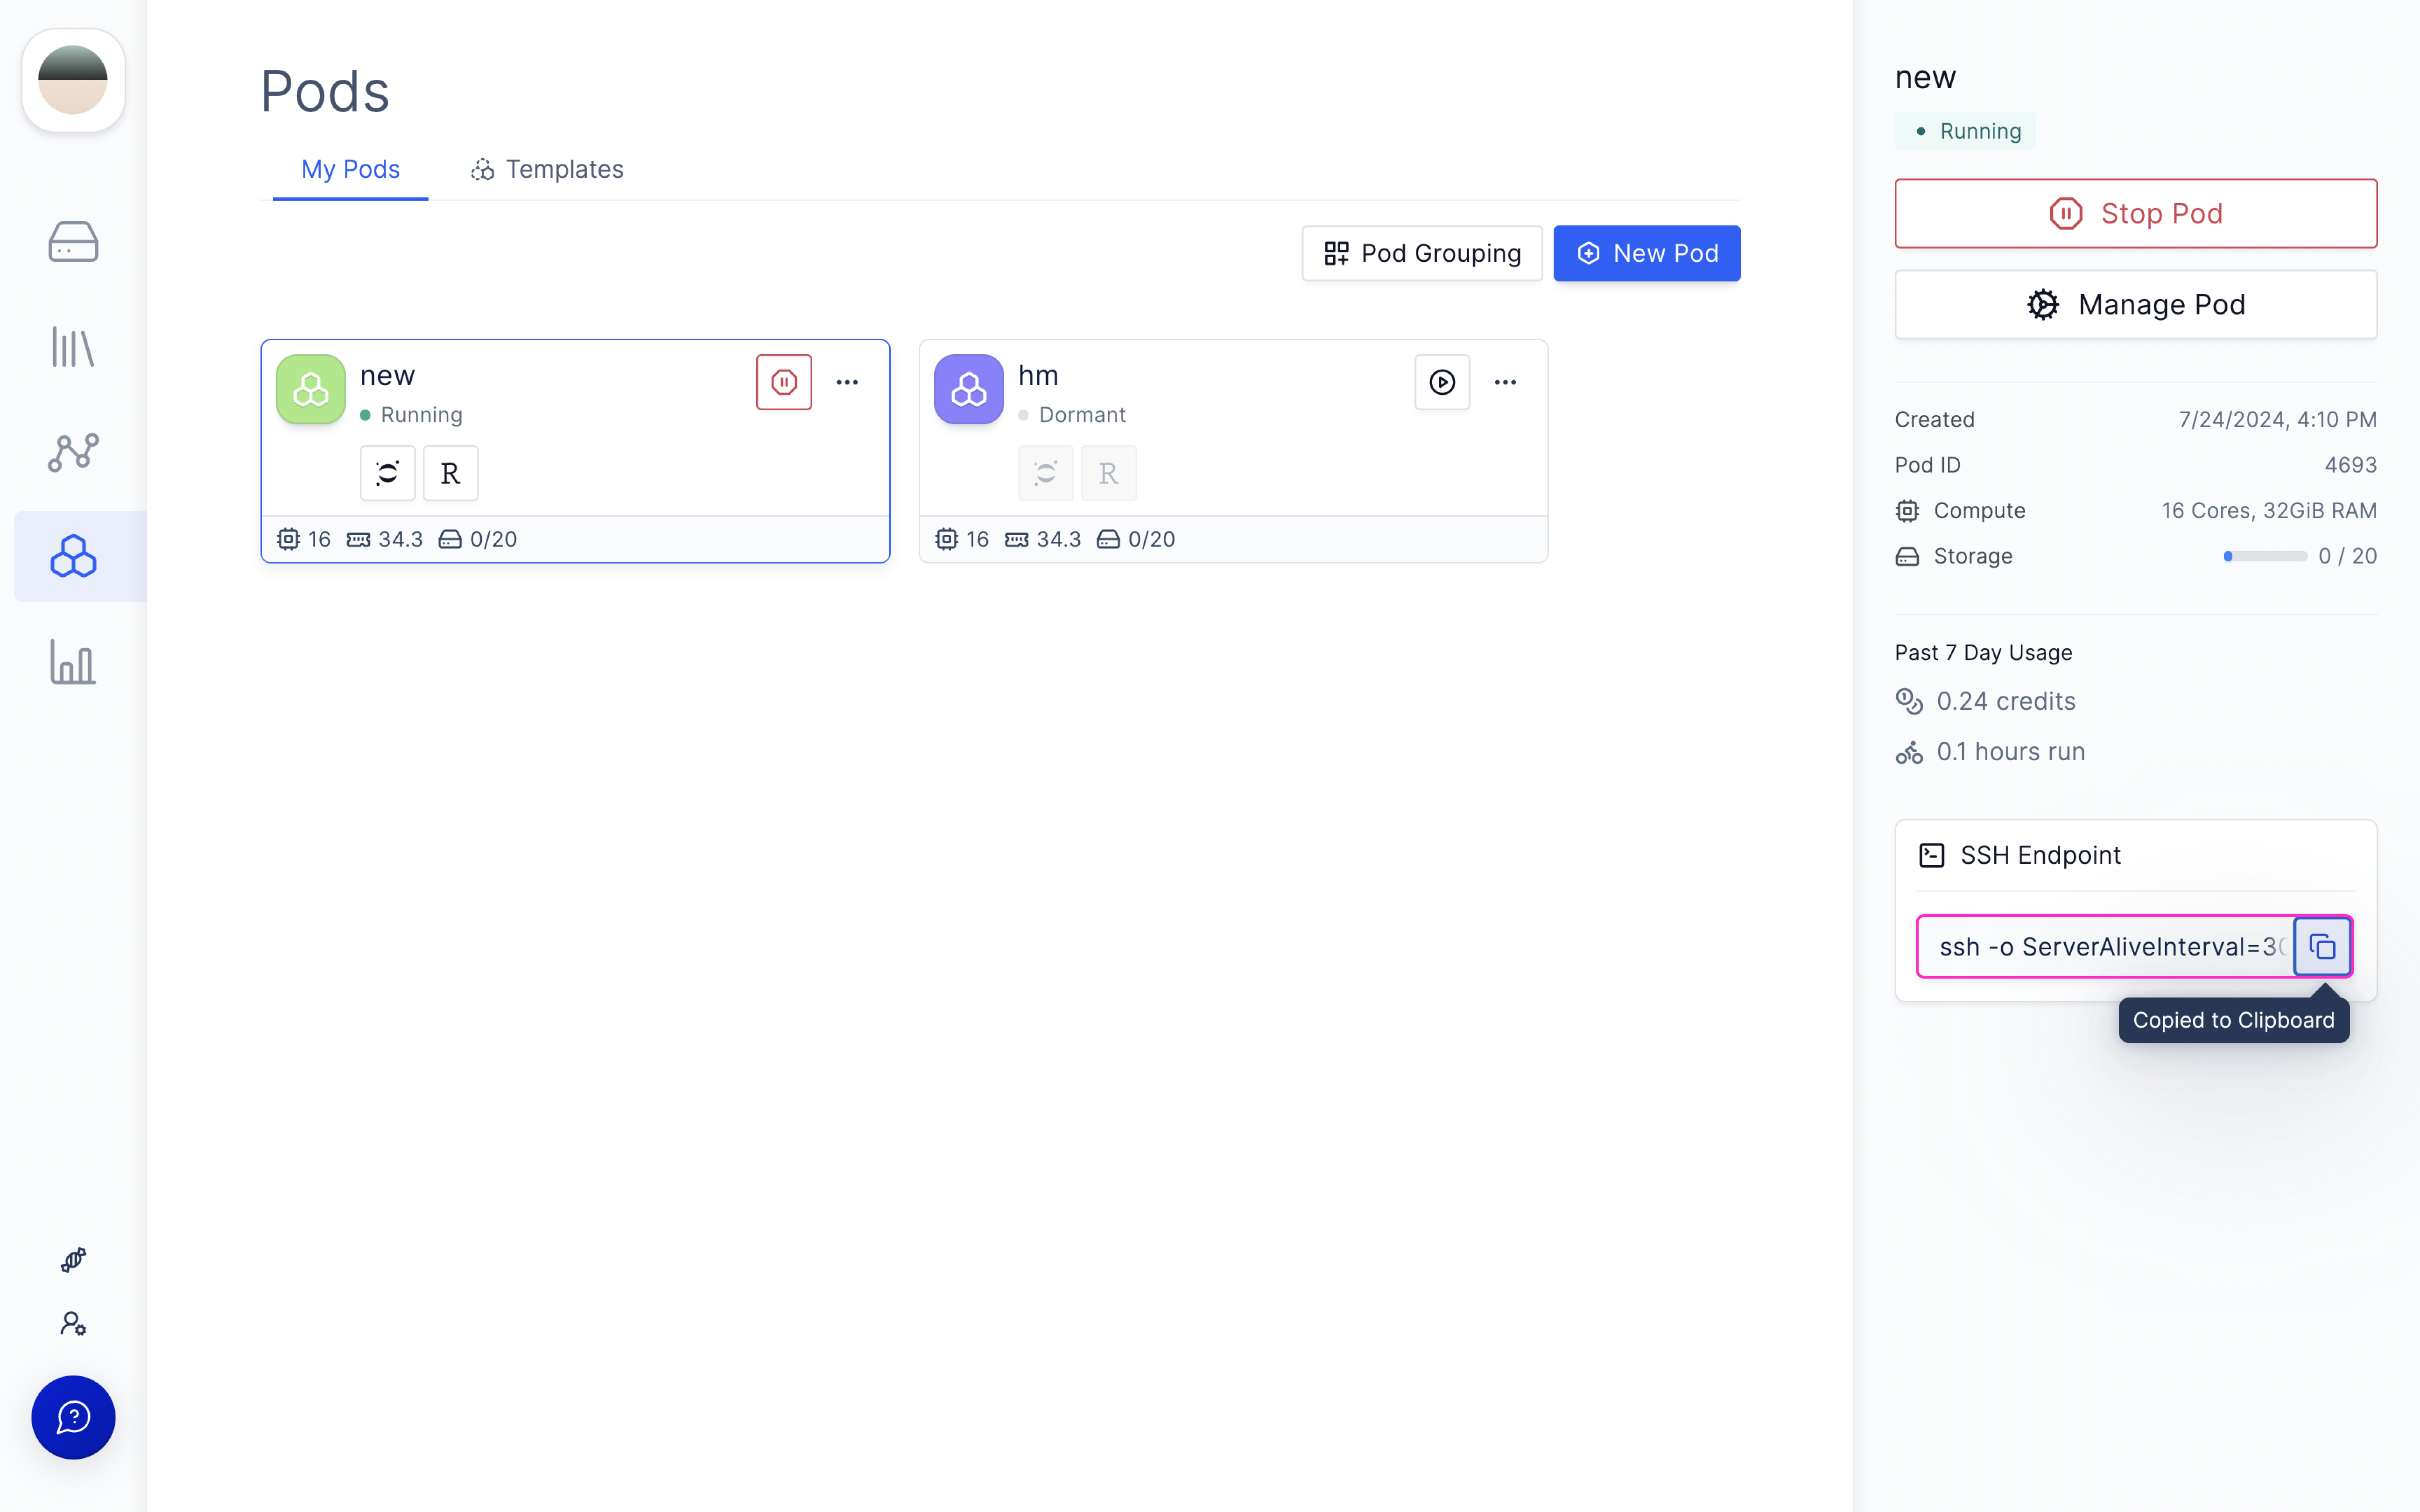
-
Past the SSH command into the terminal.
If your SSH was added successfully, the directory you are in will change to the pod.
Connect to VSCode
-
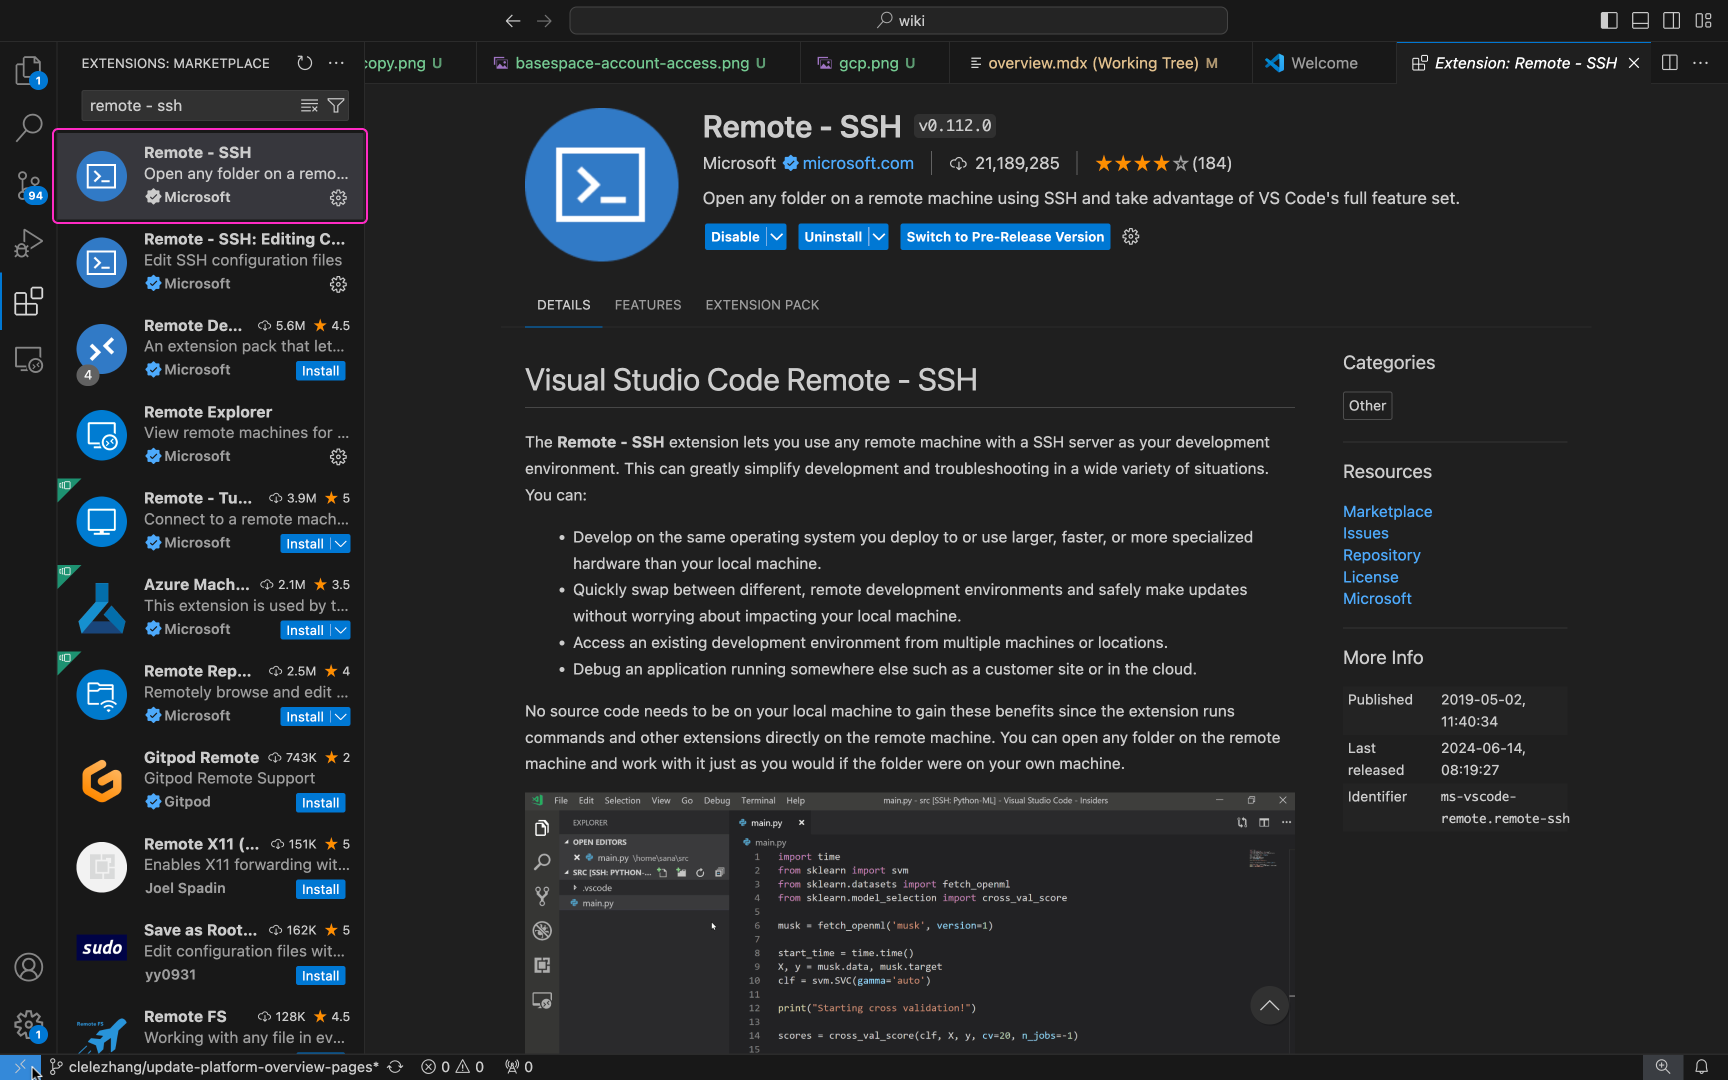
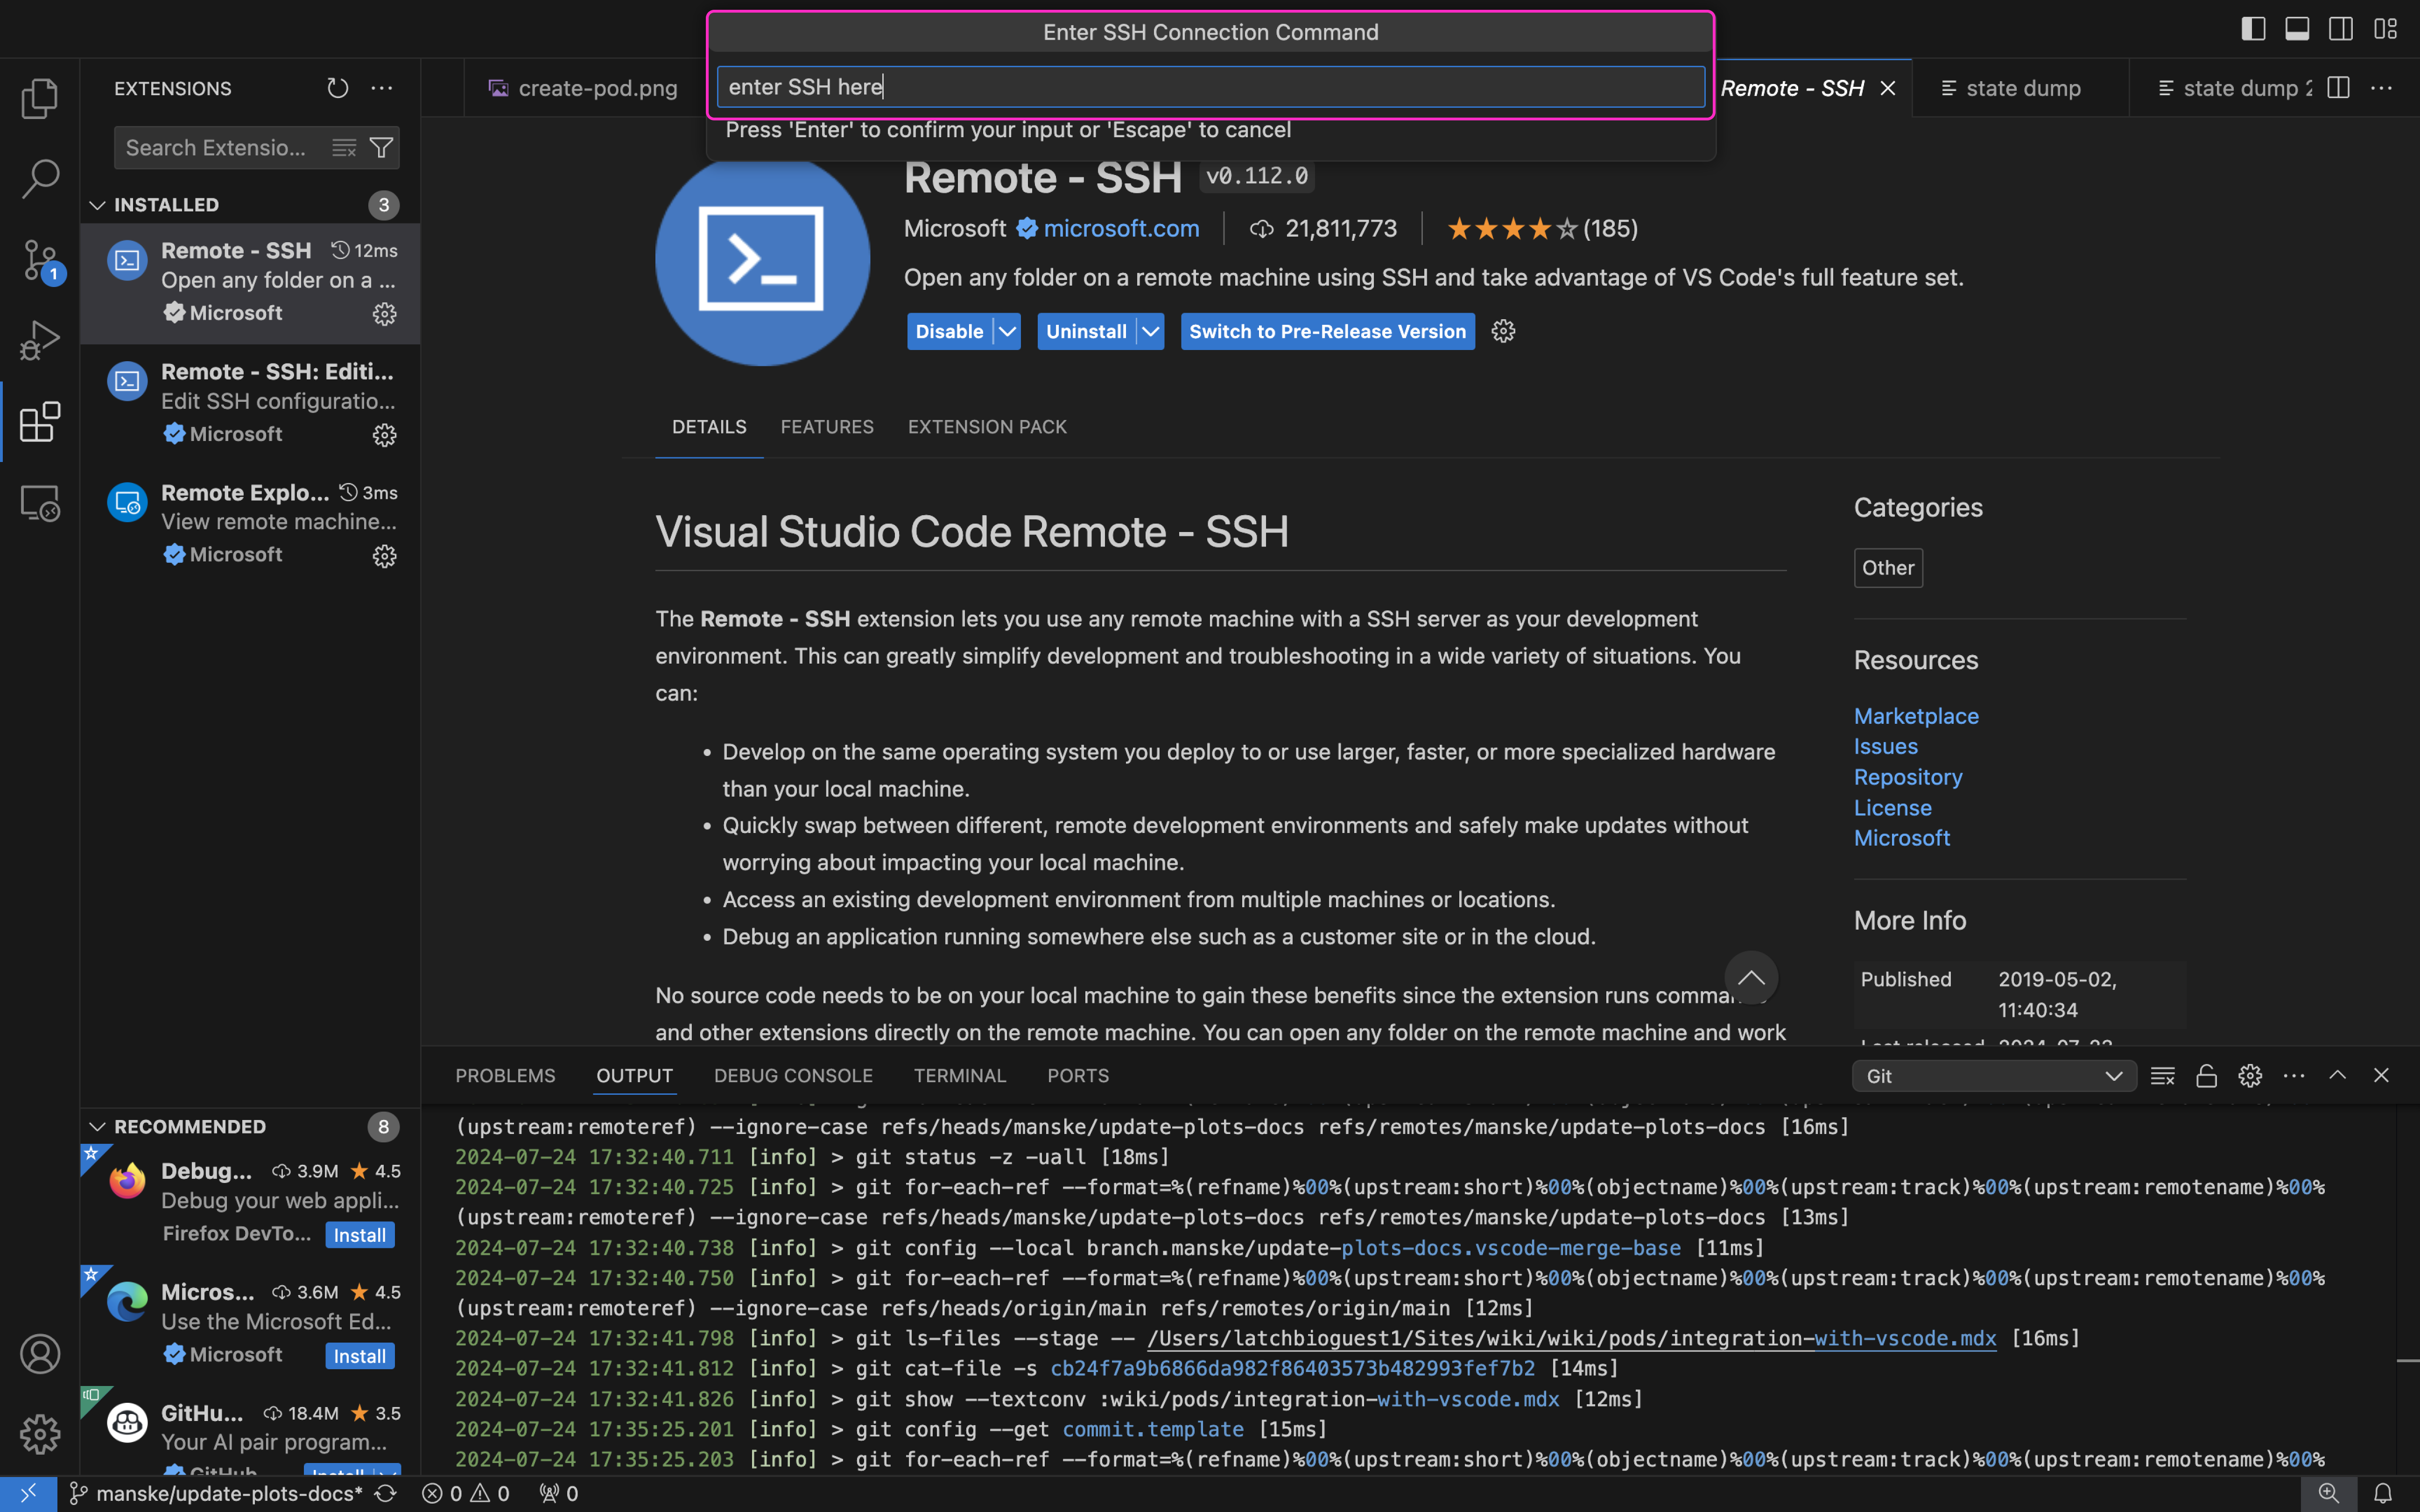
Download the “Remote - SSH” extension in VSCode.
-
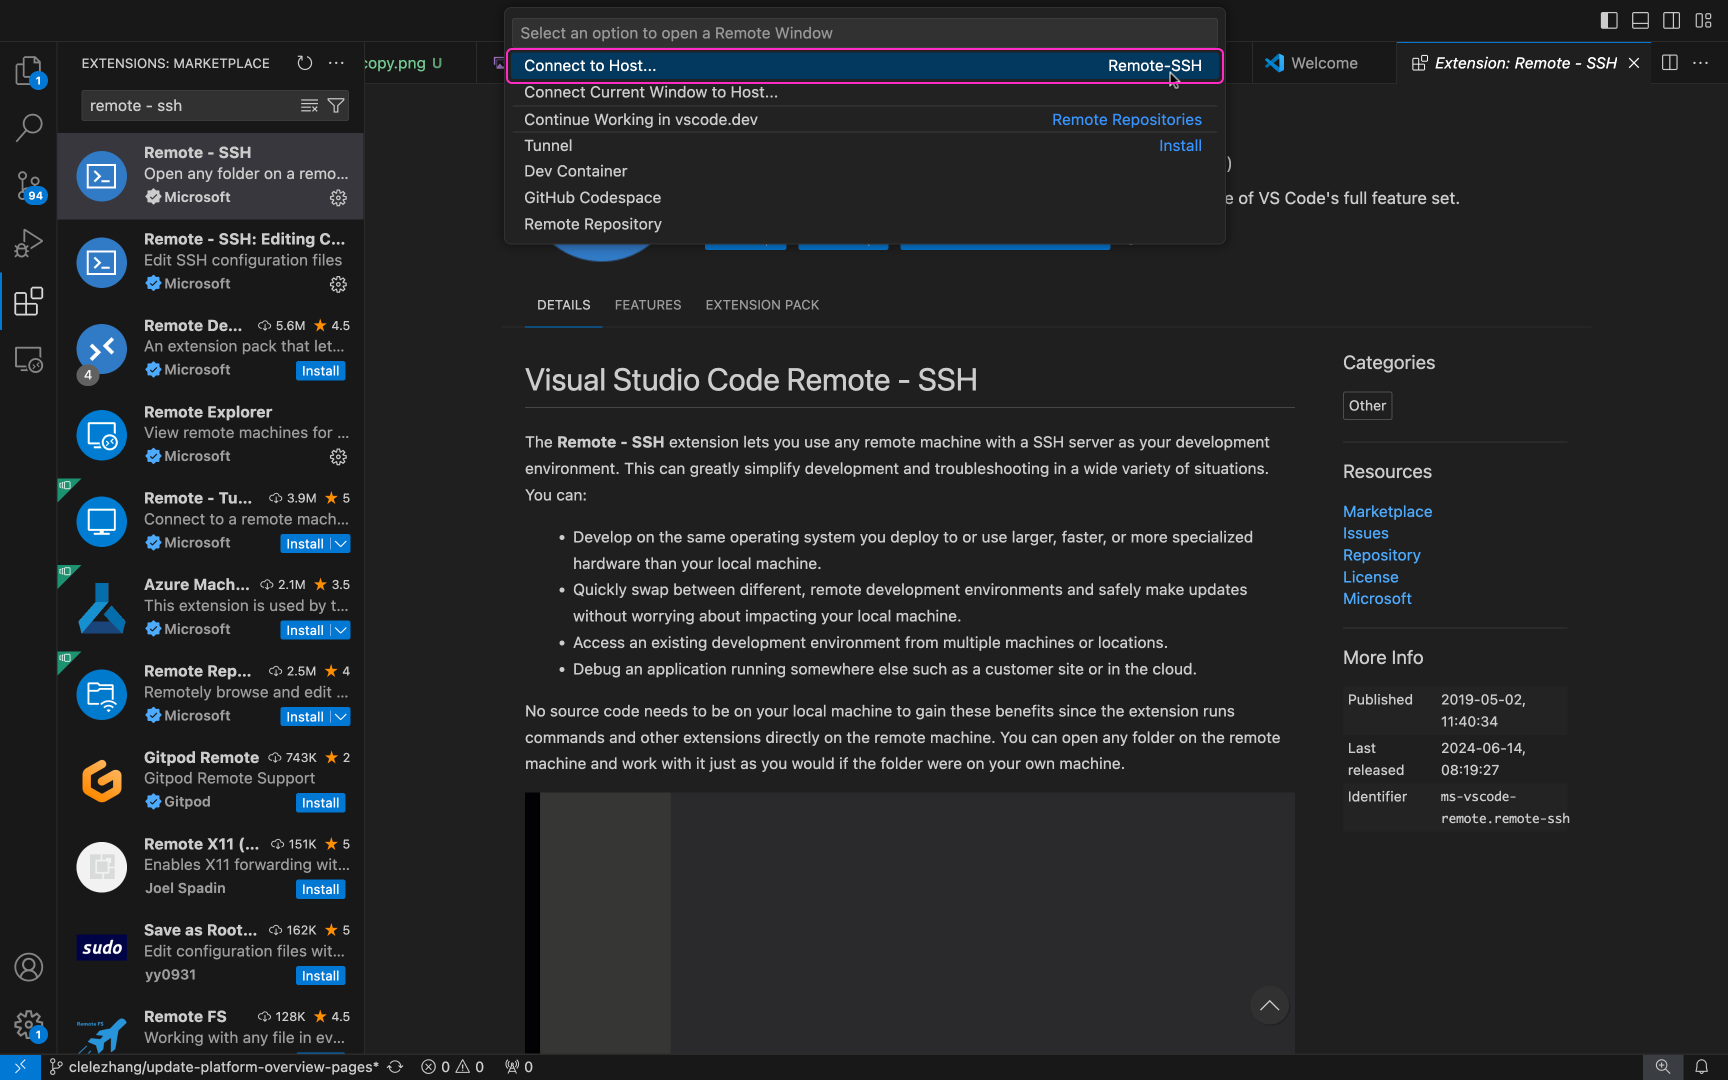
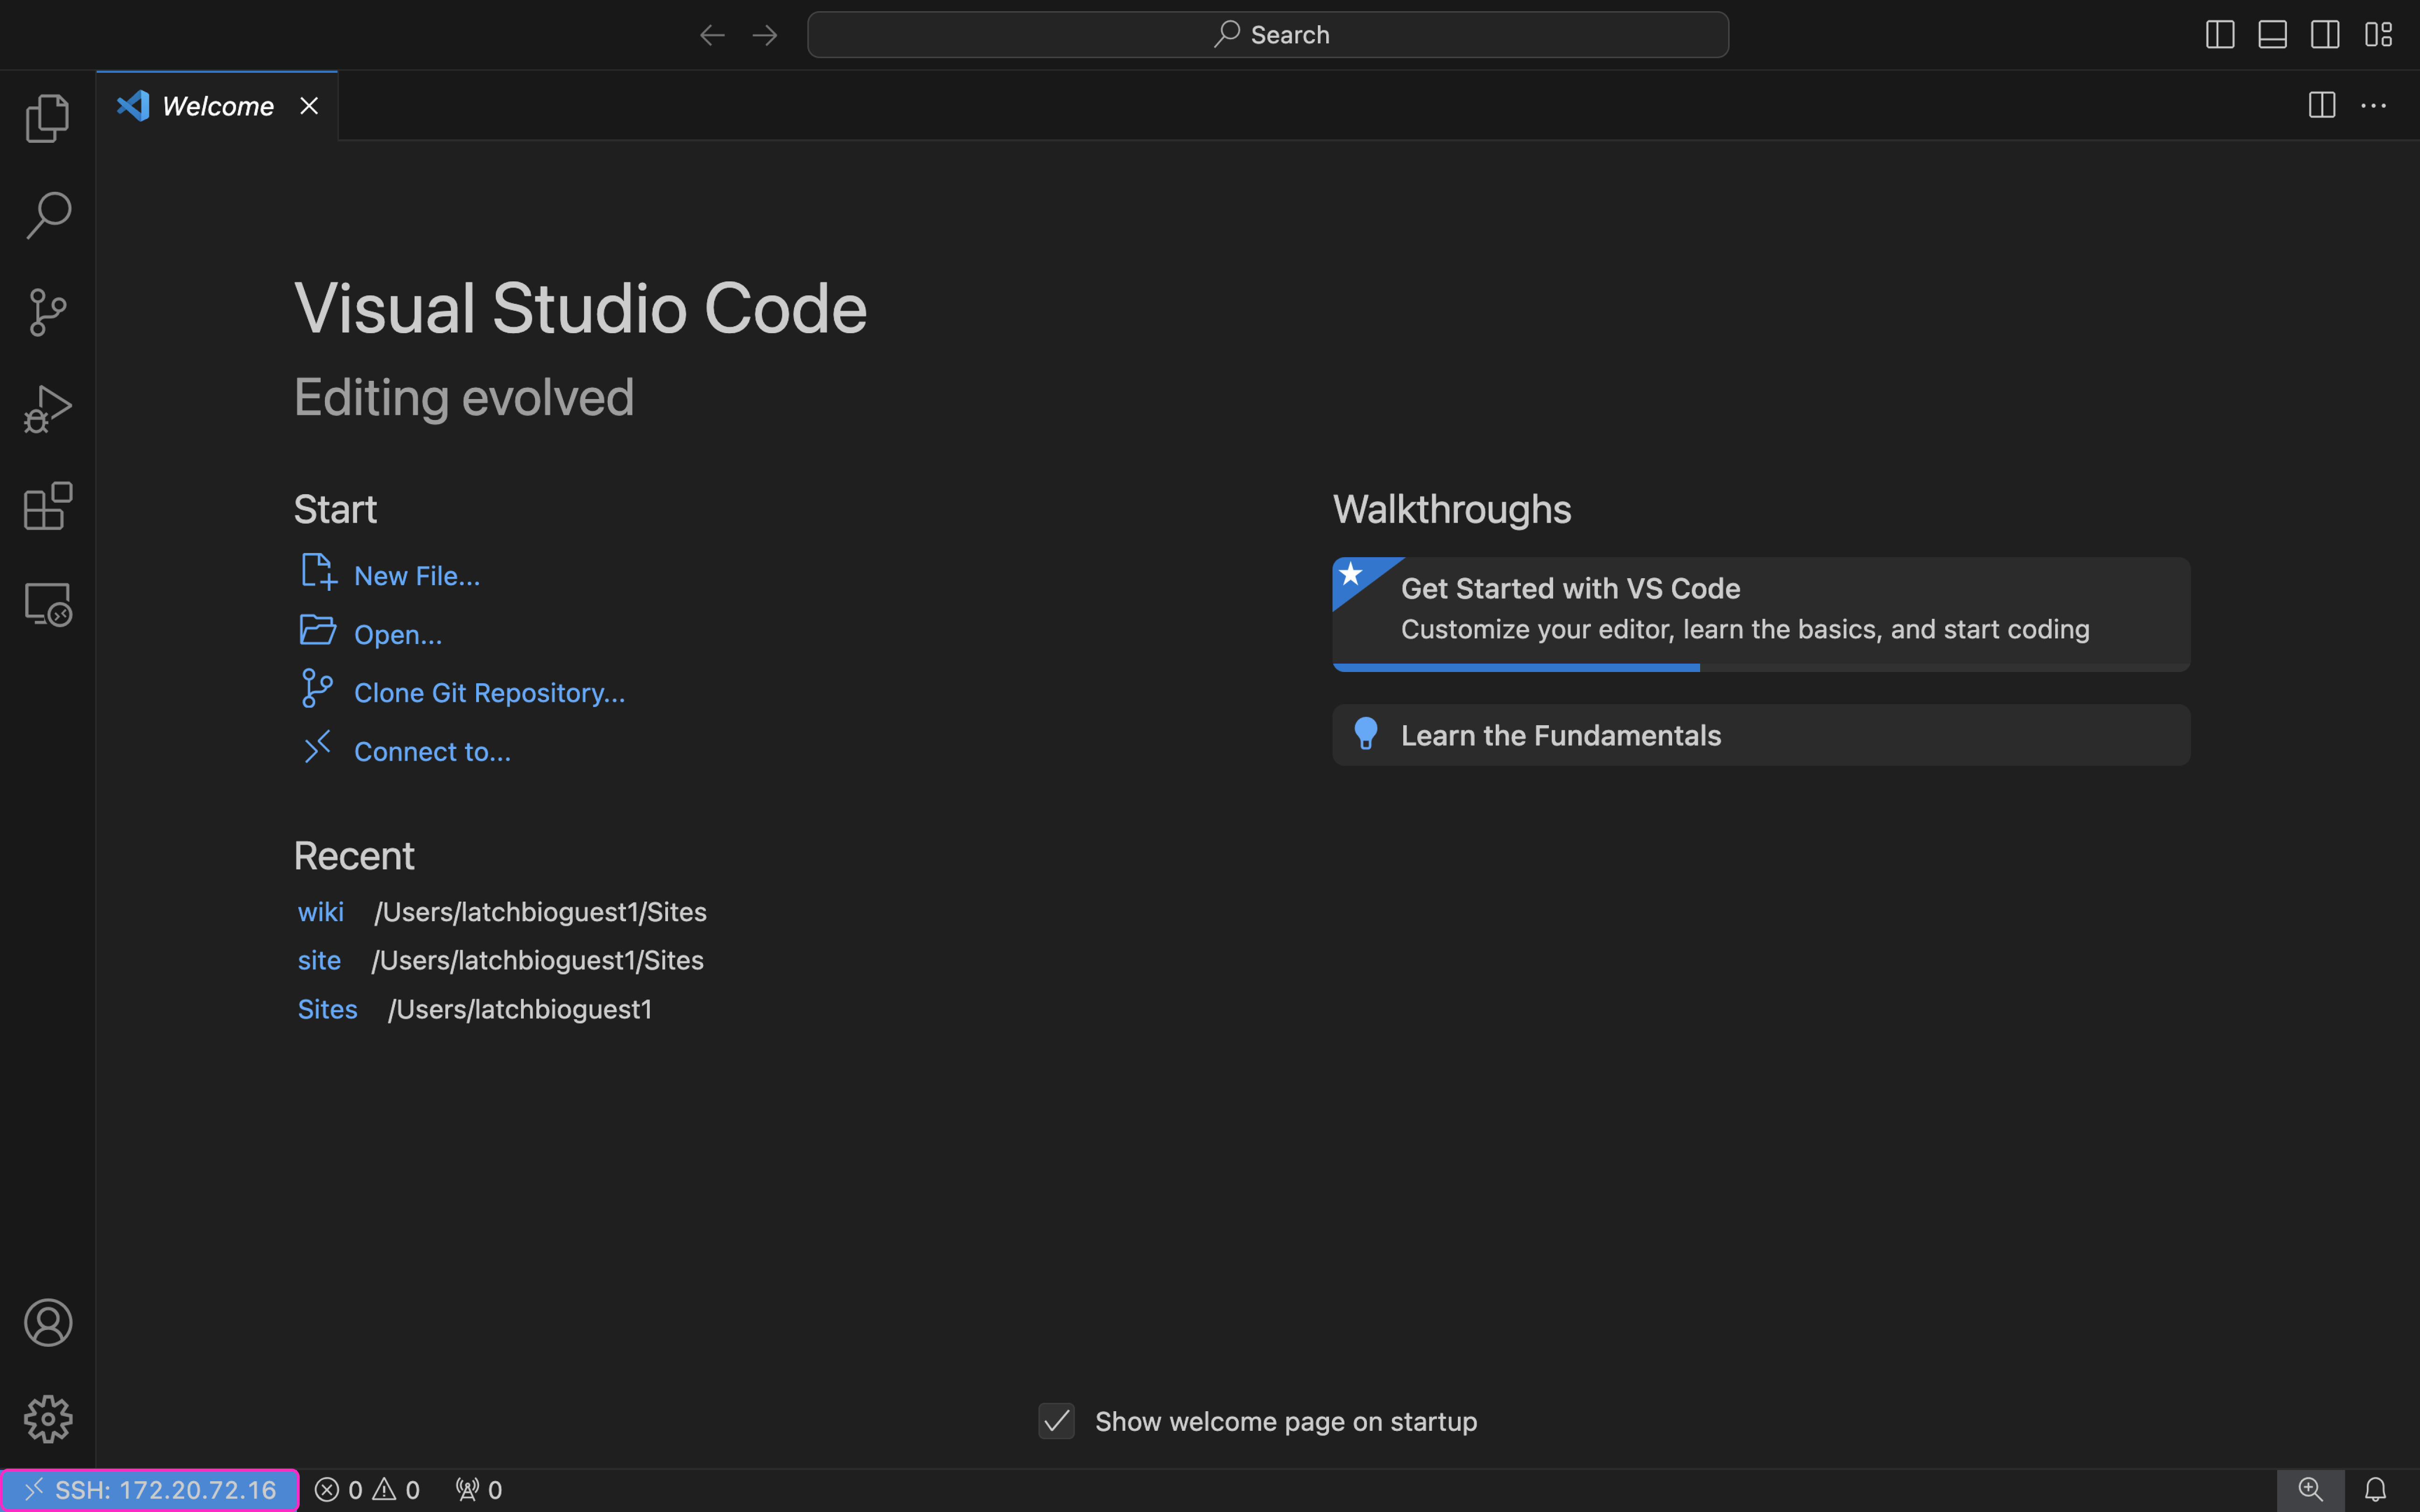
Click on the small green or blue remote icon at the bottom left of your VSCode Window.
The icon looks like a greater than sign slightly under a less than sign.

-
Select “Connect to Host”.
-
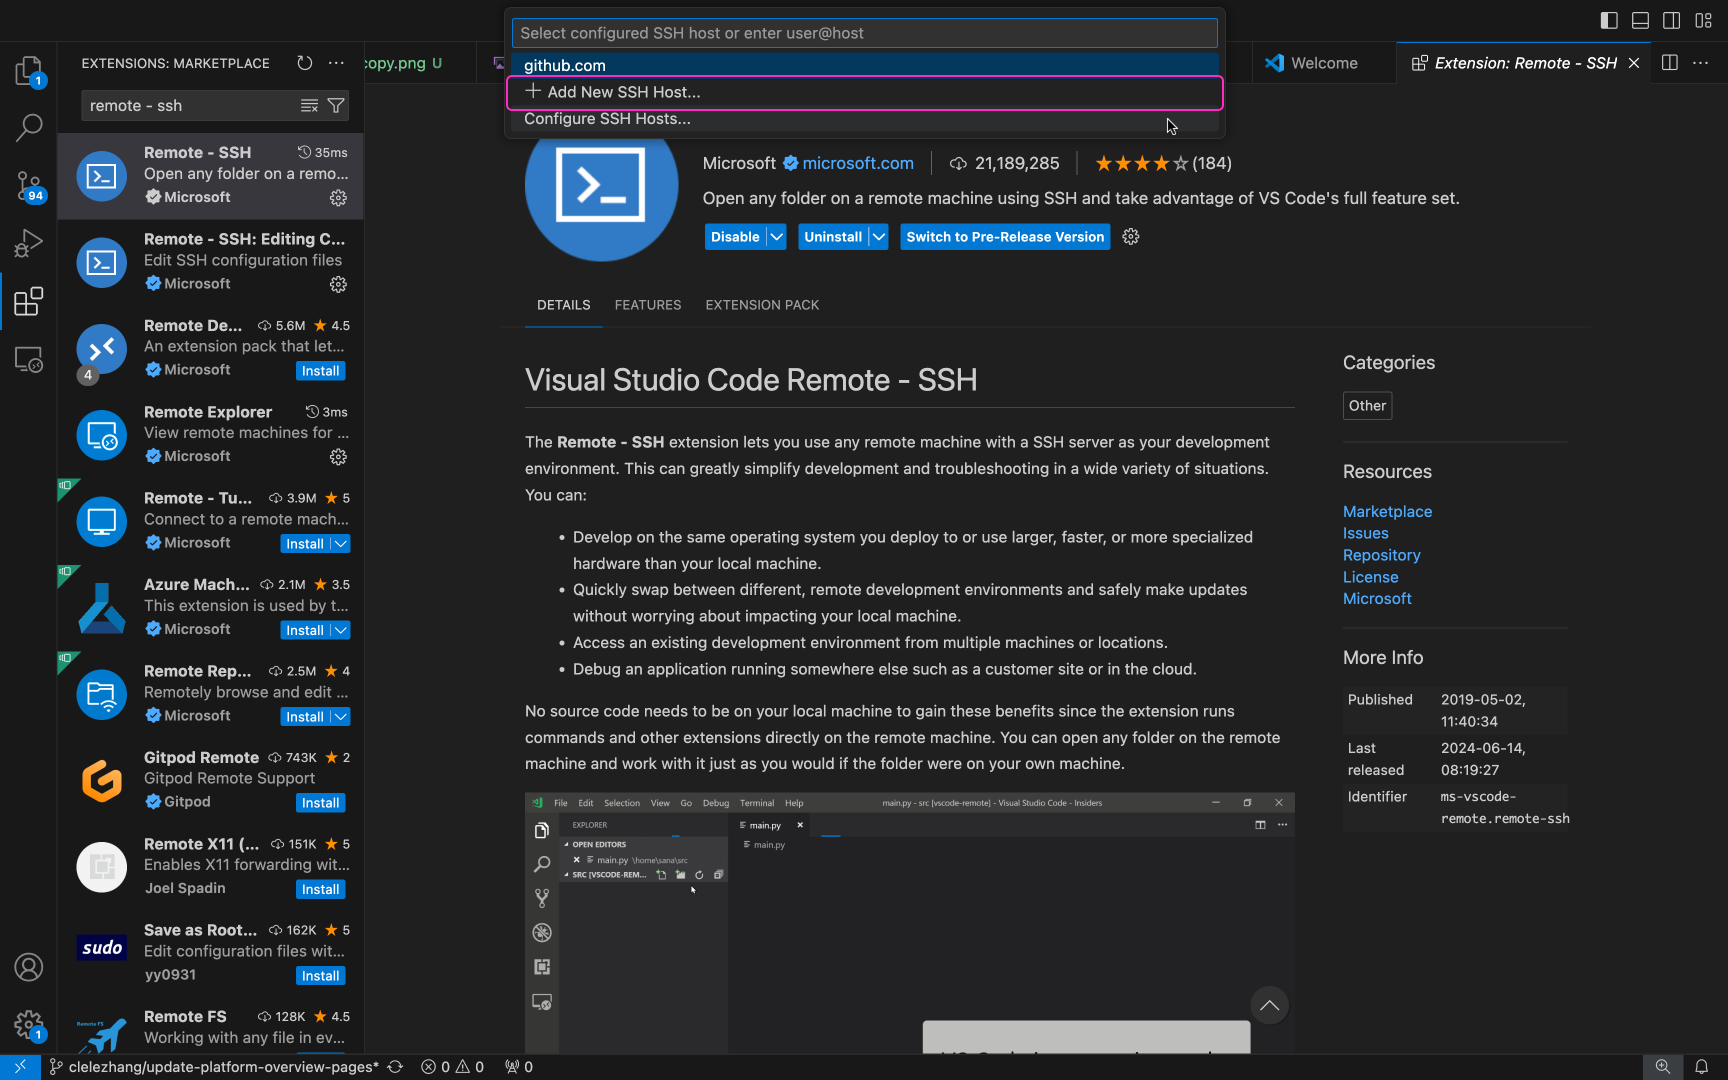
Select “Add New SSH Host”.
-
Copy the SSH command on the sidebar of Pods.
-
Paste the SSH command into VS Code.
-
In the bottom right corner, click connect in the Host Added pop-up.

-
Another VS Code window will open and connect to your SSH.
You can mouse over the green/blue remote icon in the bottom left corner to see the host IP and the status
of your SSH connection.
-
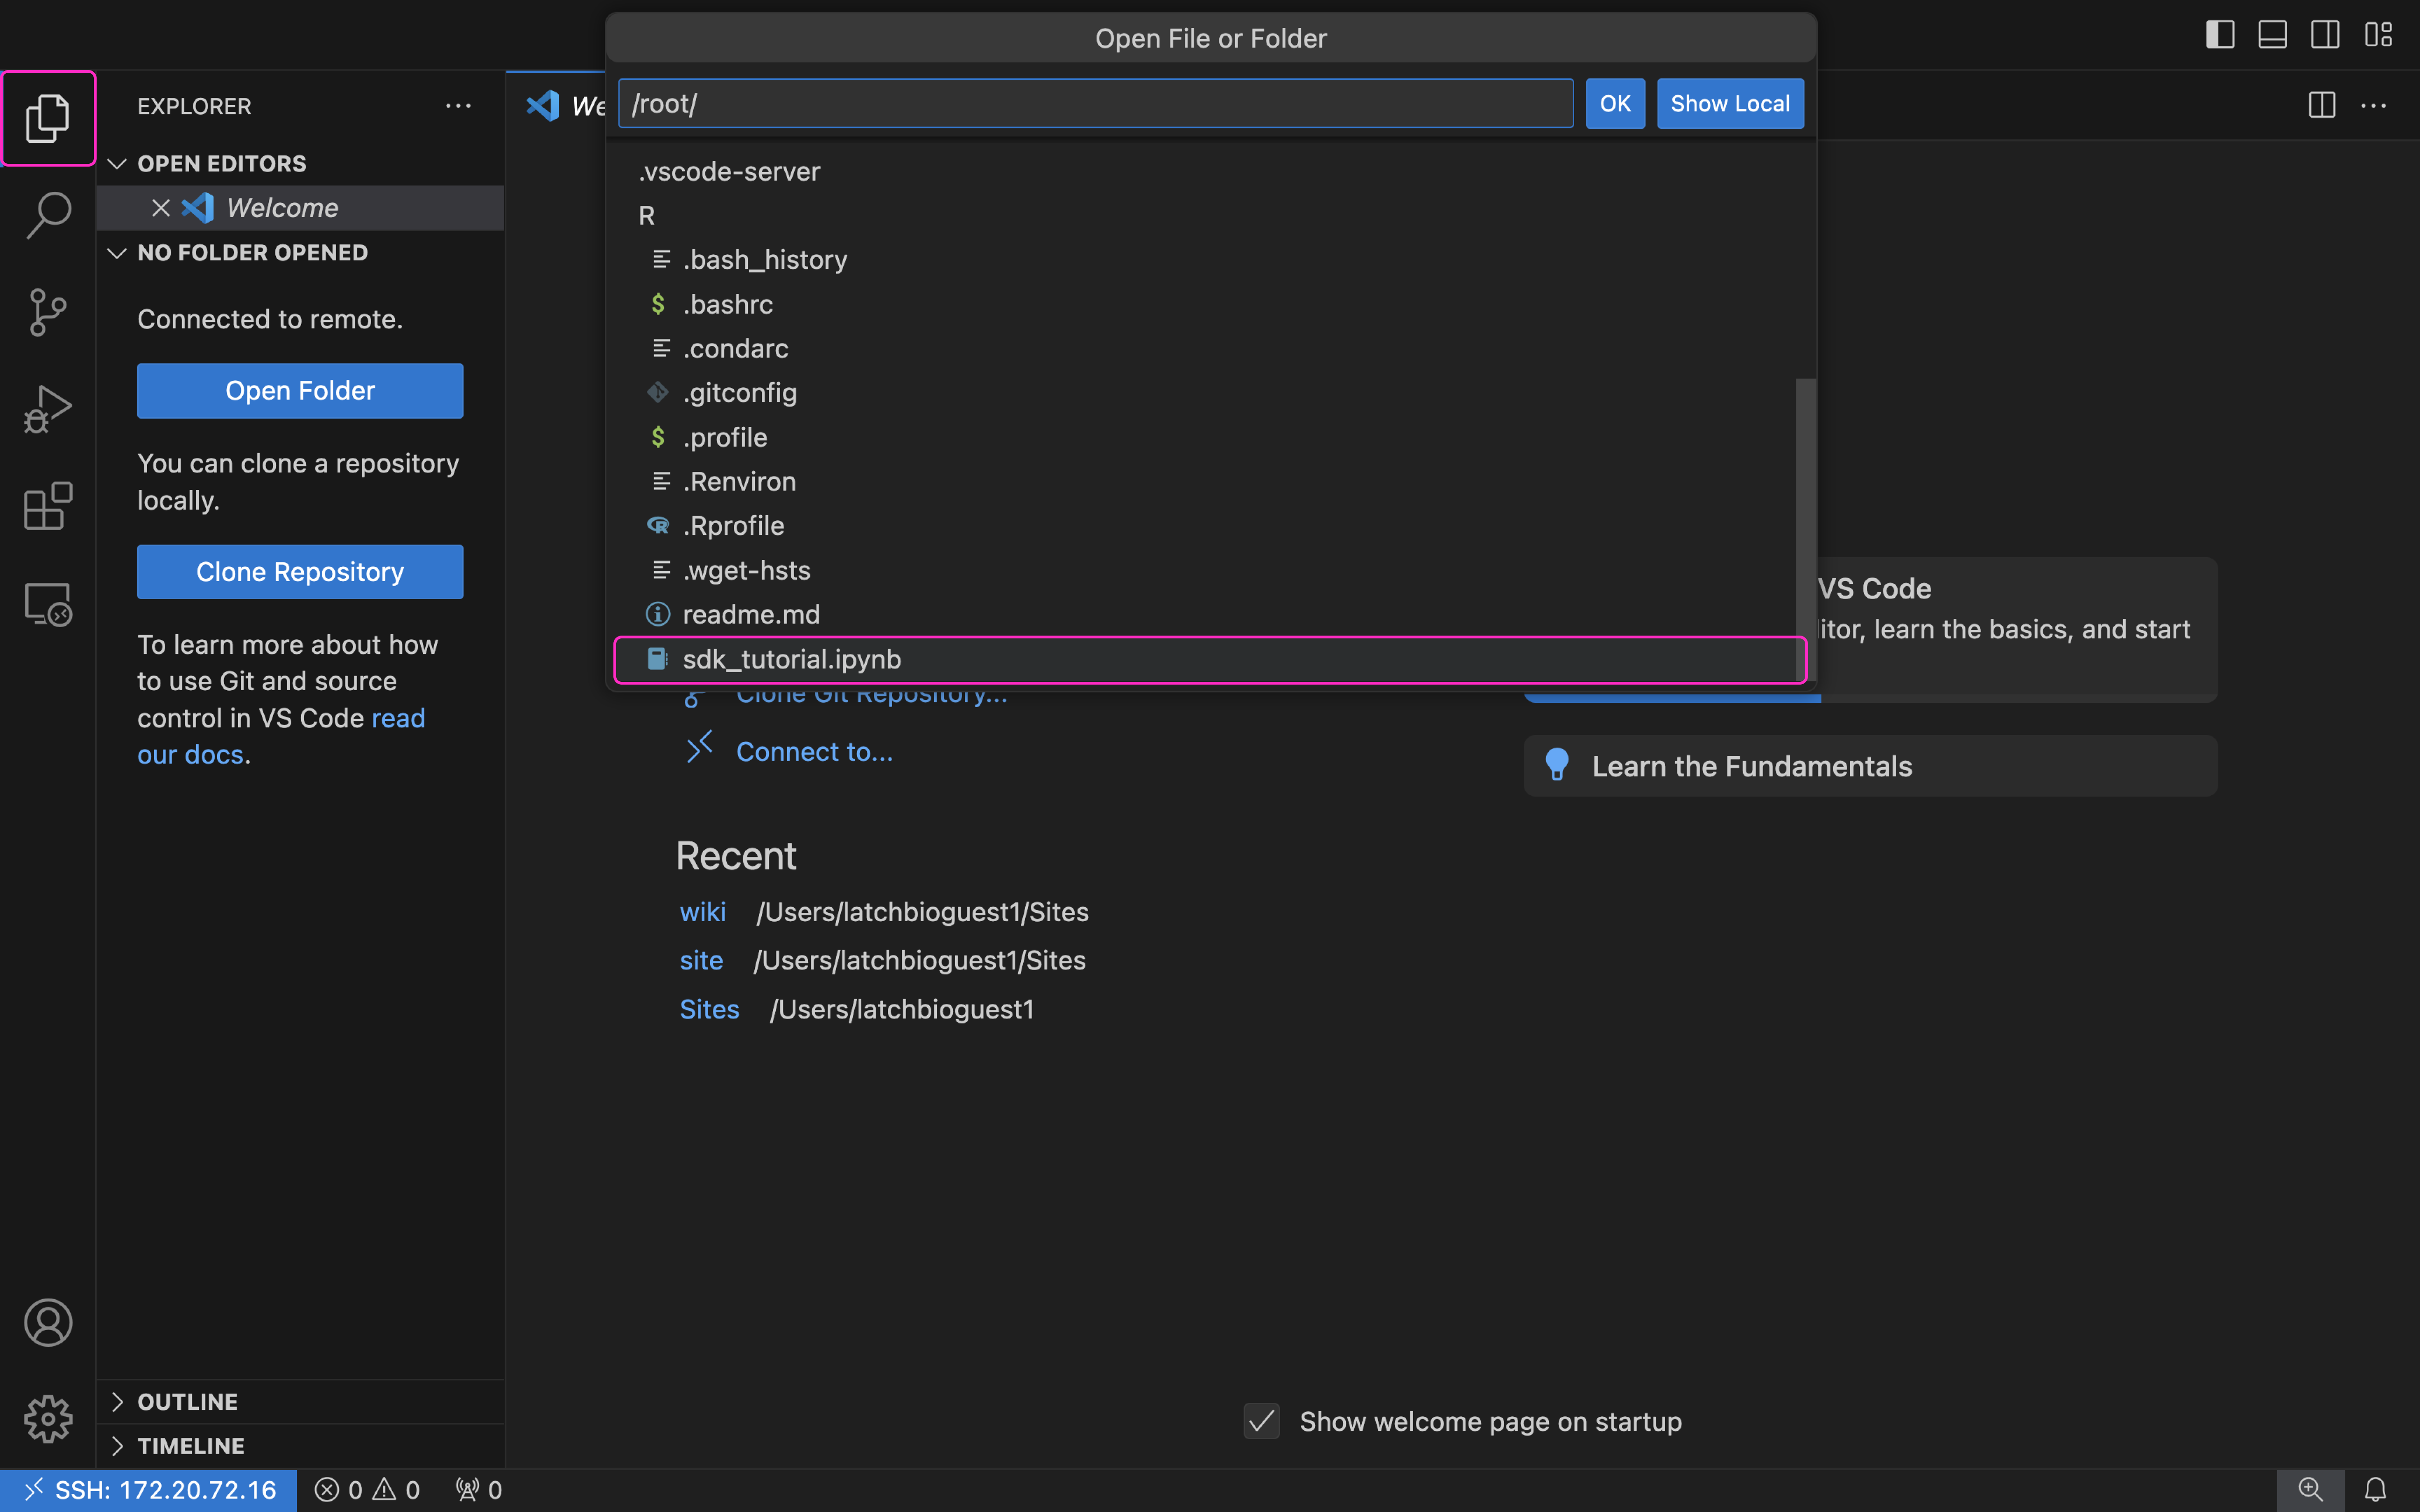
Once you are connected, you can start programming in the SSH.
Click on the explorer tab, then click open folder and open sdk_tutorial.ipynb to test out
programming in the SSH!