1. Add your Pod
-
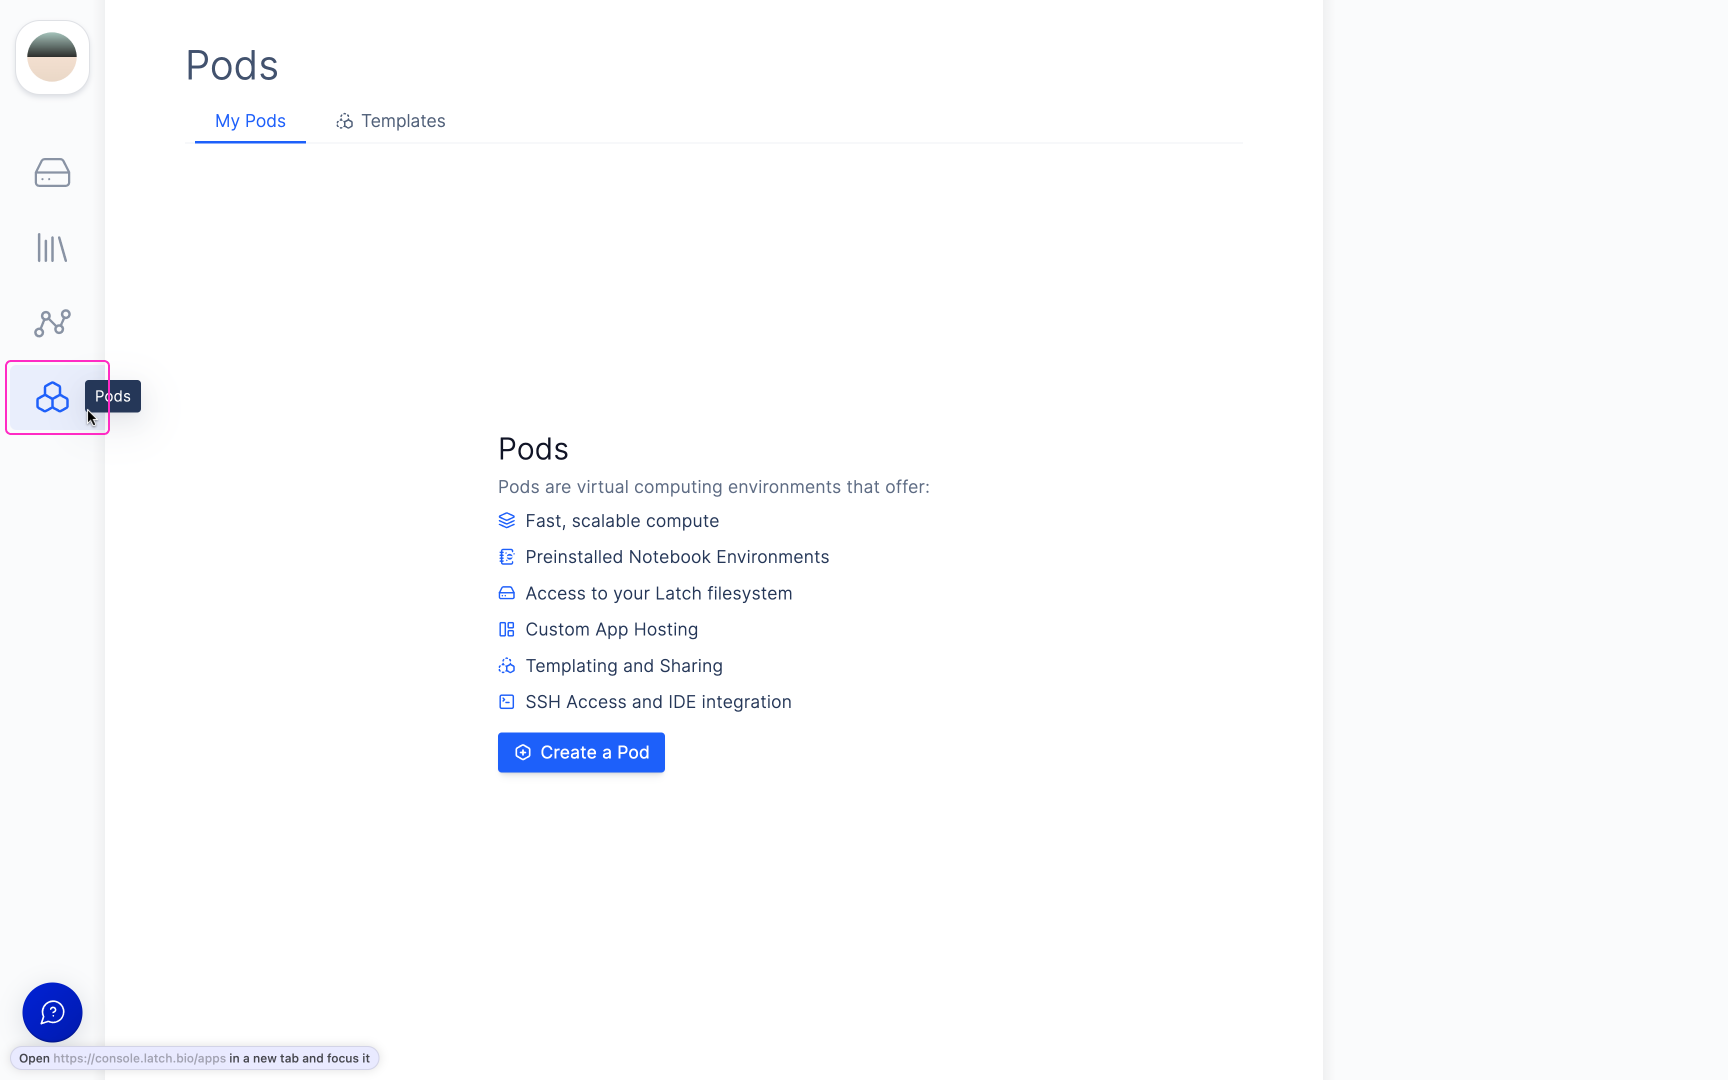
First, navigate to the Pods tab on the left sidebar.
Find the Pods tab here.
-
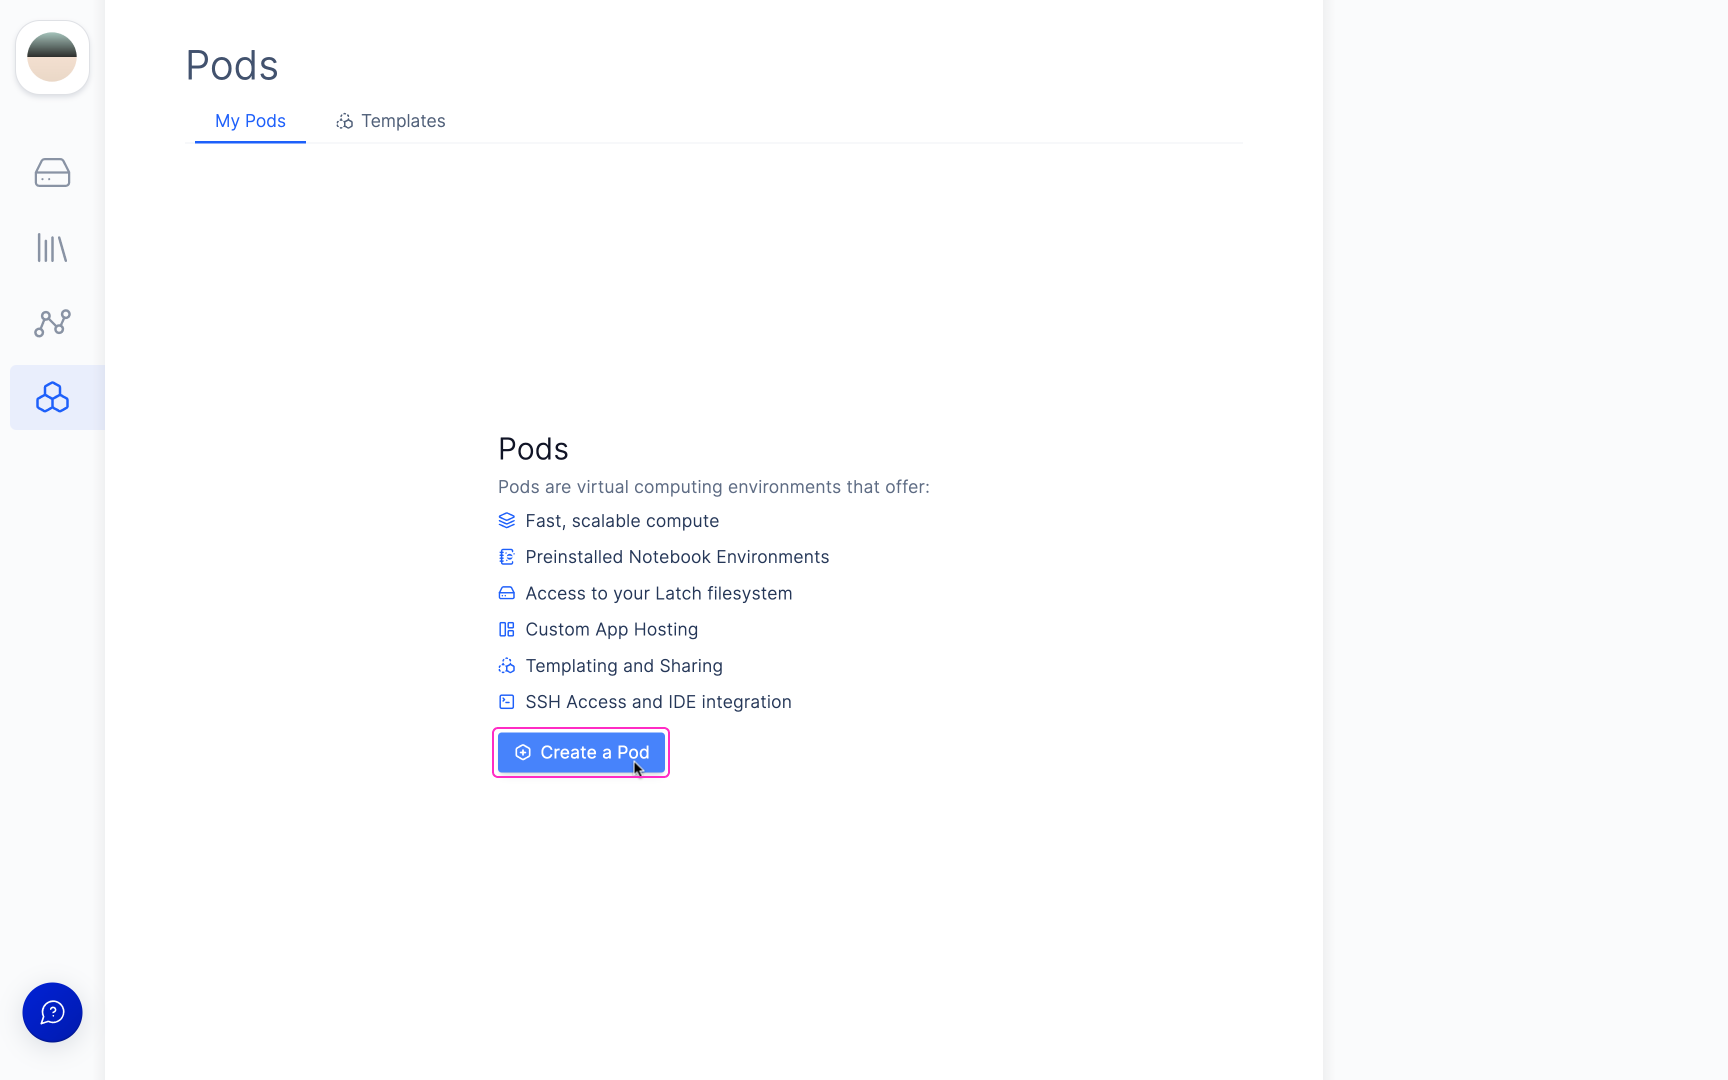
Click ‘Create a Pod’ to create your first Pod.
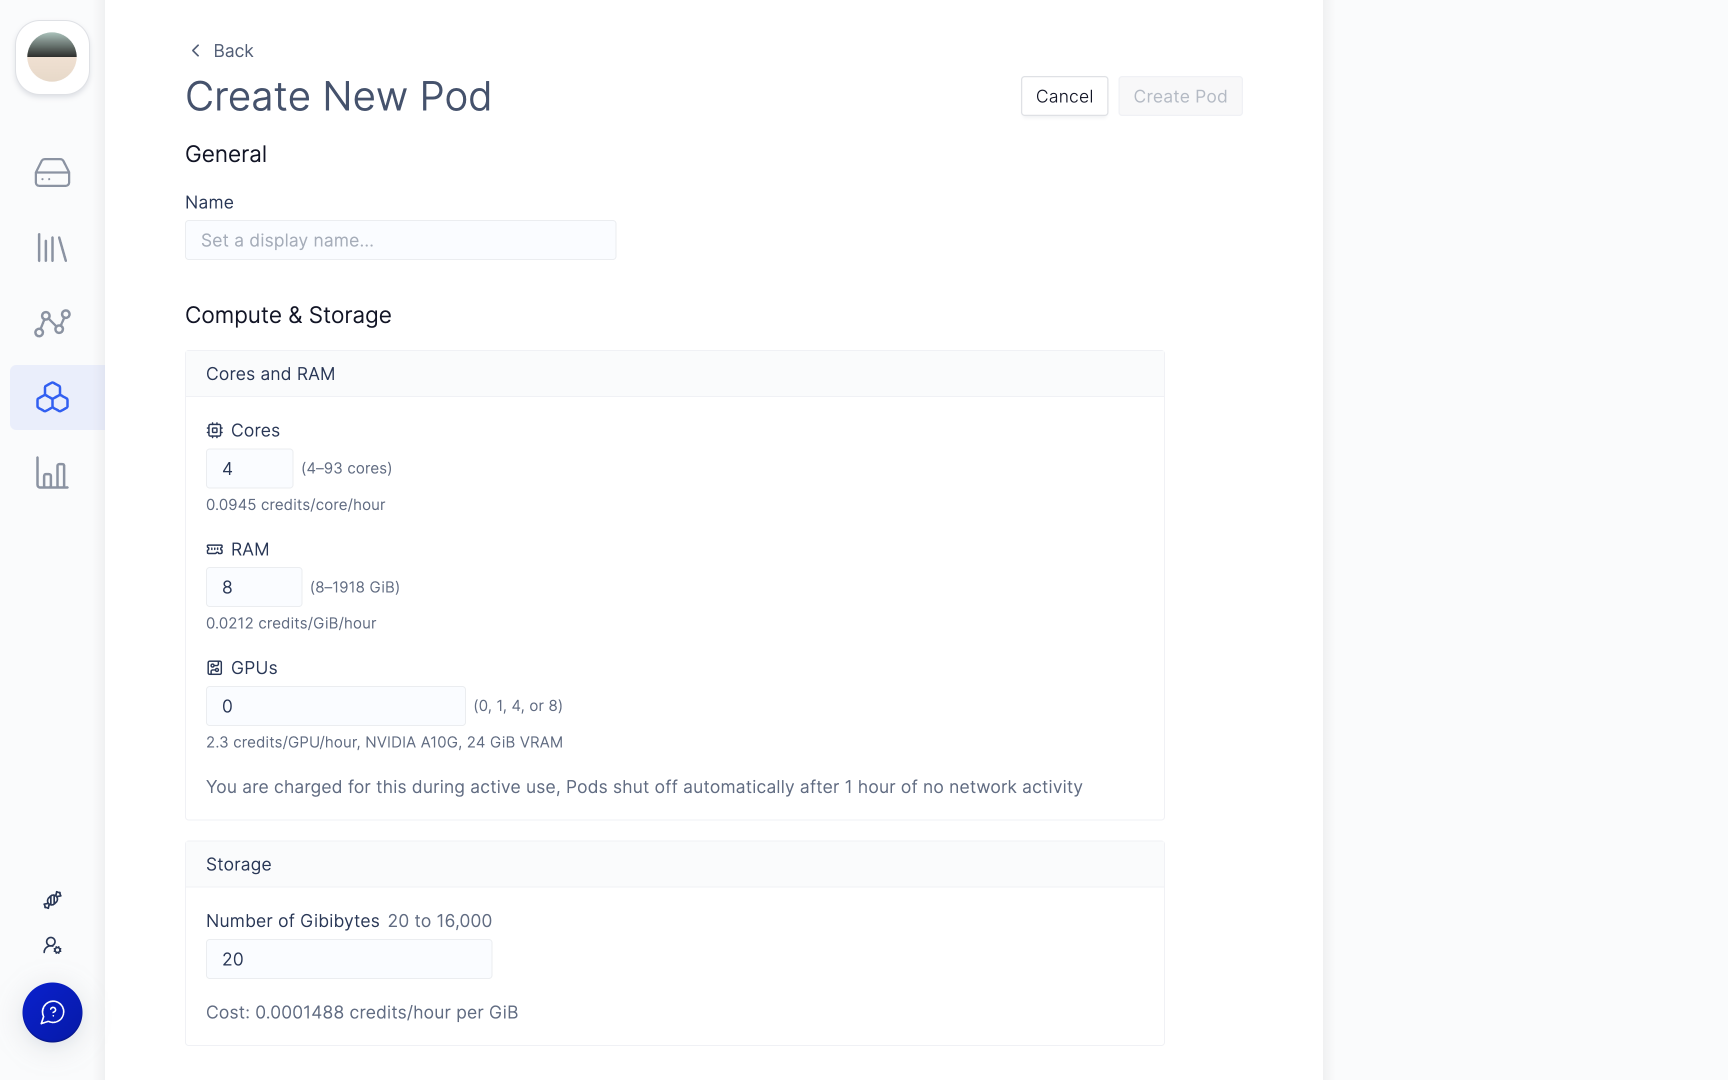
You will be prompted to the Pod settings page to specify your Pod’s name, compute, and storage resources.
2. Set up GPUs & Compute
-
You can choose from a maximum of 93 CPU cores and 2 TB of RAM for your Pod, or up to 8 GPUs. Pod resources can also be modified easily at a later time once the Pod has been created.
-
Click Create Pod to start launching your Pod.
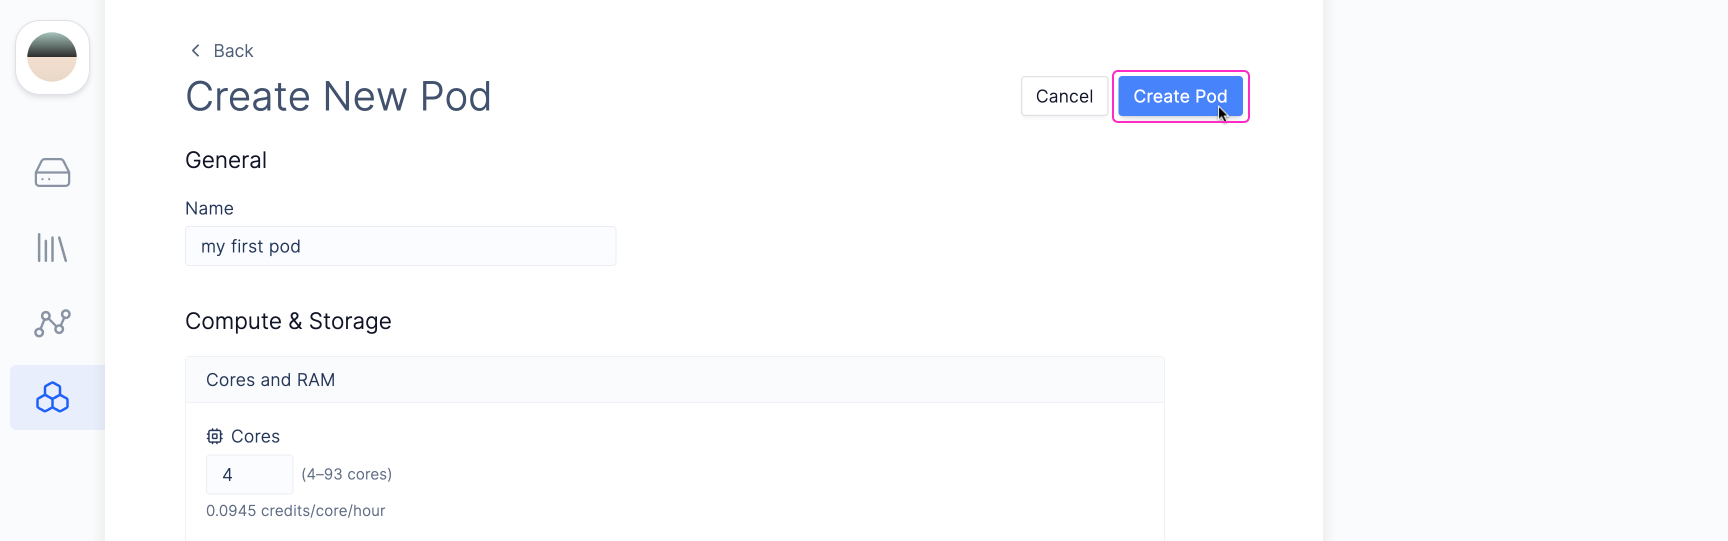
Depending on your resource settings, Pods may take 5-10 minutes to start.
Larger pods are likely to take longer to start up.
3. Access RStudio and Jupyter Labs
Once a Pod is running, JupyterLab and RStudio will start automatically. Click on the Jupyter Labs or RStudio buttons to access your notebook environment.At first, you will see the RStudio and Jupyter Labs buttons greyed out. This
means the applications are starting, may take an additionally 30 seconds to 1
minute to start.
4. Accessing your Latch Data inside Latch Pods
Latch Pods come with Latch Data FUSE (Filesystem in Userspace), which displays the entire filesystem for a workspace Latch Data in those workspace’s pods. The Latch Data filesystem is mounted at the/ldata.
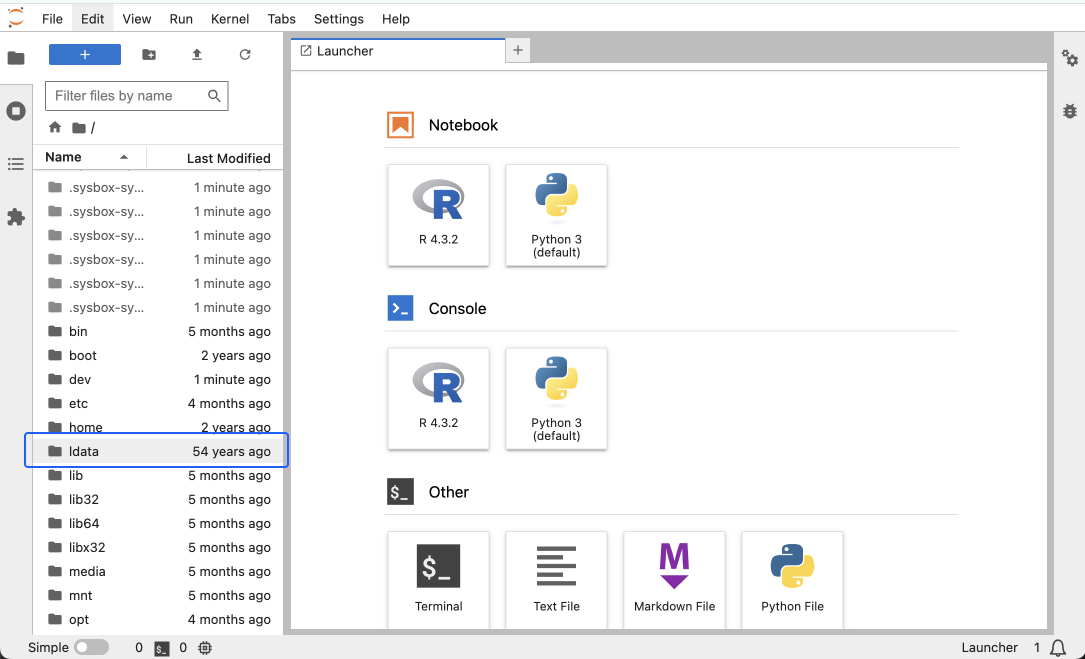
/ldata to a local scratch directory inside your Pod. You can use the command latch cp to copy frequently use files to a Pod. More on using latch cp here.
That’s it! You have successfully started your first Pod, which has RStudio and Jupyter Labs pre-installed, and direct access to Latch Data.