> ## Documentation Index
> Fetch the complete documentation index at: https://wiki.latch.bio/llms.txt
> Use this file to discover all available pages before exploring further.
# Registry Basics
> Learn how to set up your registry to manage your data.
## 1. Create your first project
### Discover optimal antibody candidates through multiple rounds of phage display assays.
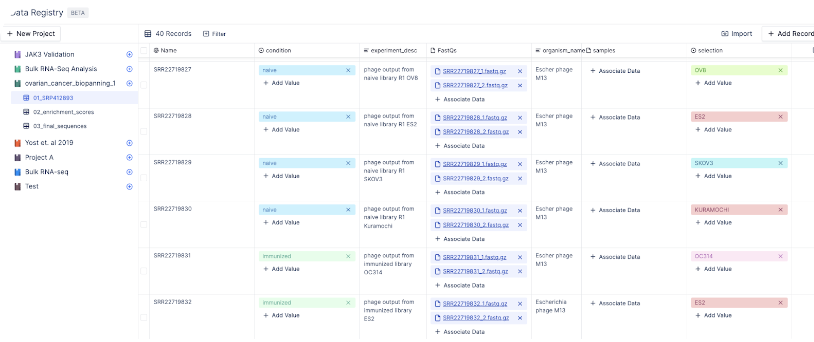
To identify the most suitable antibody candidates, scientists may employ several rounds of phage display assays. To facilitate this, we can create a table consisting of SRA IDs and their corresponding FastQ files in Latch Registry. Each biological sample is accompanied by information regarding the selection method employed for the phage display assay, as well as the experimental conditions. Following data acquisition, this table can be incorporated into a Latch workflow to derive enrichment scores for diverse antibody sequences
 ### Explore top differentially expressed genes using public transcriptomics studies.
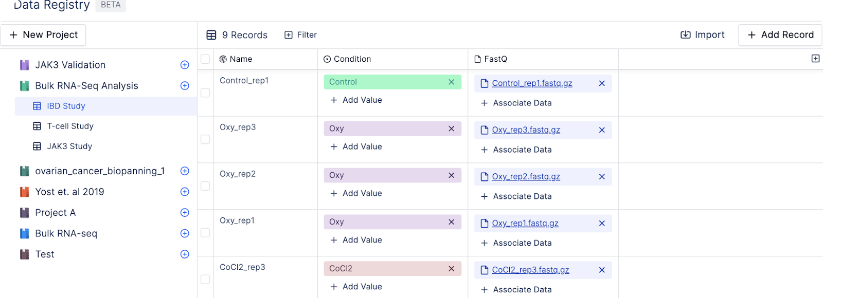
In this project, we imported several transcriptomics studies using bulk RNA-sequencing to identify differentially expressed genes and pathways across a range of biological conditions.
### Explore top differentially expressed genes using public transcriptomics studies.
In this project, we imported several transcriptomics studies using bulk RNA-sequencing to identify differentially expressed genes and pathways across a range of biological conditions.
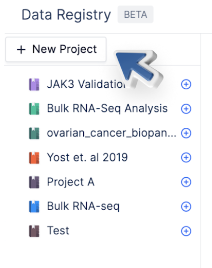
 Now that you’ve explored what projects are, let’s create our first project! To do so, simply click on the “New Project” button on the top left.
 ## 2. Create a Table
A table is a collection of records. Each record, also known as a row, contains a unique record name and a set of attributes.
For example, the table IBD Study below contains different sample names, conditions, and sequencing reads.
## 2. Create a Table
A table is a collection of records. Each record, also known as a row, contains a unique record name and a set of attributes.
For example, the table IBD Study below contains different sample names, conditions, and sequencing reads.
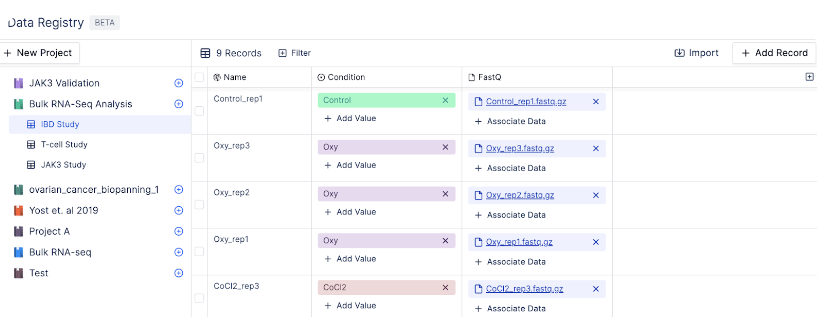 To create a table, click on the project in which the table will be created. Here, we select “Bulk RNA-seq Analysis”. Then, click the plus sign to create a new table.
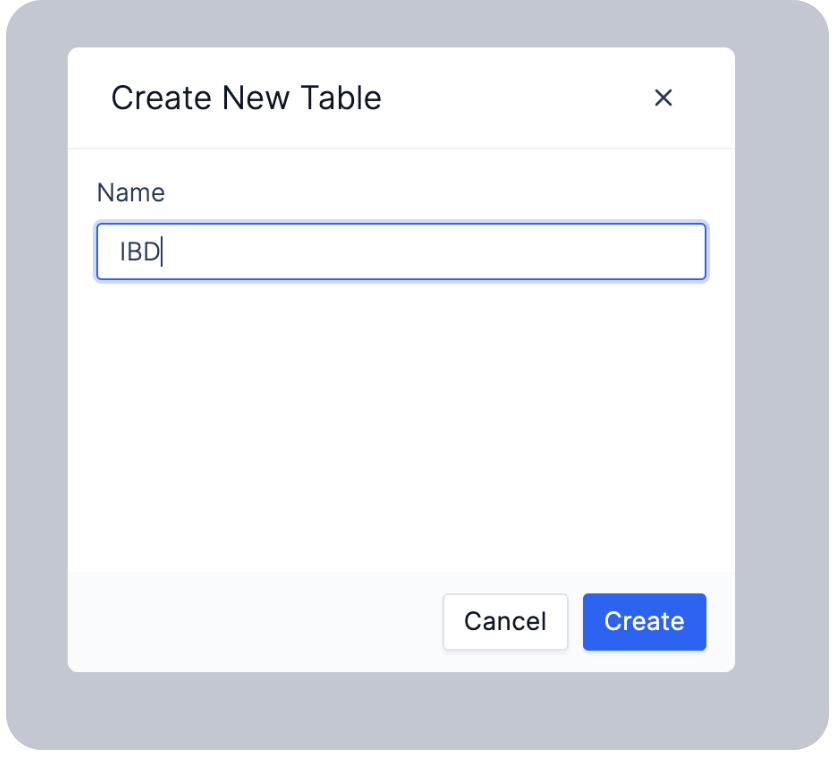
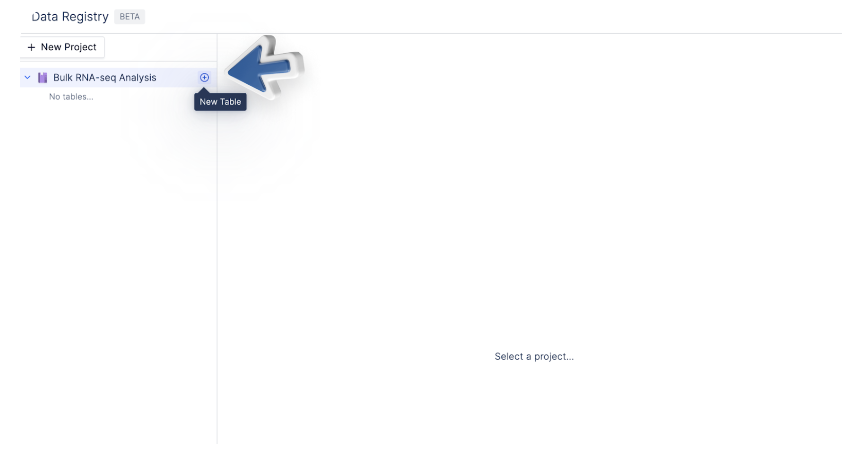 Enter your table name, and choose “Create”.
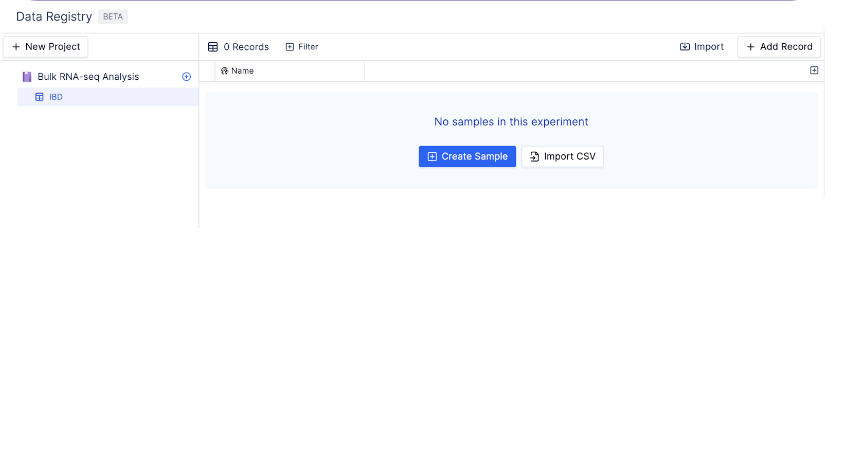
 A new table will be created under your chosen project.
 ## 3. Add Records to a Table
You can add records manually, link existing files within latch, import data with a CSV, or sync data from Benchling.
## 4. Modify Records in a Table
There are multiple ways you can modify record(s) in a registry table:
1. [Edit a single cell value at once](/registry/create-a-project#edit-a-single-cell-value-at-a-time)
2. [Edit a multiple cell values at once](/registry/create-a-project#edit-multiple-cell-values-at-once)
### Edit a single cell value at a time
Similar to a spreadsheet interface, you can double click on each cell and assign it to a new value.
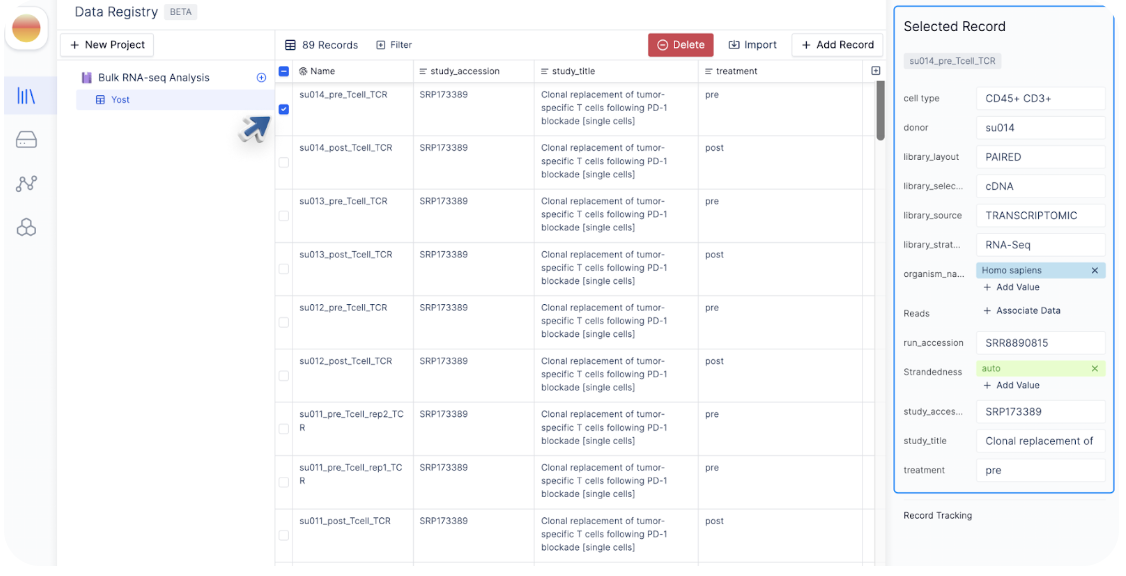
Alternatively, you can check the box next to the record you want to modify. The sidebar will display attributes associated with that record and provide an easy way where you can edit.
## 3. Add Records to a Table
You can add records manually, link existing files within latch, import data with a CSV, or sync data from Benchling.
## 4. Modify Records in a Table
There are multiple ways you can modify record(s) in a registry table:
1. [Edit a single cell value at once](/registry/create-a-project#edit-a-single-cell-value-at-a-time)
2. [Edit a multiple cell values at once](/registry/create-a-project#edit-multiple-cell-values-at-once)
### Edit a single cell value at a time
Similar to a spreadsheet interface, you can double click on each cell and assign it to a new value.
Alternatively, you can check the box next to the record you want to modify. The sidebar will display attributes associated with that record and provide an easy way where you can edit.
 ### Edit multiple cell values at once
If you want to assign the same value to multiple cells at once, you can bulk select multiple records, and change the attribute value using the sidebar.
### Edit multiple cell values at once
If you want to assign the same value to multiple cells at once, you can bulk select multiple records, and change the attribute value using the sidebar.