> ## Documentation Index
> Fetch the complete documentation index at: https://wiki.latch.bio/llms.txt
> Use this file to discover all available pages before exploring further.
# Bulk Import Data Using a CSV
Alternatively, you can easily use an existing CSV that you have locally to populate the table in Registry. To do so, you can click on the “Import” button and choose “Import CSV”.
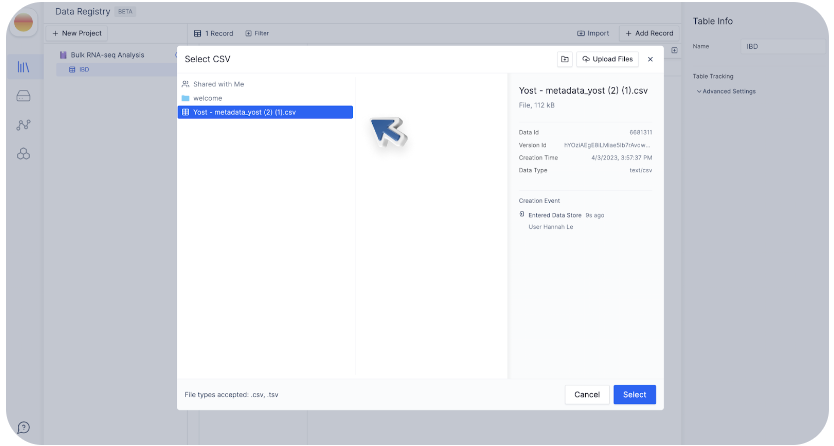
 As an exercise, we will use the [metadata sheet](https://docs.google.com/spreadsheets/d/1i3HdGhWC4P7RYlmswxnE6LjcfAroSx61PQR20q6mCZM/edit?usp=sharing) from Yost et. al (2019) here.
Note that Registry CSV import only supports **.csv** at the moment. If you
have an Excel file (.xls, .xlsx) or text file (.txt), please make sure to save
them as a CSV first.
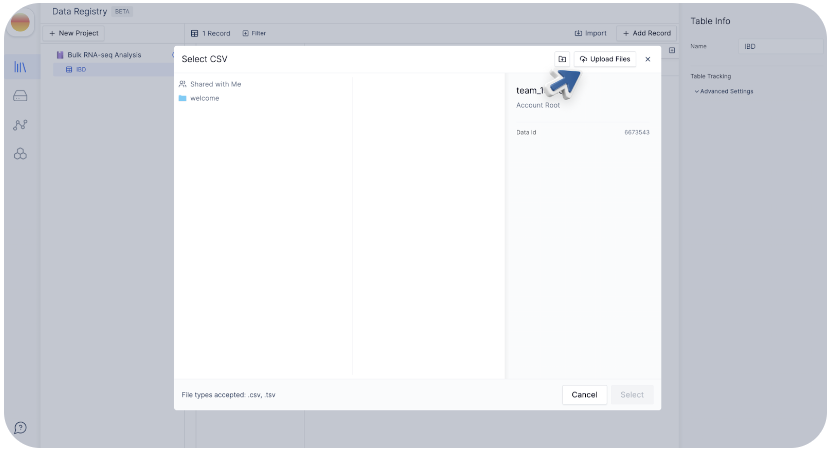
Select “Upload Files” to upload the metadata sheet downloaded in the previous step.
As an exercise, we will use the [metadata sheet](https://docs.google.com/spreadsheets/d/1i3HdGhWC4P7RYlmswxnE6LjcfAroSx61PQR20q6mCZM/edit?usp=sharing) from Yost et. al (2019) here.
Note that Registry CSV import only supports **.csv** at the moment. If you
have an Excel file (.xls, .xlsx) or text file (.txt), please make sure to save
them as a CSV first.
Select “Upload Files” to upload the metadata sheet downloaded in the previous step.
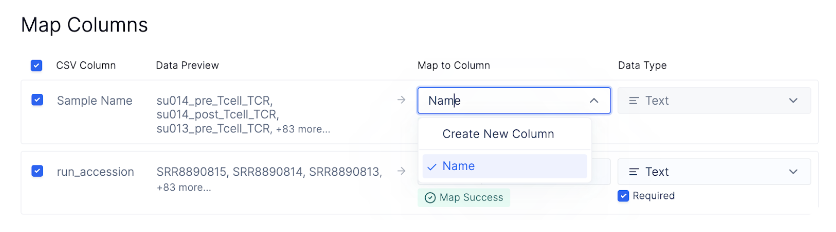
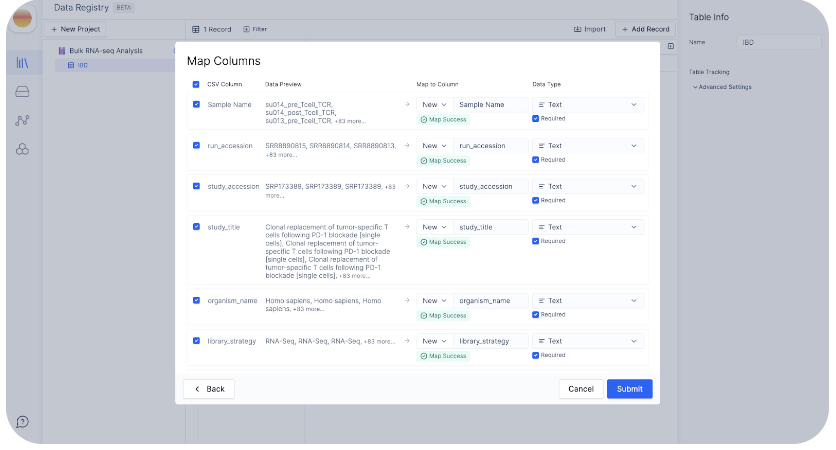 New tables only have one default existing column, which is “Name”. Let’s change the mapped column for the “Sample Name” (in the original CSV) to “Name” (in the Registry).
 As an exercise, we can change the type of the columns “organism\_name” and “Strandedness” to “Select”.
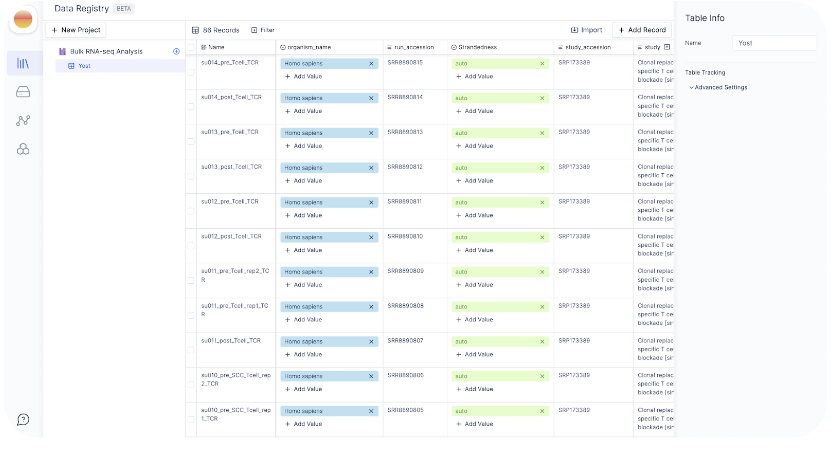
Once the import finishes, you will see your Registry table populated like so.
**Pro-tip:** If you want to import a CSV with new columns and one of the
columns contains values that match record names in the Registry, the columns
and their values will be linked with those records automatically.
As an exercise, we can change the type of the columns “organism\_name” and “Strandedness” to “Select”.
Once the import finishes, you will see your Registry table populated like so.
**Pro-tip:** If you want to import a CSV with new columns and one of the
columns contains values that match record names in the Registry, the columns
and their values will be linked with those records automatically.