> ## Documentation Index
> Fetch the complete documentation index at: https://wiki.latch.bio/llms.txt
> Use this file to discover all available pages before exploring further.

# CELLxGENE

> CELLxGENE Explorer allows scientists to execute interactive analyses on a dataset to explore how patterns of gene expression are determined by environmental and genetic factors using an interactive speed no-code UI.

## 1: Select the H5AD file you want to visualize

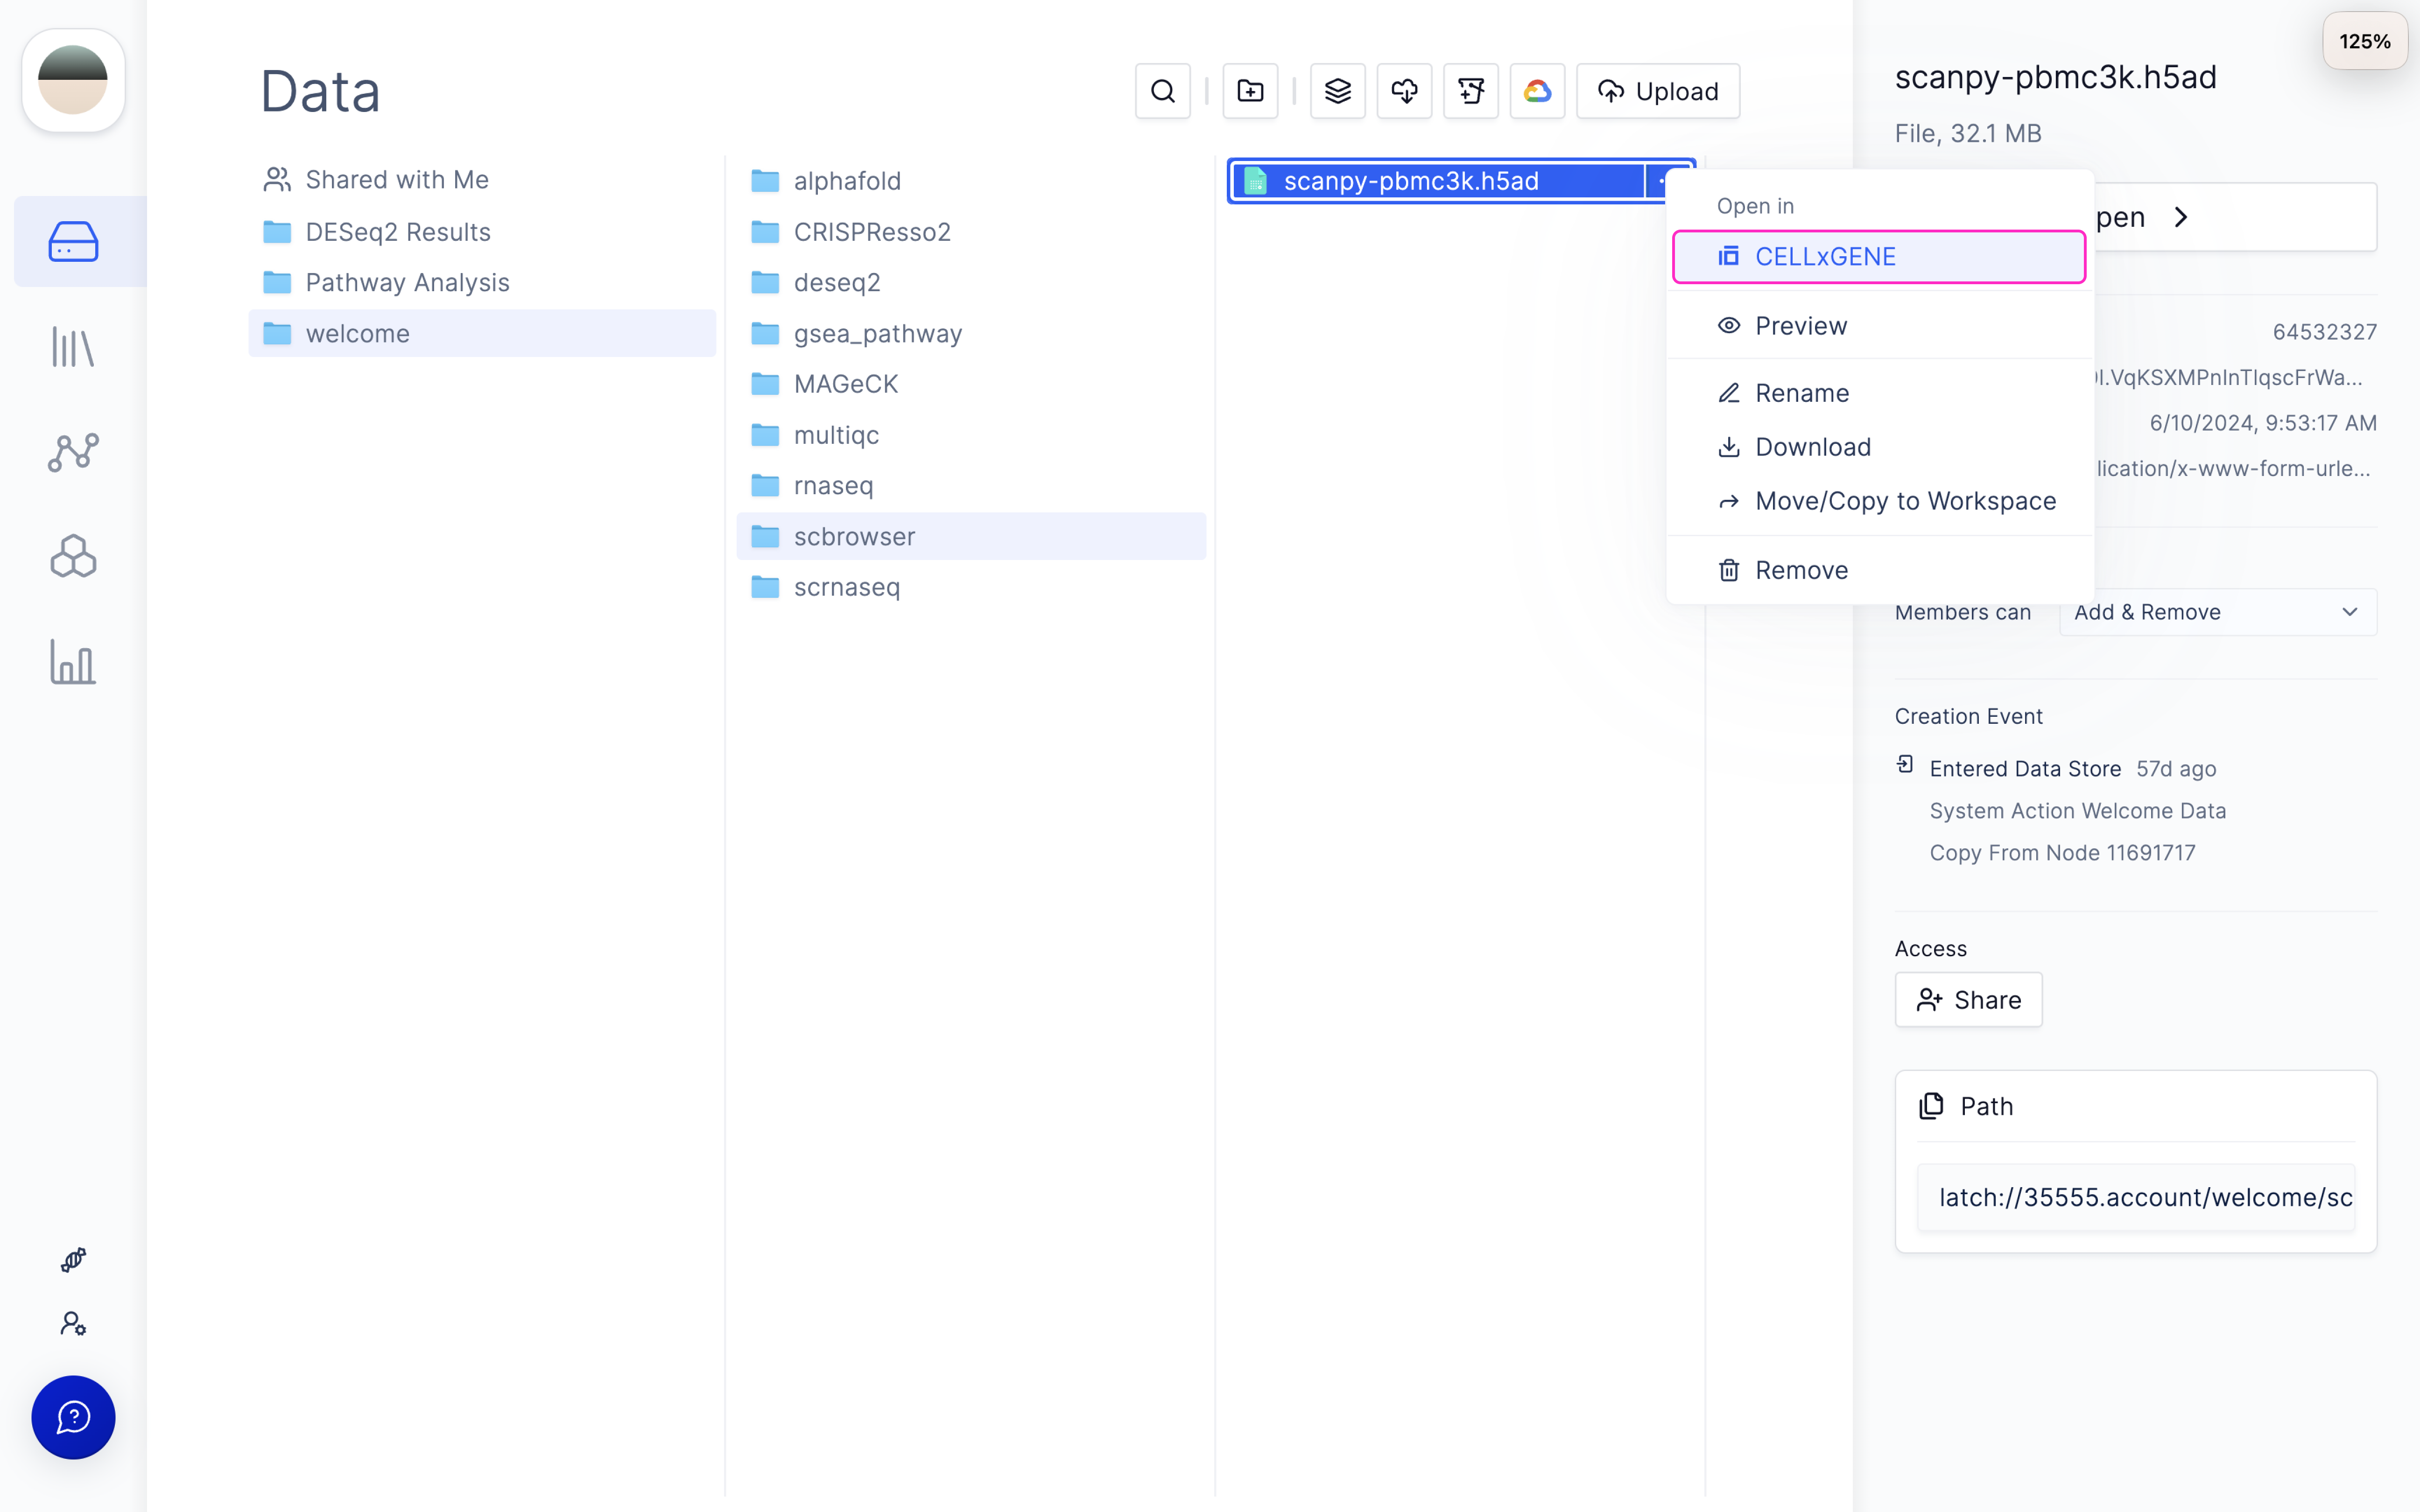
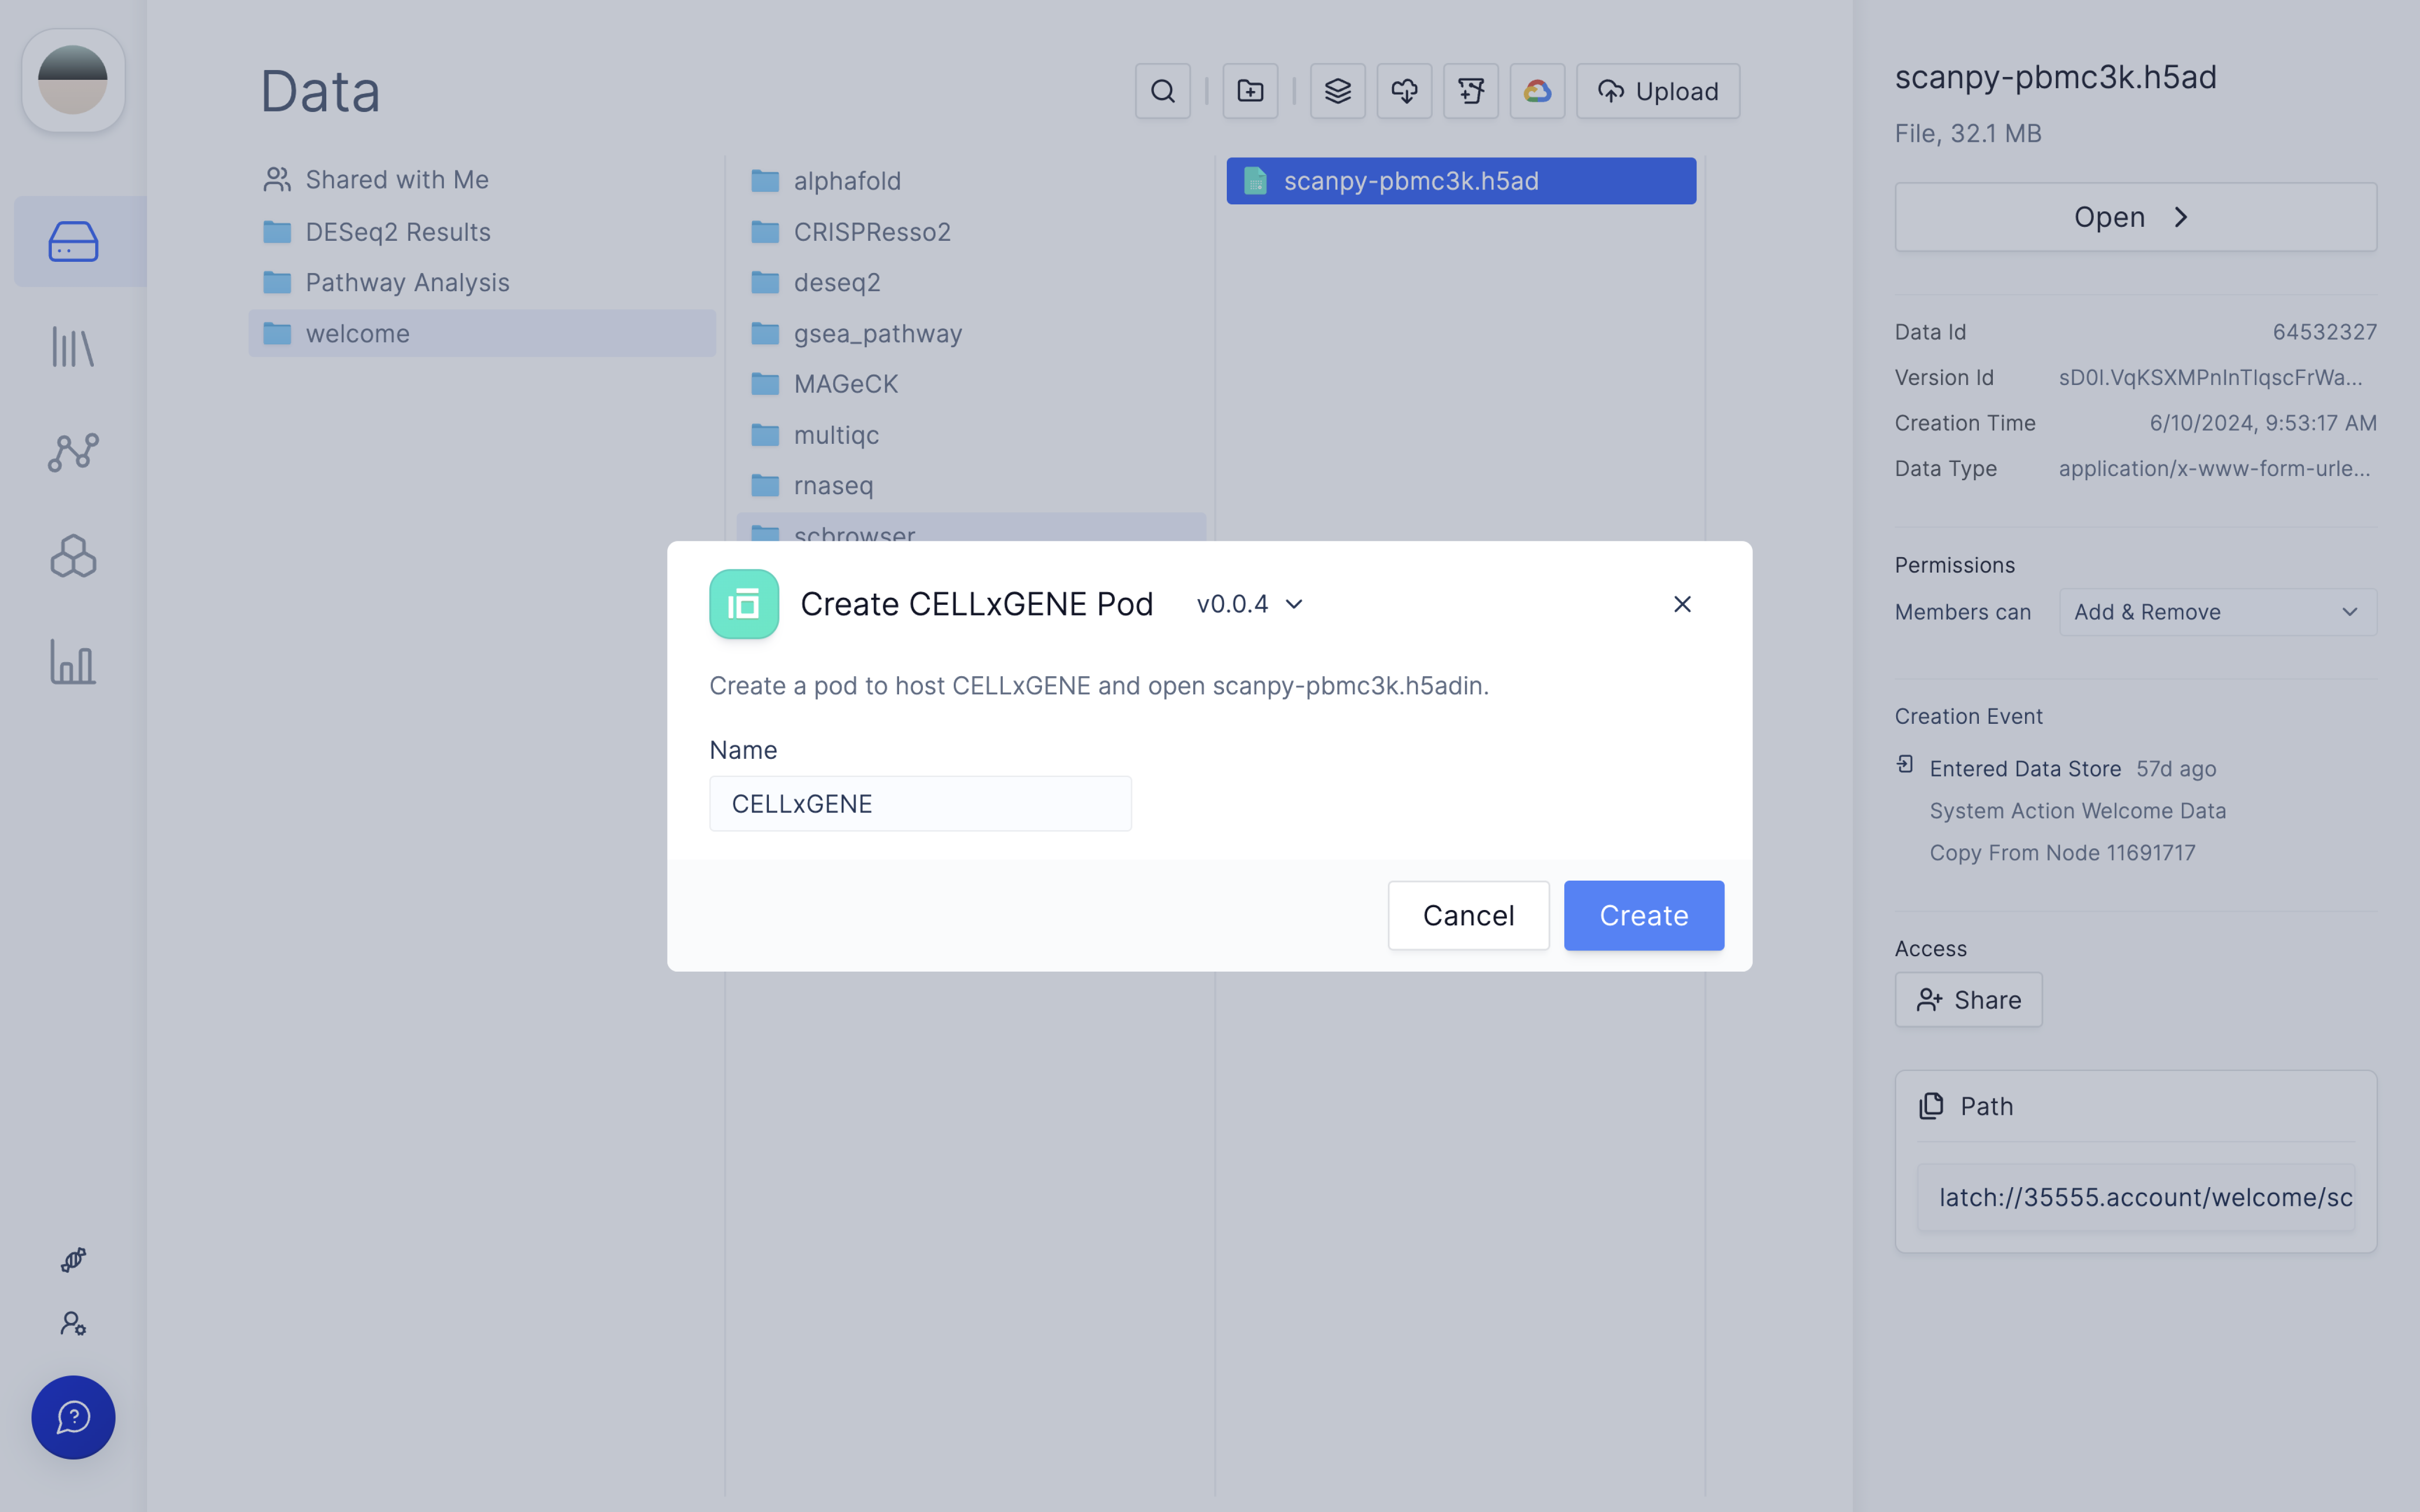
First, navigate to the H5AD file that you want to visualize. If this is your first time on Latch, you will find an example H5AD file under the folder `welcome/scbrowser/scanpy-pbmc3k.h5ad`

<img src="https://mintcdn.com/latchbio/H6zlCTun8E59mJDX/images/visualizer/cellxgene/cellxgene1.png?fit=max&auto=format&n=H6zlCTun8E59mJDX&q=85&s=d6b7eddd2e23e0fe2347ddce7befa8e6" className="h-40 border-slate-100 border rounded-md" width="5184" height="3240" data-path="images/visualizer/cellxgene/cellxgene1.png" />

## 2: Start a new CELLxGENE Pod session

<Steps>
  <Step title="When you open CELLxGENE on the file for the first time, a new Latch Pod will be created.">
    Latch Pod is a cloud-based computer that can scale up to 96 CPUs and 2TB of RAM, making it ideal for hosting interactive visualizations such as CELLxGENE, RShiny, Dash App, Jupyter Notebook, or RStudio.

    For compute-intensive visualization of large single-cell datasets with over 1 million
    cells, the customizable Latch Pod is powerful, as you can increase the RAM as needed
    to accommodate growing datasets.

    <img src="https://mintcdn.com/latchbio/H6zlCTun8E59mJDX/images/visualizer/cellxgene/cellxgene2.png?fit=max&auto=format&n=H6zlCTun8E59mJDX&q=85&s=84252ad88e30613964b0bacb130b60a7" className="h-40 border-slate-100 border rounded-md" width="5184" height="3240" data-path="images/visualizer/cellxgene/cellxgene2.png" />
  </Step>

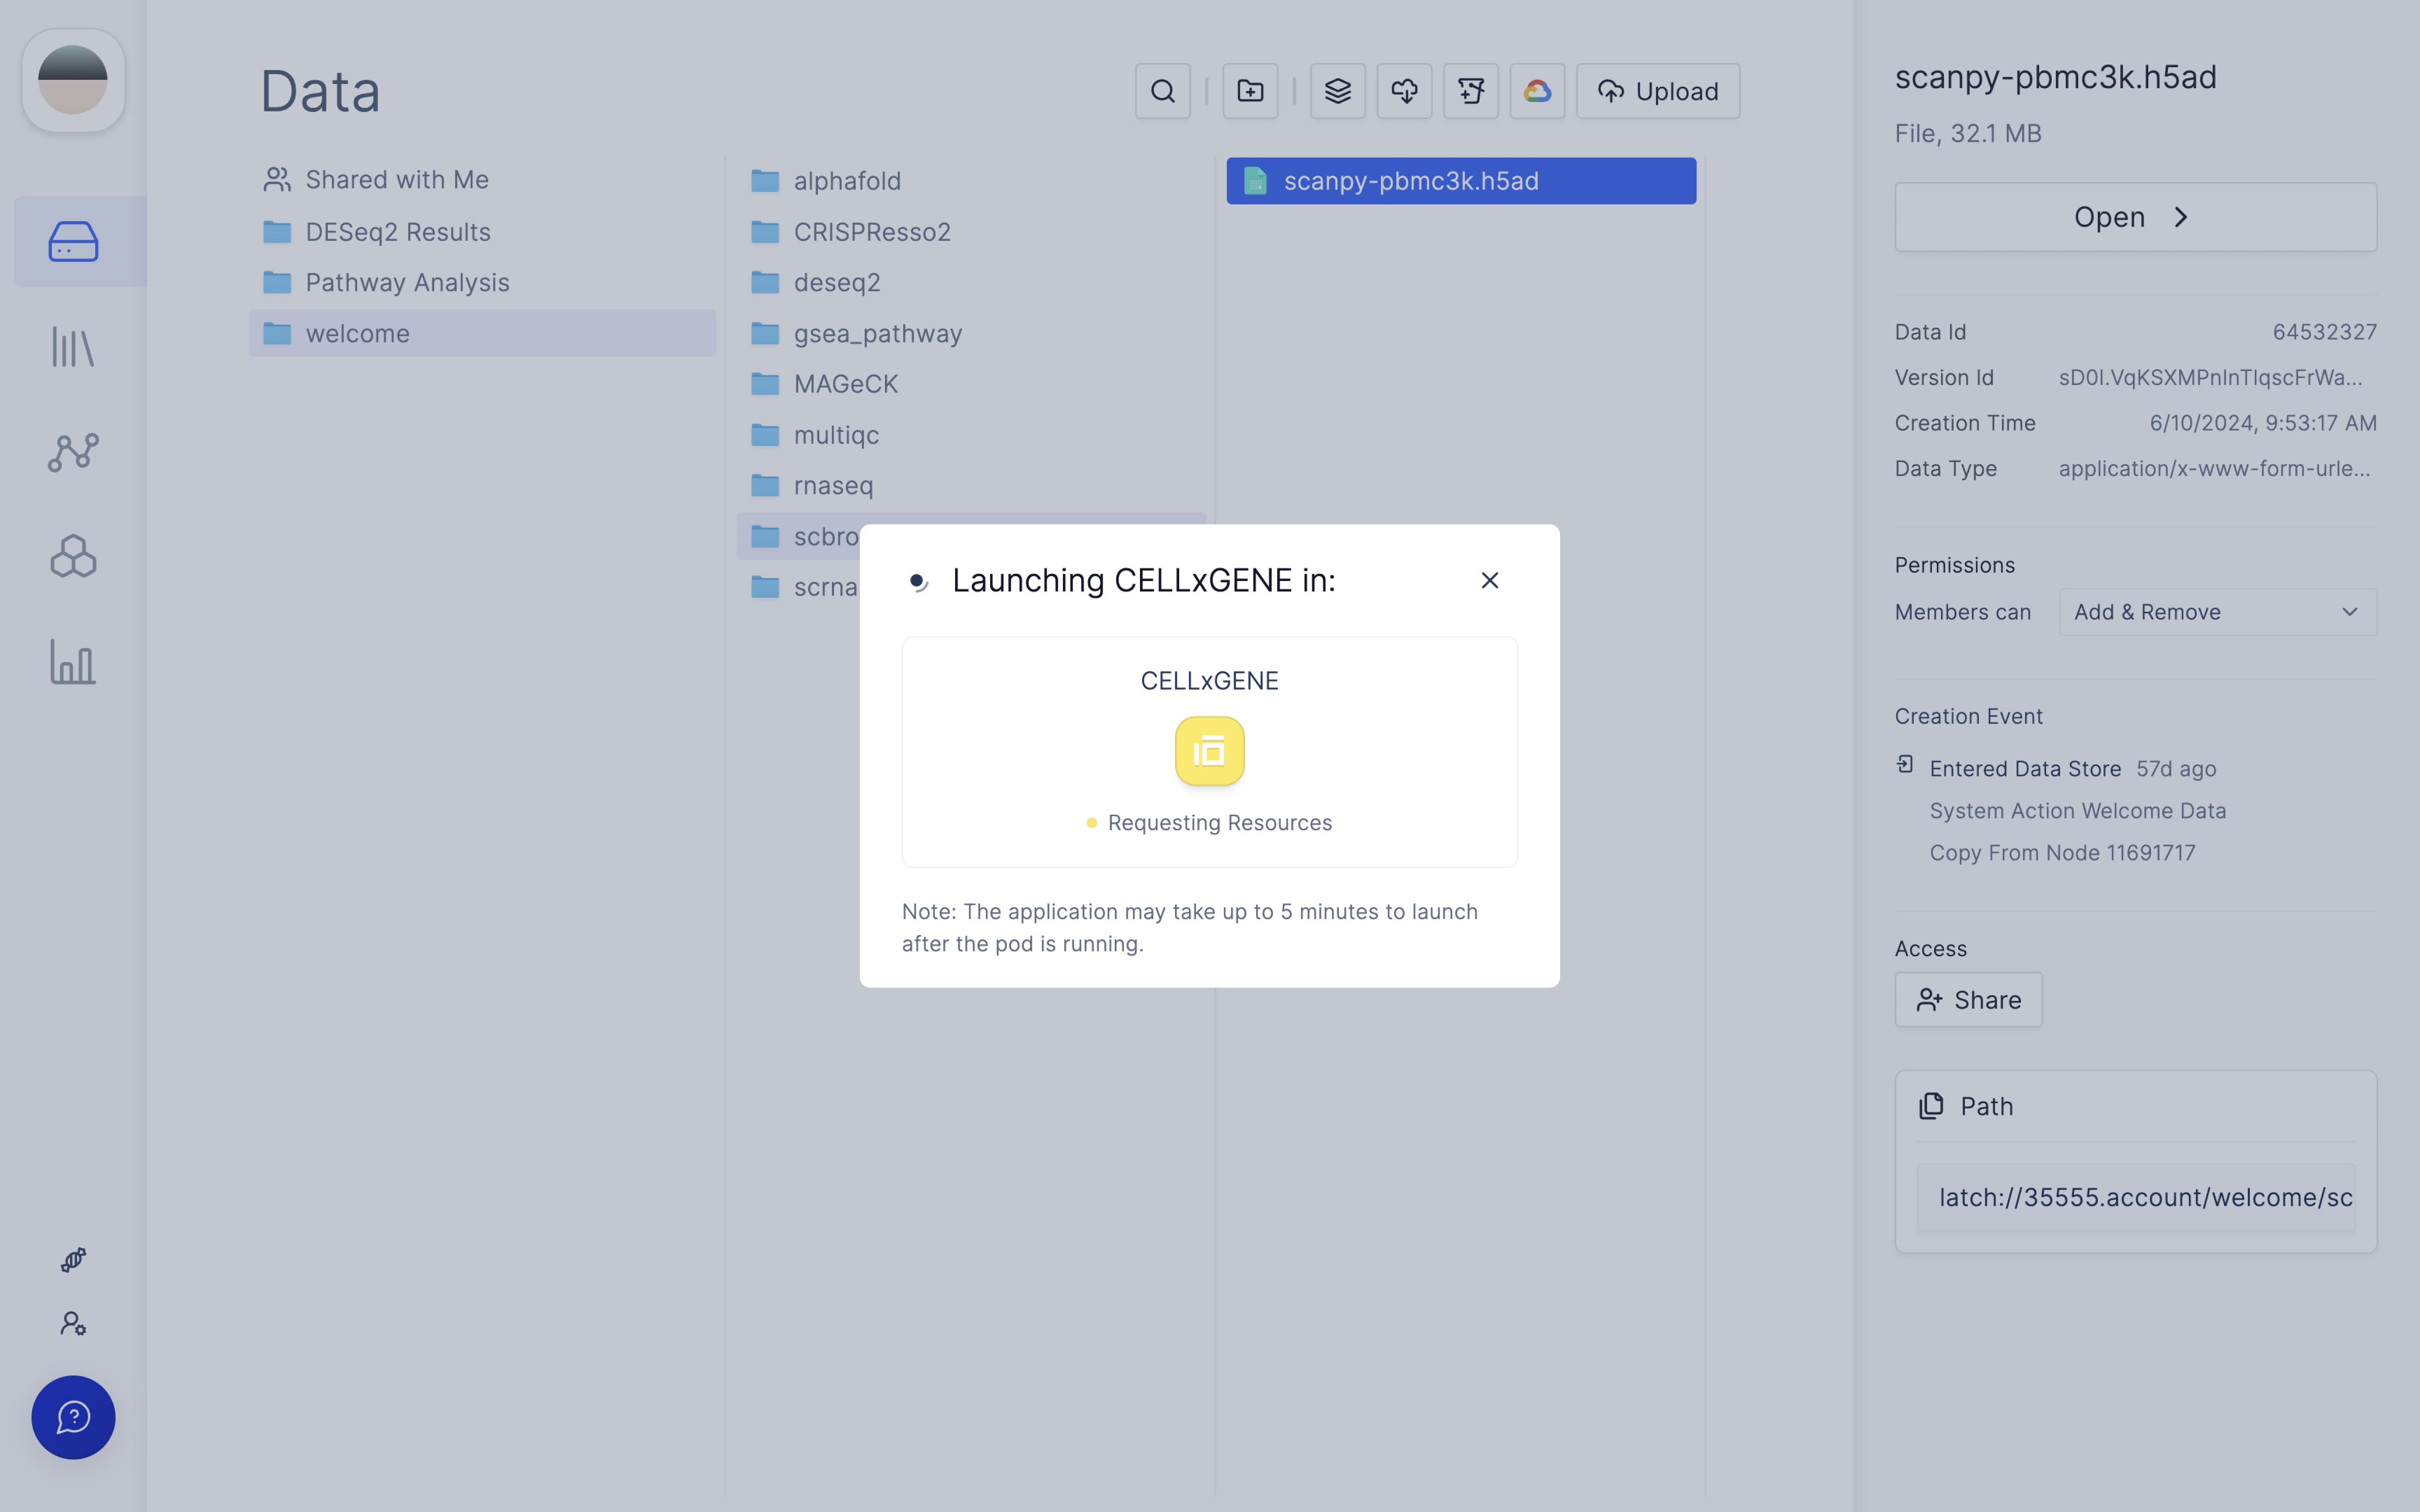
  <Step title="Once you click 'Create', you will see a status that indicates a Latch Pod is Launching.">
    <Note>
      Please note that for H5AD files greater than 10GB, it may take up to 5-10
      minutes to launch the Pod.{" "}
    </Note>

    <Accordion title="FAQ: What contributes to the wait time?">
      When a Pod is launched for the first time, the following steps occur:

      1. A computer instance is started with the default configuration of 8 CPUs and 32 GiB RAM.
      2. The necessary file is downloaded from Latch Data into the Pod.
      3. The `cellxgene launch` command is automatically executed on the downloaded file.

      All these steps together can incur a few minutes of wait time, depending on the input data size.
    </Accordion>

    <img src="https://mintcdn.com/latchbio/H6zlCTun8E59mJDX/images/visualizer/cellxgene/cellxgene3.png?fit=max&auto=format&n=H6zlCTun8E59mJDX&q=85&s=aba75f73e5184ff4a118eb58a9bcaff6" className="h-40 border-slate-100 border rounded-md" width="5184" height="3240" data-path="images/visualizer/cellxgene/cellxgene3.png" />
  </Step>

  <Step title="Start Visualizing!">
    The CellXGene pod will open automatically.

    <video autoPlay muted loop playsInline className="w-full aspect-video" class="rounded-md">
      <source src="https://mintcdn.com/latchbio/H6zlCTun8E59mJDX/images/visualizer/cellxgene/cellxgenev.mp4?fit=max&auto=format&n=H6zlCTun8E59mJDX&q=85&s=cc897aaae77ed16a65623754cc6a9c40" data-path="images/visualizer/cellxgene/cellxgenev.mp4" />

      <source src="https://mintcdn.com/latchbio/H6zlCTun8E59mJDX/images/visualizer/cellxgene/cellxgenev.webm?fit=max&auto=format&n=H6zlCTun8E59mJDX&q=85&s=107326ec9b7d18f493aa7be1f81f2dcc" data-path="images/visualizer/cellxgene/cellxgenev.webm" />
    </video>
  </Step>
</Steps>

### (Optional) 3: Change the compute resources for CELLxGENE

Sometimes, it's often desirable for single-cell applications to increase the computer's RAM for compute-intensive steps, such as computing TSNE and PCA, or running differential expression analyses.

Because CELLxGENE is directly hosted on a Latch Pod that you have direct access to, changing the underlying resource profile is easy.

<Steps>
  <Step title="Navigate to Latch Pods">
    First, navigate to the [Latch Pods](https://console.latch.bio/apps) tab. It should be fourth tab on the left navigation sidebar. You should see the CELLxGENE pod that you just opened.
  </Step>

  <Step title="Open the Pod Manager">
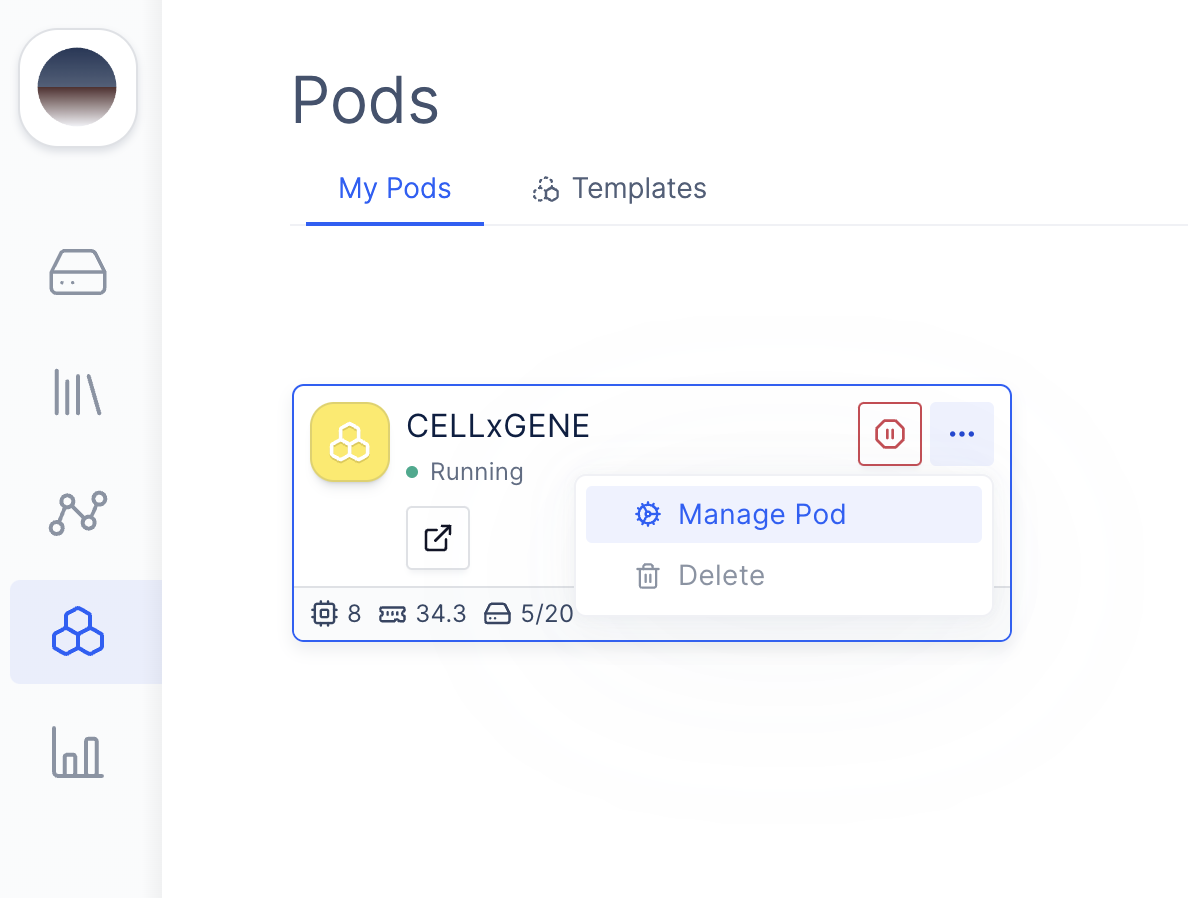
    Click on **Manage Pod**.

    <img src="https://mintcdn.com/latchbio/H6zlCTun8E59mJDX/images/visualizer/cellxgene/pod-settings.png?fit=max&auto=format&n=H6zlCTun8E59mJDX&q=85&s=525c1a08aa36c4302c9b475cc03e2d30" className="h-40 border-slate-100 border rounded-md" width="1188" height="898" data-path="images/visualizer/cellxgene/pod-settings.png" />
  </Step>

  <Step title="Modify Compute">
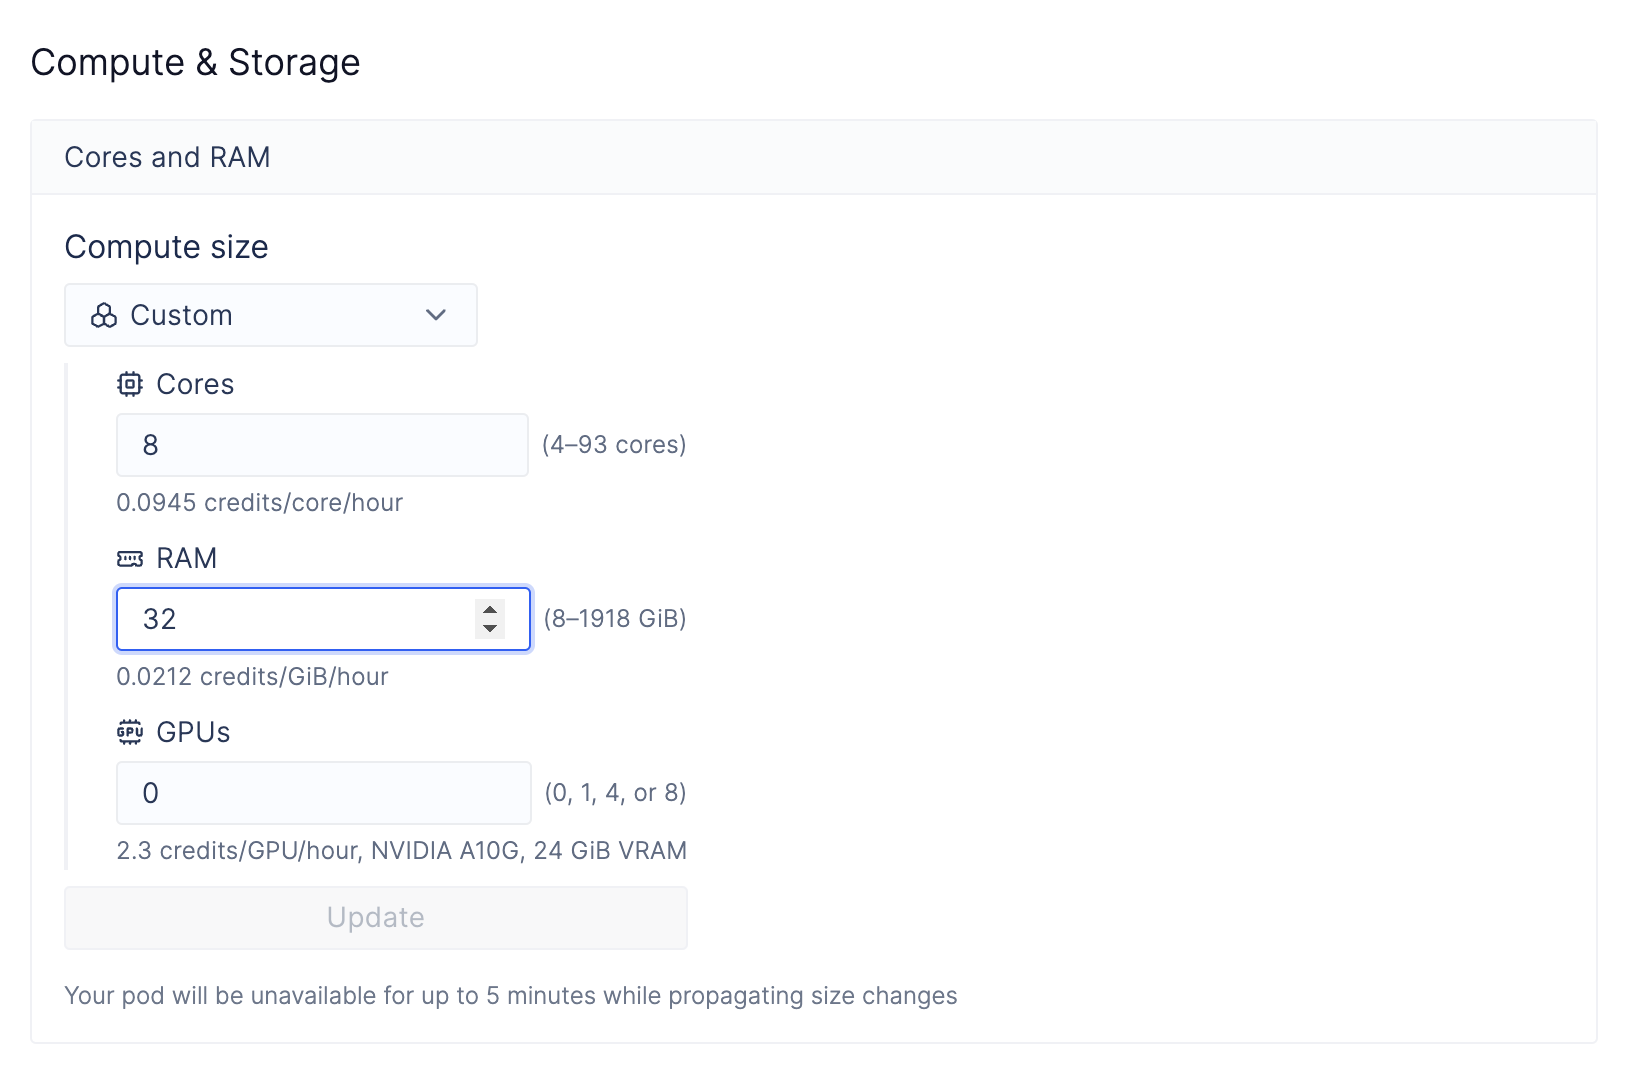
    Scroll down to the **Compute & Storage** section, modify the cores and RAM, and click **Update**.

    It will take a few seconds for your Pod to scale up.
    <Note>Don't worry, all the dependencies and files are fully preserved inside the Pod during the scaling process.</Note>

    <img src="https://mintcdn.com/latchbio/H6zlCTun8E59mJDX/images/visualizer/cellxgene/upgrade.png?fit=max&auto=format&n=H6zlCTun8E59mJDX&q=85&s=9c6711bc36d9a079f08608dde781a50f" className="h-40 border-slate-100 border rounded-md" width="1636" height="1074" data-path="images/visualizer/cellxgene/upgrade.png" />
  </Step>

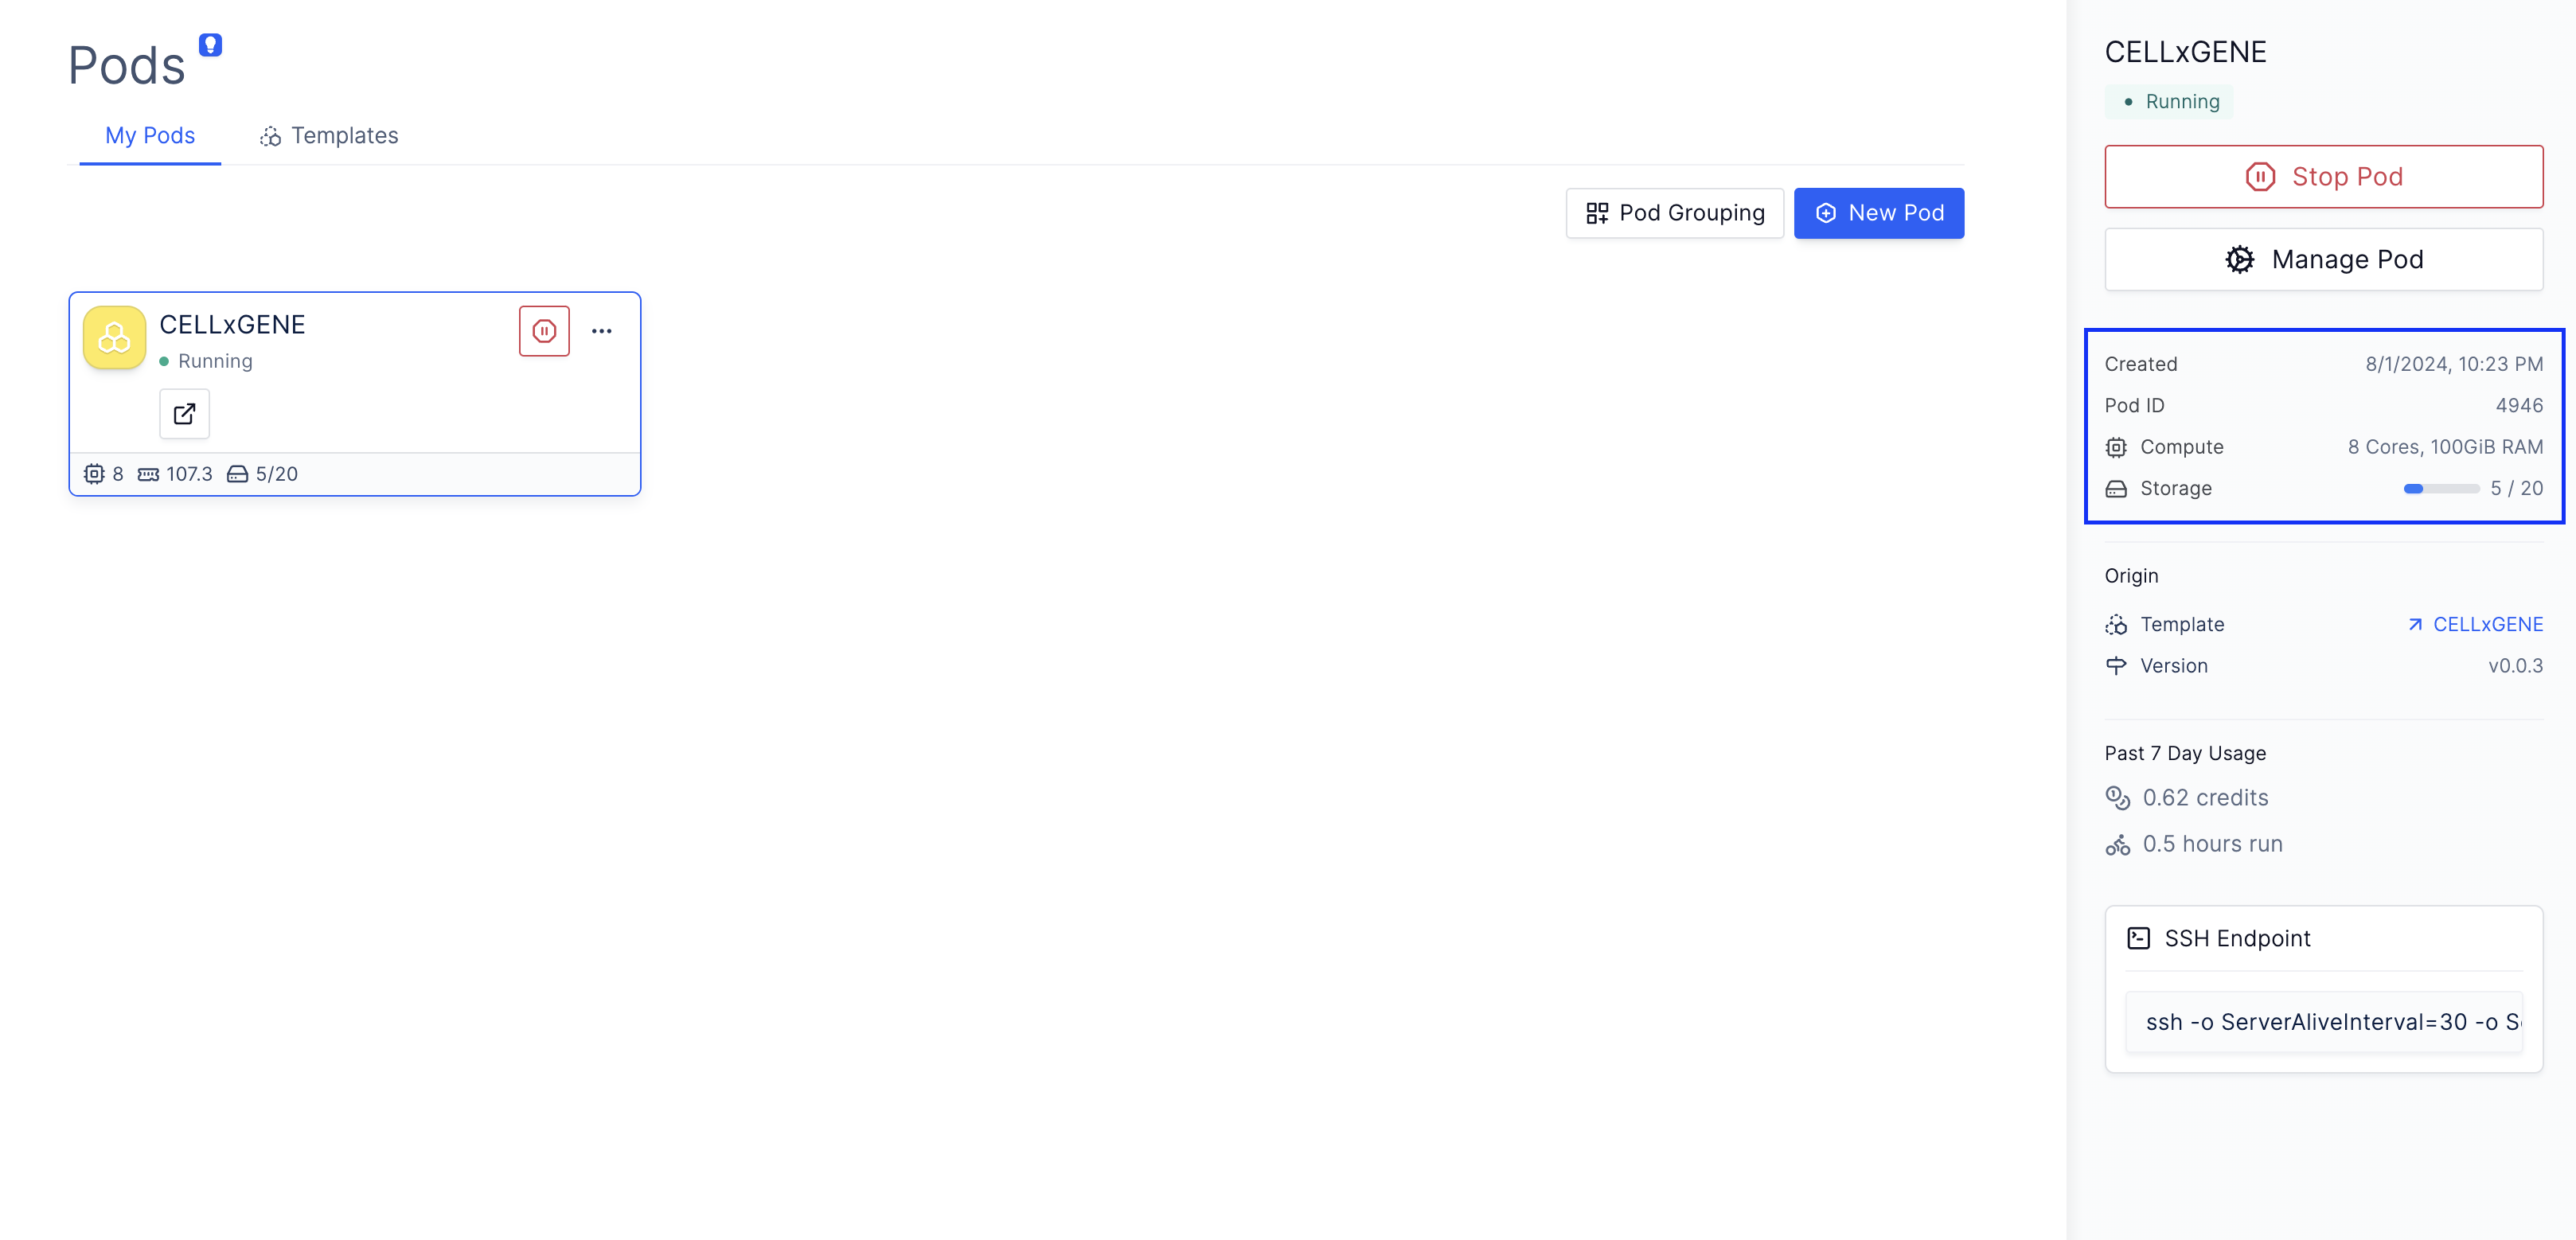
  <Step title="View the Updatted Resources">
    Once the Pod finishes scaling up, you can verify the new resource profile on the sidebar.

    <img src="https://mintcdn.com/latchbio/H6zlCTun8E59mJDX/images/visualizer/cellxgene/scale.png?fit=max&auto=format&n=H6zlCTun8E59mJDX&q=85&s=2b8e6ae8205abc34febb11043fd1887f" className="h-40 border-slate-100 border rounded-md" width="3236" height="1558" data-path="images/visualizer/cellxgene/scale.png" />
  </Step>
</Steps>

### (Optional) 4: Turn off the Pod to save costs

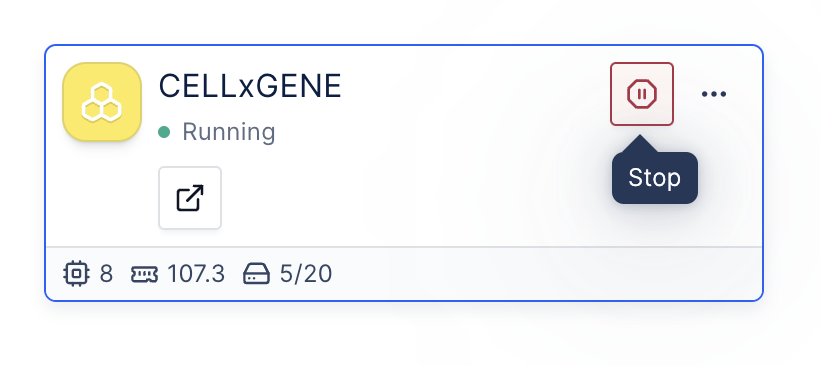
Once you finish your analysis, you can go to the Pod and click the **Stop** button to shut down the Pod.

<img src="https://mintcdn.com/latchbio/H6zlCTun8E59mJDX/images/visualizer/cellxgene/stop.png?fit=max&auto=format&n=H6zlCTun8E59mJDX&q=85&s=0aed8712dc5b59349f7d5a5992101c98" className="h-40 border-slate-100 border rounded-md" width="820" height="366" data-path="images/visualizer/cellxgene/stop.png" />

### Frequently Asked Questions

<AccordionGroup>
  <Accordion title="Can I open multiple h5ad files per Pod?">
    Currently, only one h5ad file can be visualized in a single Pod at a time. To visualize a different h5ad file, you must manually stop the Pod, restart it, and then select the new h5ad file.

    This restriction is in place because CELLxGENE opens a new session for each file. This approach ensures that your session remains undisturbed by other users who might want to visualize their files.
  </Accordion>

  <Accordion title="(Advanced) I'm a developer and want to modify the startup script in my Pod when an h5ad file is selected. How do I do that? ">
    Please follow the instructions [here](/pods/ssh#set-up-ssh-access) to SSH into your Pod.

    The startup script is located at `/opt/latch/custom_app`. You can use a code editor like `vim` or `nano` to modify the script.

    ```bash theme={null}
    nano /opt/latch/custom_app
    ```
  </Accordion>

  <Accordion title="(Advanced) My Pod is taking unusually long to start (10+ minutes). How can I see the logs to understand what may be wrong?">
    Please follow the instructions [here](/pods/ssh#set-up-ssh-access) to SSH into your Pod.

    To see the logs, type the following command:

    ```bash theme={null}
    journalctl -f -b --user-unit latch-custom-app
    ```
  </Accordion>
</AccordionGroup>