> ## Documentation Index
> Fetch the complete documentation index at: https://wiki.latch.bio/llms.txt
> Use this file to discover all available pages before exploring further.
# Command Line Interface Data Upload/Download
For more advanced users, a quick way to interact with Latch Data files is through the command line.
### Setup
```bash theme={null}
python3 -m pip install latch
```
The Latch CLI requires Python >=3.8 and \< 3.11.
If you're on a computer where you're logged into console.latch.bio, simply enter `latch login` which will authenticate you through the browser that you're logged into.
If you are SSH-ing into a computer where you only have command line access, you
can authenticate by typing `latch login` and pasting in your Latch developer key.
### To do this:
1. First, type `latch login`. You should see the following message in the terminal:
```bash theme={null}
[ec2-user@ip-172-31-85-121 ~]$ latch login
Go to `https://console.latch.bio/settings/developer`, generate a Personal API Token (or Workspace API Token if you only need to access a single workspace from this machine), and paste it here:
```
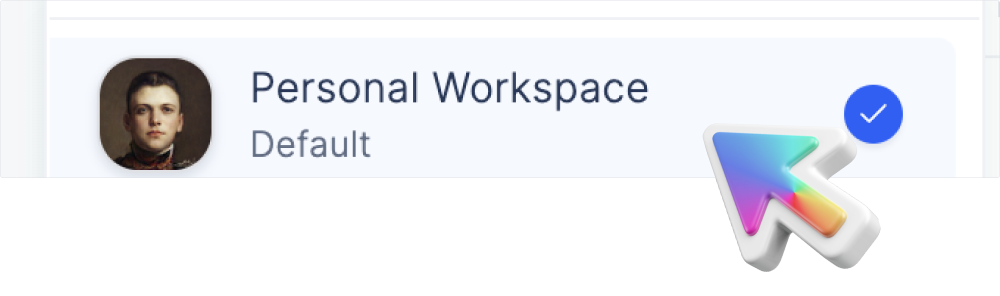
1. Navigate to the workspace that you want to work with on [console.latch.bio](https://console.latch.bio). You can do this by clicking on your profile picture on the top left corner, and select your workspace of interest.
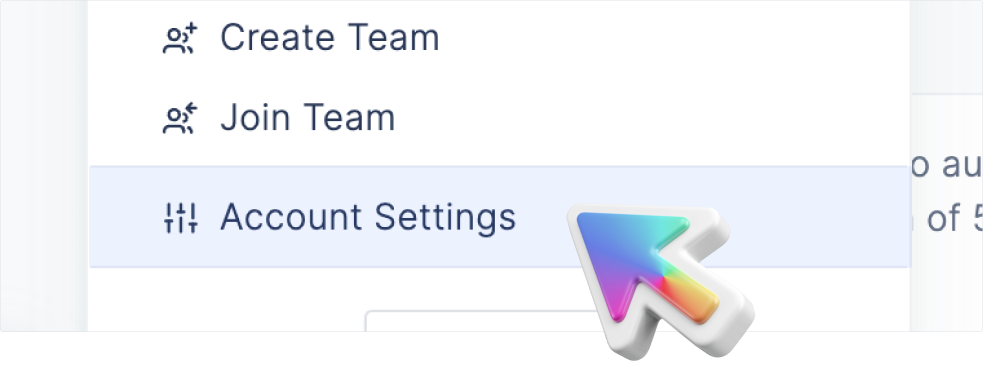
 2. Then go down to account settings on the bottom of the avatar menu.
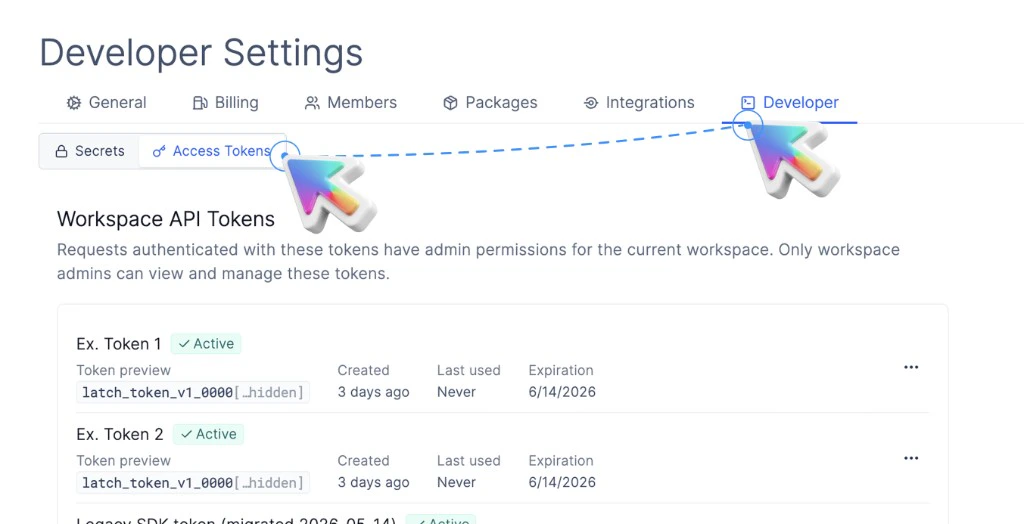
 3. Then go to **[Developer > Access Tokens](https://console.latch.bio/settings/developer)**, generate a Workspace API Token, and copy the value shown (it is only displayed once).
 4. Then on your local computer's terminal, paste in the API token you just copied.
```bash theme={null}
latch workspace
```
Verify that the authentication works and that you are in the desired workspace by typing:
```bash theme={null}
latch ls
```
Check that the content displayed in the terminal matches your files and folders on [https://console.latch.bio](https://console.latch.bio)
### Copying Data
```bash theme={null}
latch cp file.txt latch:///welcome/
```
This uploads `file.txt` and puts it into `welcome/` on Latch.
```bash theme={null}
latch cp latch:///welcome local_folder/
```
This downloads the contents of `/welcome` on Latch and puts them into `local_folder` on your local computer.
```bash theme={null}
latch cp latch:///dir1/ latch:///dir2/
```
This copies the contents of `/dir1` on Latch and puts them into `/dir2` on Latch.
```bash theme={null}
latch cp latch://123.account/dir1/ latch://456.account/dir2/
```
This copies the contents of `/dir1` in workspace 123 and puts them into `/dir2` in workspace 456.
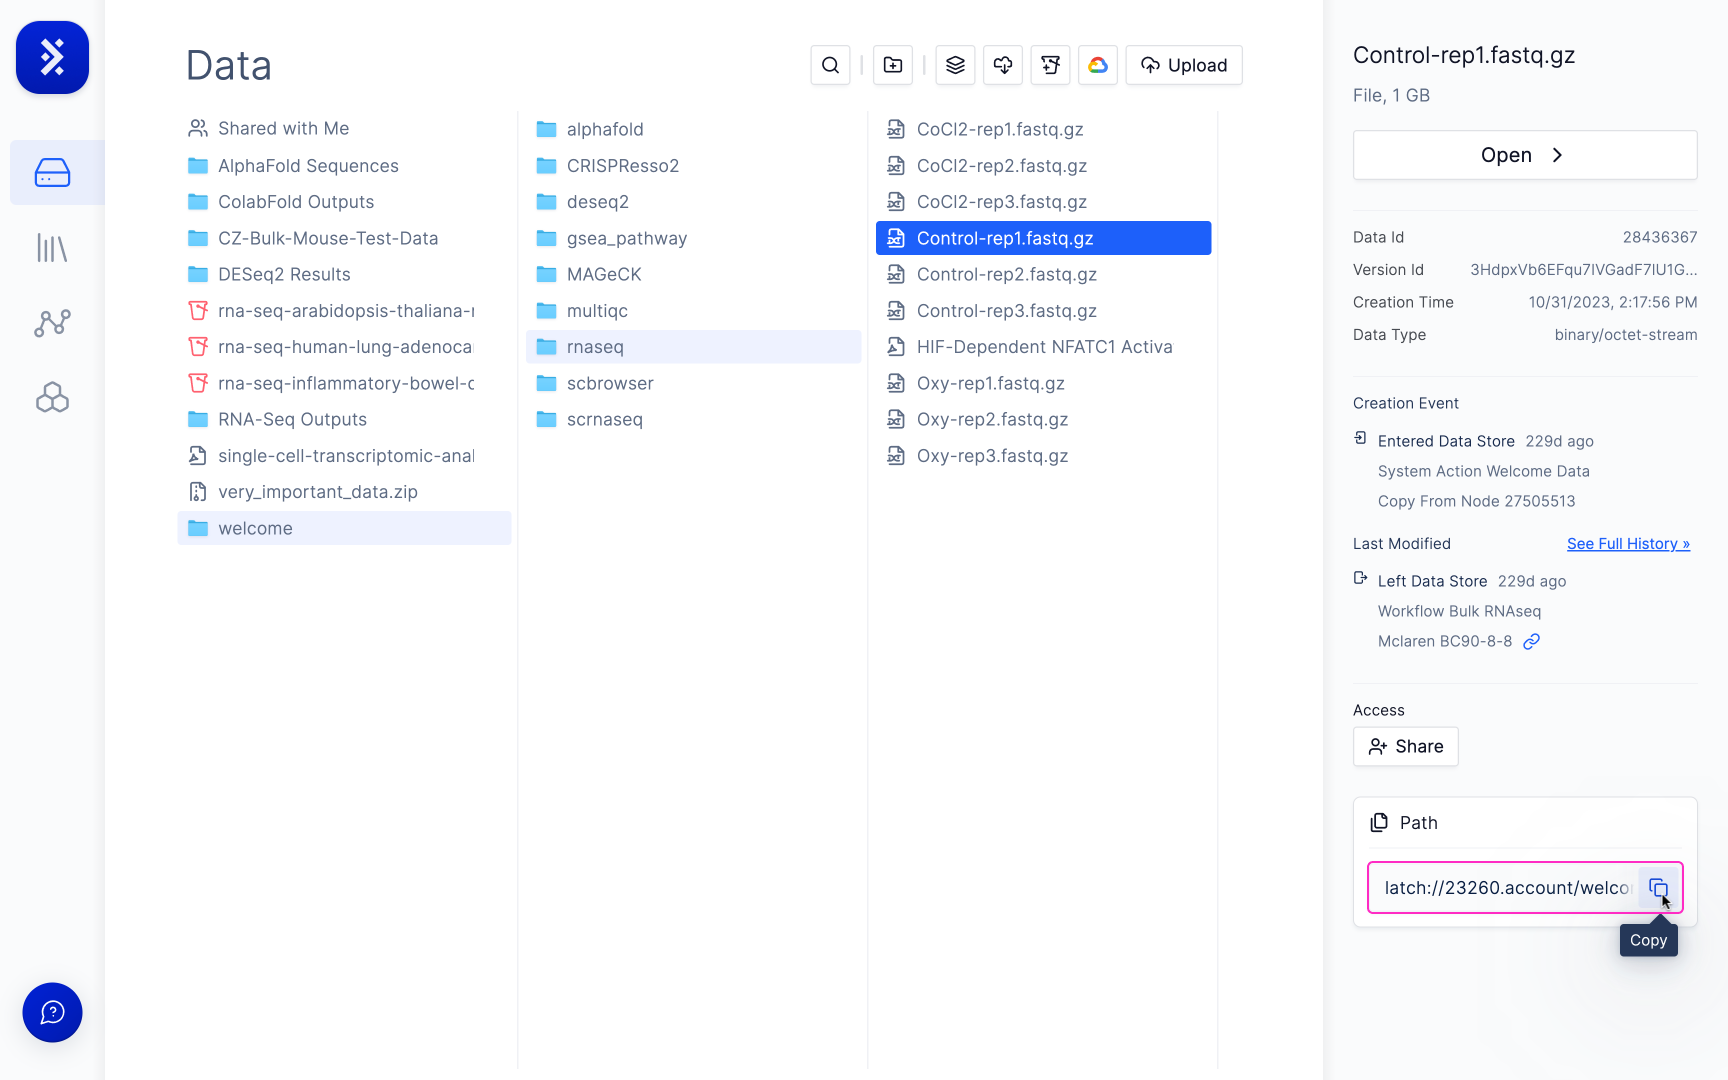
You can find the remote path of the file you want to copy in the sidebar of the Latch Console
4. Then on your local computer's terminal, paste in the API token you just copied.
```bash theme={null}
latch workspace
```
Verify that the authentication works and that you are in the desired workspace by typing:
```bash theme={null}
latch ls
```
Check that the content displayed in the terminal matches your files and folders on [https://console.latch.bio](https://console.latch.bio)
### Copying Data
```bash theme={null}
latch cp file.txt latch:///welcome/
```
This uploads `file.txt` and puts it into `welcome/` on Latch.
```bash theme={null}
latch cp latch:///welcome local_folder/
```
This downloads the contents of `/welcome` on Latch and puts them into `local_folder` on your local computer.
```bash theme={null}
latch cp latch:///dir1/ latch:///dir2/
```
This copies the contents of `/dir1` on Latch and puts them into `/dir2` on Latch.
```bash theme={null}
latch cp latch://123.account/dir1/ latch://456.account/dir2/
```
This copies the contents of `/dir1` in workspace 123 and puts them into `/dir2` in workspace 456.
You can find the remote path of the file you want to copy in the sidebar of the Latch Console
 ### Moving Data
You can also move data between two Latch directories.
For example, the following command will create `file.txt` in `dir2` and remove it from `dir1` in your current workspace.
```bash theme={null}
latch mv latch:///dir1/file.txt latch:///dir2/
```
### Syncing Data
The Latch CLI provides a simple way to sync data from a local directory to a Latch Data directory.
For example, the following command will update the contents of `dir1` in Latch Data with the contents of `local_folder` on your local computer.
```bash theme={null}
latch sync local_folder latch:///dir1
```
If you add files to `local_folder` and rerun the above command, the changes will be reflected in `dir1` in Latch Data. The `sync` command will only upload files when:
1. The file does not exist in the remote directory.
2. The last modified time of the file in the remote directory is older than the last modified time of the file in the local directory.
Note that, by default, the `sync` command will not remove files from the remote directory if they are removed from `local_folder` on your local computer. To allow files to be deleted from the remote directory, use the `--delete` flag:
```bash theme={null}
latch sync --delete local_folder latch:///dir1
```
### Other Commands
* List files in `dir1`:
```bash theme={null}
latch ls latch:///dir1
```
* Create directory `dir3`, creating parent directories `dir1` and `dir2` if they do not exist:
```bash theme={null}
latch mkdirp latch:///dir1/dir2/dir3/
```
* Recursively remove `dir2` in Latch Data:
```bash theme={null}
latch rmr latch:///dir1/dir2
```
### Behavior
All of the above commands follow the same behavior as their corresponding UNIX command.
* Using wildcards (\*):
```bash theme={null}
latch cp local_directory/* latch:///latch_folder
```
This copies all content within `local_directory` to `latch_folder`:
```
>>> latch ls latch:///latch_folder
Size Date Modified Name
12 29 Feb 00:43 A.txt
12 29 Feb 00:43 B.txt
```
* Using trailing slashes:
```bash theme={null}
latch cp local_directory/ latch:///latch_folder
```
This copies the directory itself and uploads it to `latch_folder`:
```
>>> latch ls latch:///latch_folder
Size Date Modified Name
- - local_directory/
```
* Omitting the trailing slash:
```bash theme={null}
latch cp local_directory latch:///latch_folder
```
This has the same behavior as `latch cp local_directory/ latch:///latch_folder`.
### DEPRECATED
The following commands have been deprecated and will not be available for Latch SDK version >= 2.39.2.
To check which version of latch you are using, run `latch --version`.
1. `latch rm` - Use `latch rmr` instead
2. `latch mkdir` - Use `latch mkdirp` instead
3. `latch touch` - No longer supported
4. `latch open` - No longer supported
### Moving Data
You can also move data between two Latch directories.
For example, the following command will create `file.txt` in `dir2` and remove it from `dir1` in your current workspace.
```bash theme={null}
latch mv latch:///dir1/file.txt latch:///dir2/
```
### Syncing Data
The Latch CLI provides a simple way to sync data from a local directory to a Latch Data directory.
For example, the following command will update the contents of `dir1` in Latch Data with the contents of `local_folder` on your local computer.
```bash theme={null}
latch sync local_folder latch:///dir1
```
If you add files to `local_folder` and rerun the above command, the changes will be reflected in `dir1` in Latch Data. The `sync` command will only upload files when:
1. The file does not exist in the remote directory.
2. The last modified time of the file in the remote directory is older than the last modified time of the file in the local directory.
Note that, by default, the `sync` command will not remove files from the remote directory if they are removed from `local_folder` on your local computer. To allow files to be deleted from the remote directory, use the `--delete` flag:
```bash theme={null}
latch sync --delete local_folder latch:///dir1
```
### Other Commands
* List files in `dir1`:
```bash theme={null}
latch ls latch:///dir1
```
* Create directory `dir3`, creating parent directories `dir1` and `dir2` if they do not exist:
```bash theme={null}
latch mkdirp latch:///dir1/dir2/dir3/
```
* Recursively remove `dir2` in Latch Data:
```bash theme={null}
latch rmr latch:///dir1/dir2
```
### Behavior
All of the above commands follow the same behavior as their corresponding UNIX command.
* Using wildcards (\*):
```bash theme={null}
latch cp local_directory/* latch:///latch_folder
```
This copies all content within `local_directory` to `latch_folder`:
```
>>> latch ls latch:///latch_folder
Size Date Modified Name
12 29 Feb 00:43 A.txt
12 29 Feb 00:43 B.txt
```
* Using trailing slashes:
```bash theme={null}
latch cp local_directory/ latch:///latch_folder
```
This copies the directory itself and uploads it to `latch_folder`:
```
>>> latch ls latch:///latch_folder
Size Date Modified Name
- - local_directory/
```
* Omitting the trailing slash:
```bash theme={null}
latch cp local_directory latch:///latch_folder
```
This has the same behavior as `latch cp local_directory/ latch:///latch_folder`.
### DEPRECATED
The following commands have been deprecated and will not be available for Latch SDK version >= 2.39.2.
To check which version of latch you are using, run `latch --version`.
1. `latch rm` - Use `latch rmr` instead
2. `latch mkdir` - Use `latch mkdirp` instead
3. `latch touch` - No longer supported
4. `latch open` - No longer supported