> ## Documentation Index
> Fetch the complete documentation index at: https://wiki.latch.bio/llms.txt
> Use this file to discover all available pages before exploring further.
# Creating a Workspace
> Learn how to create a new workspace on Latch
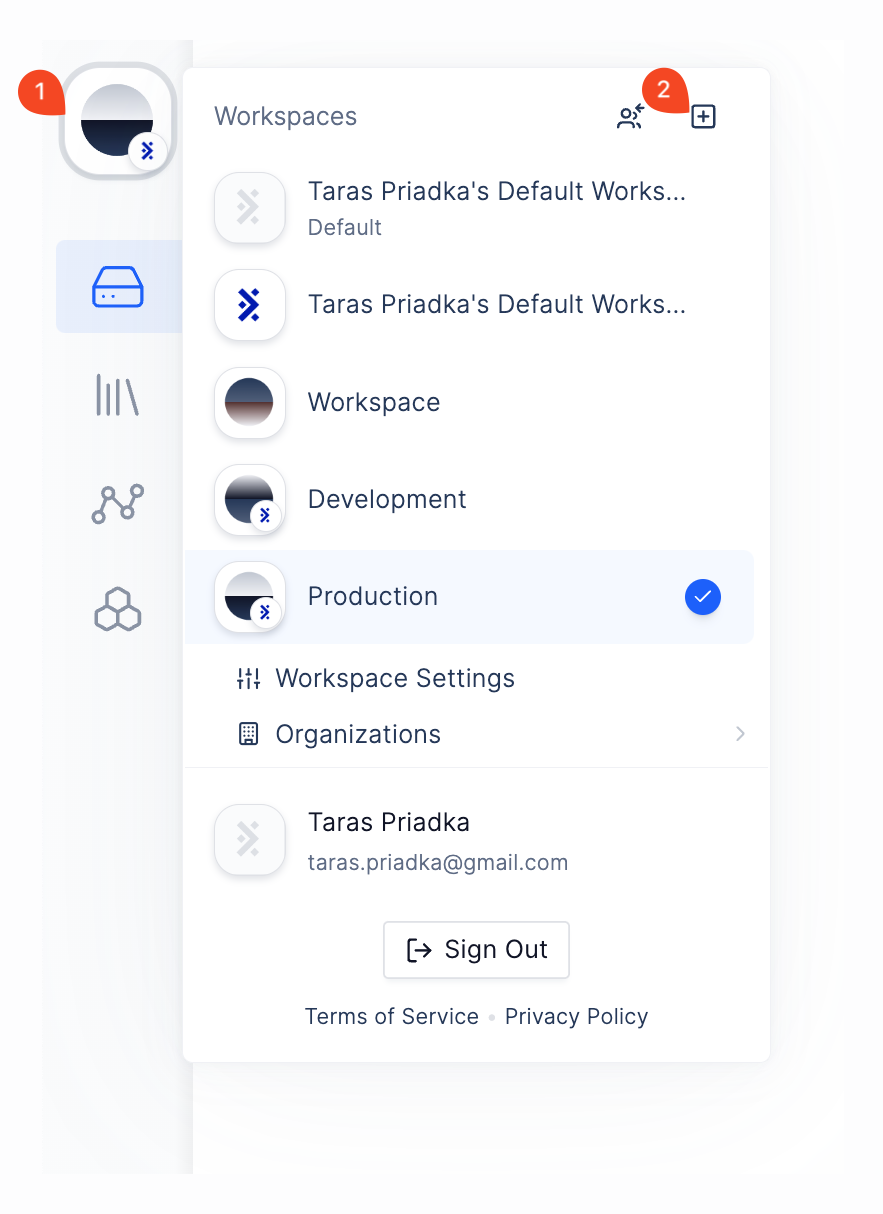
1. Click on your user avatar in the top left corner of the screen.
2. Then click on the plus icon in the top right of the Workspace Selector Dropdown.
 3. Enter the name of your new team in the opened window.
* An avatar image will automatically be generated based on the workspace name provided.
* You can also upload your image. We recommend a square .jpg or .png at 200px by 200px.
* Setting a workspace as default will make it the workspace you are automatically put in every time you log in again. You can set this later in the Workspace Selector Dropdown.
3. Enter the name of your new team in the opened window.
* An avatar image will automatically be generated based on the workspace name provided.
* You can also upload your image. We recommend a square .jpg or .png at 200px by 200px.
* Setting a workspace as default will make it the workspace you are automatically put in every time you log in again. You can set this later in the Workspace Selector Dropdown.
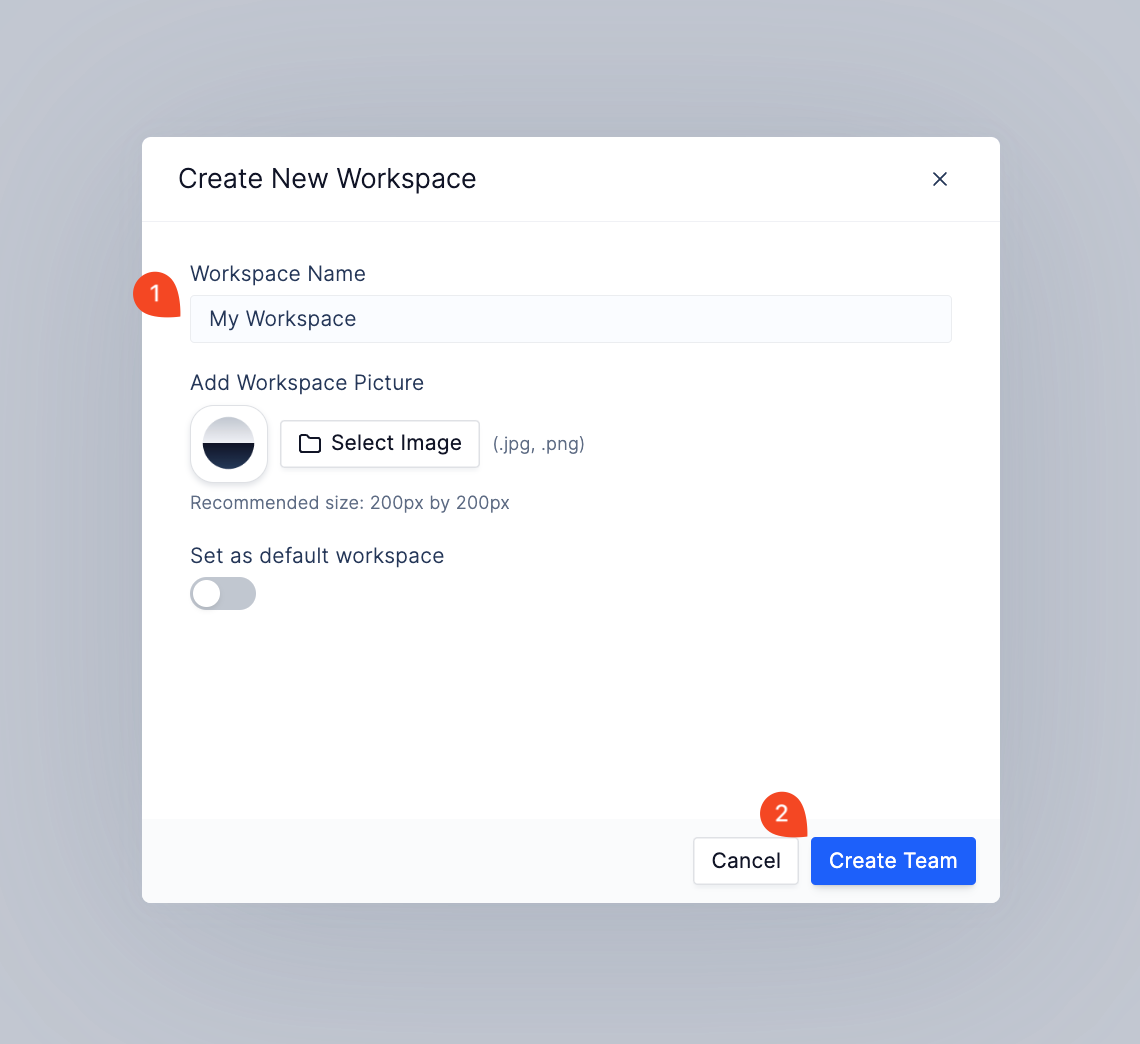 4. Finally, click **Create Team**.
When your team is created you will be dropped on the members page of that new workspace where you can [invite other users to your workspace](./inviting-members).
4. Finally, click **Create Team**.
When your team is created you will be dropped on the members page of that new workspace where you can [invite other users to your workspace](./inviting-members).