> ## Documentation Index
> Fetch the complete documentation index at: https://wiki.latch.bio/llms.txt
> Use this file to discover all available pages before exploring further.
# For Kit Providers: Analysis Packages
> Learn how to distribute analysis packages to customers
Many kit and solution providers aim to offer their customers a comprehensive analysis solution—from preprocessing raw data via workflows to unlocking novel biological insights through interactive downstream visualizations.
Latch simplifies this process by allowing kit providers to fully build and customize the customer experience using modular product components (workflows, plots, data, etc.) with **Analysis Packages**.
In this document, we’ll cover:
* What an Analysis Package is
* How to create redemption codes for customers
* How to share the Analysis Package and redemption code with customers
* What the customer experience looks like
* Ownership models for workspaces created from redemption codes
## Prerequisites
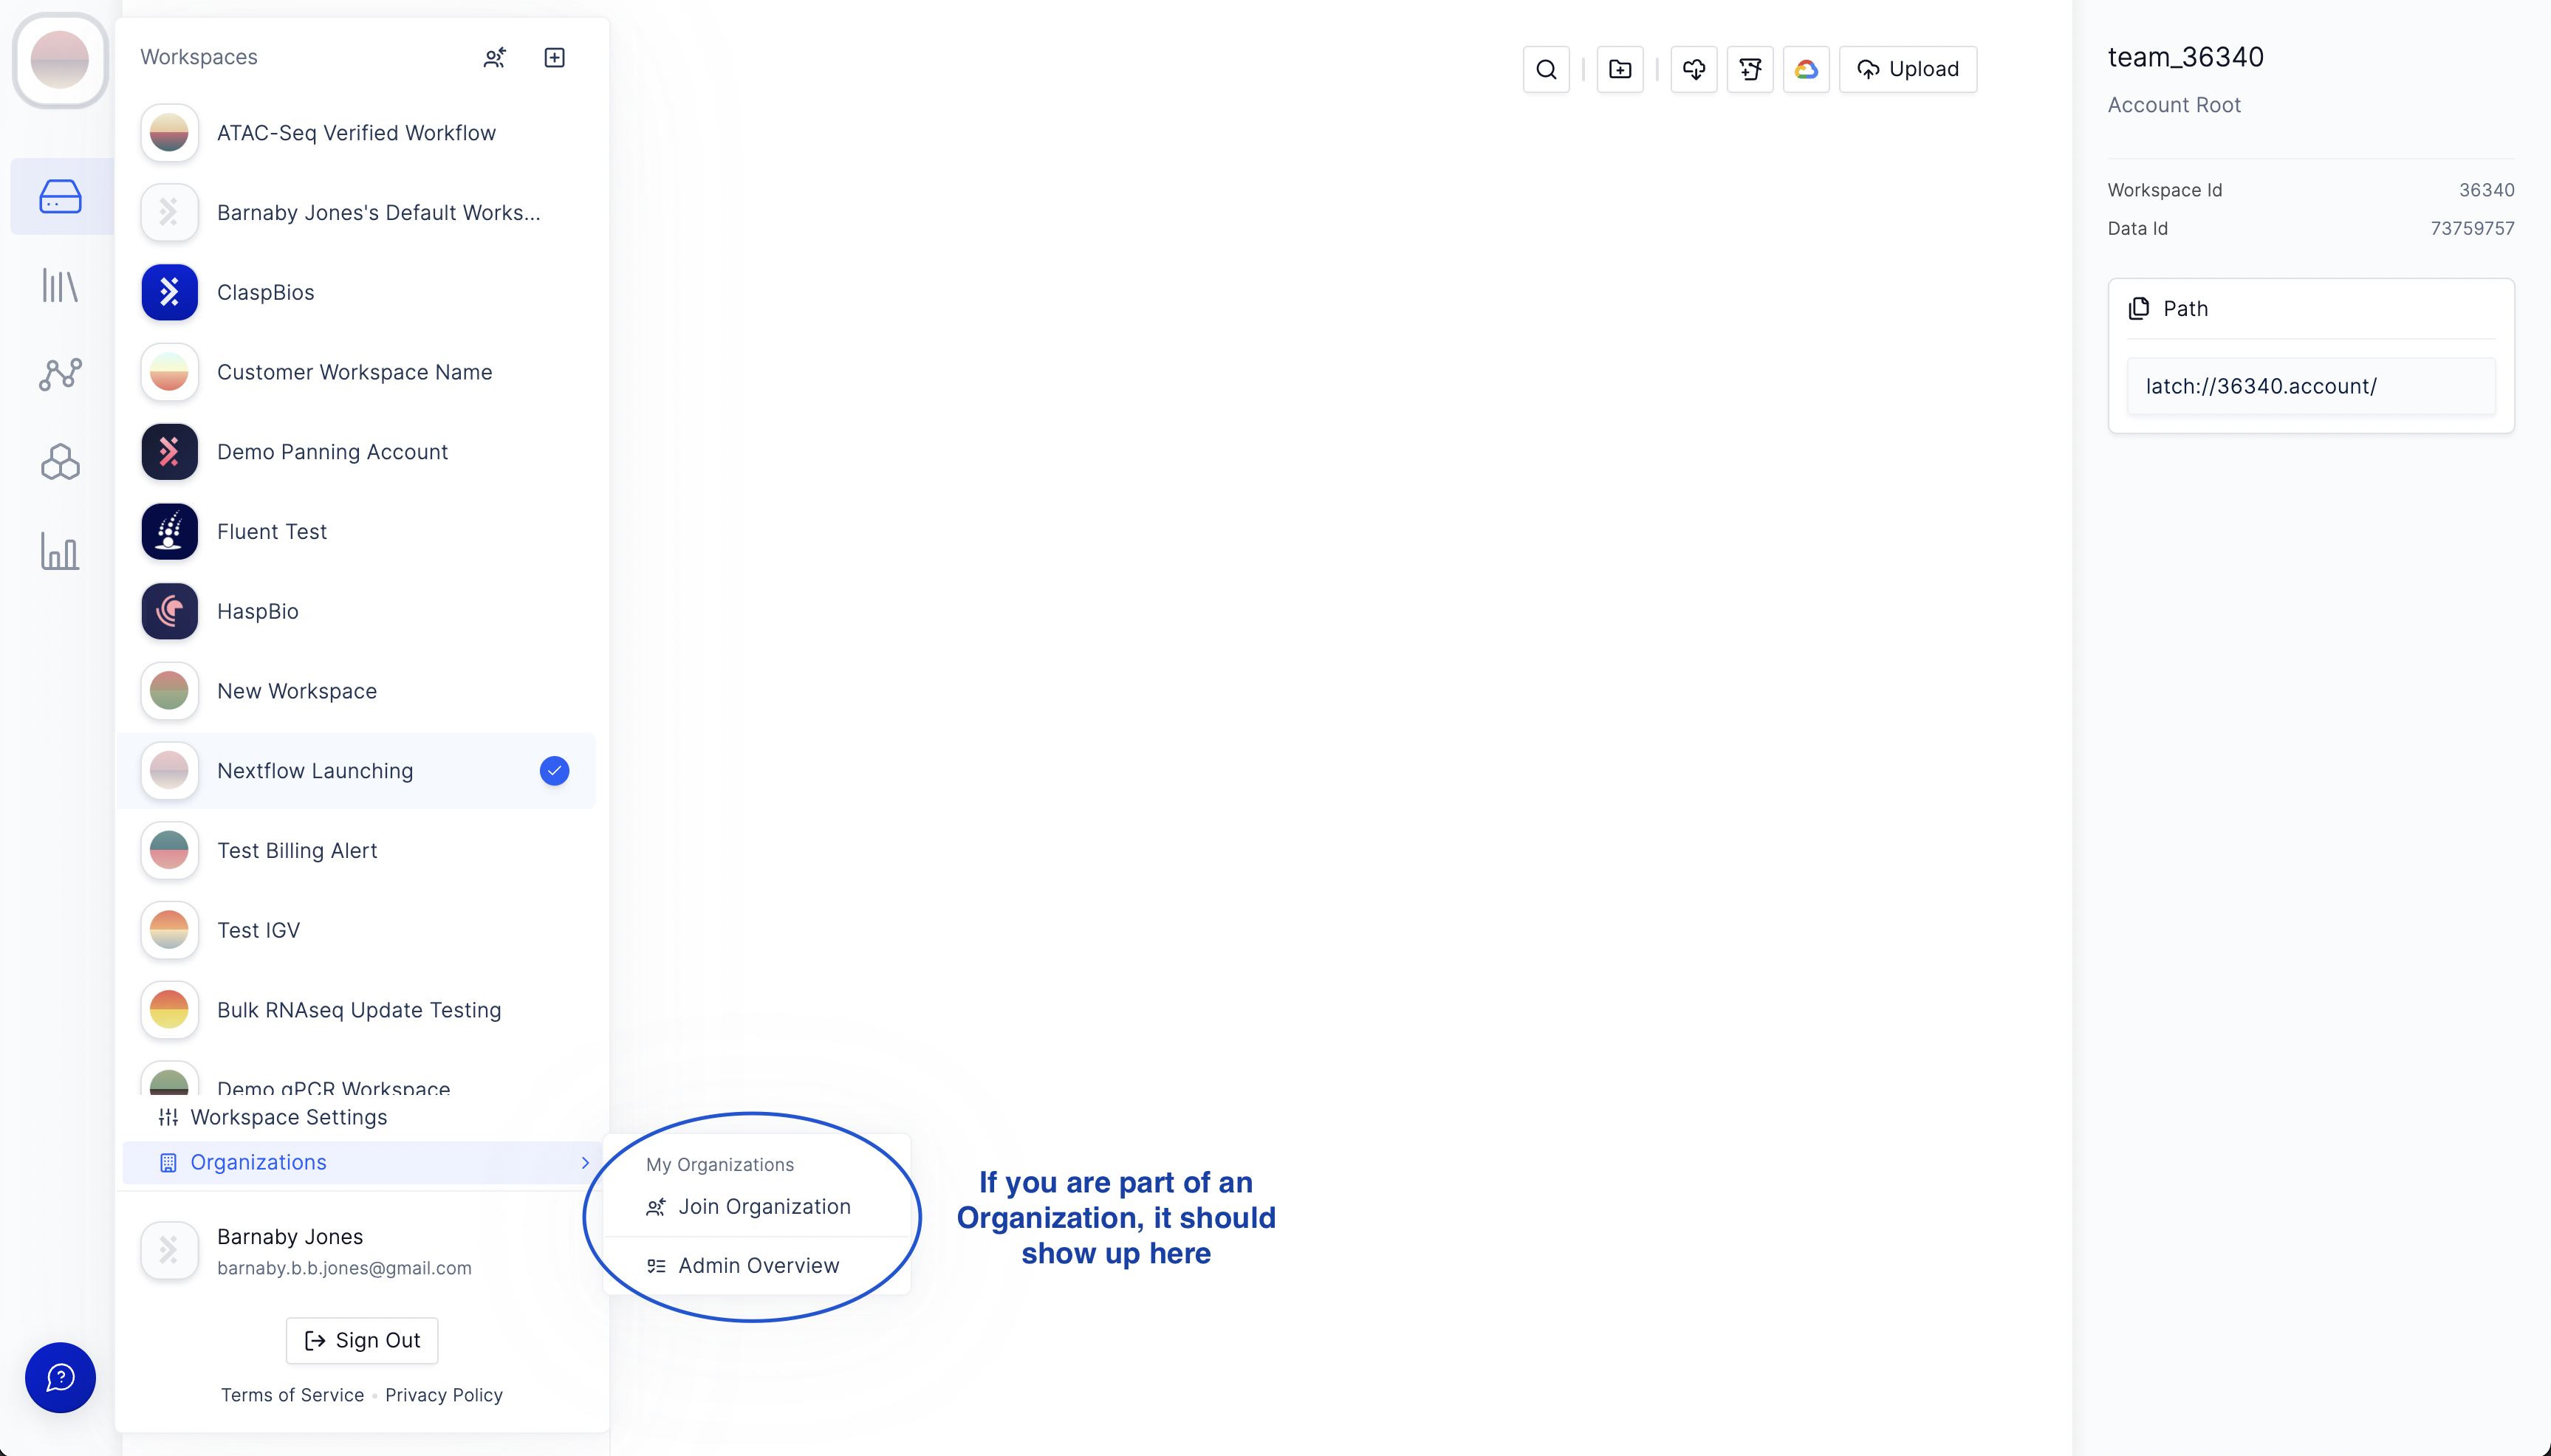 * Make sure that you have access to your Organization on Latch.
* If you do not have access to an Organization, please contact your workspace Admin or reach out to [support@latch.bio](mailto:support@latch.bio) (We respond to every request in less than 30 minutes.)
## Step 1: Create an Analysis Package
An Analysis Package is a curated set of Data, Workflows, Pod Templates, and Plot Notebook Templates—sourced from any of the organization’s workspaces.
To be able to create an Analysis Package, you are required to have **Admin** or **Owner** permission in your Organization.
To create an Analysis Package, first navigate to your Organization.
* Make sure that you have access to your Organization on Latch.
* If you do not have access to an Organization, please contact your workspace Admin or reach out to [support@latch.bio](mailto:support@latch.bio) (We respond to every request in less than 30 minutes.)
## Step 1: Create an Analysis Package
An Analysis Package is a curated set of Data, Workflows, Pod Templates, and Plot Notebook Templates—sourced from any of the organization’s workspaces.
To be able to create an Analysis Package, you are required to have **Admin** or **Owner** permission in your Organization.
To create an Analysis Package, first navigate to your Organization.
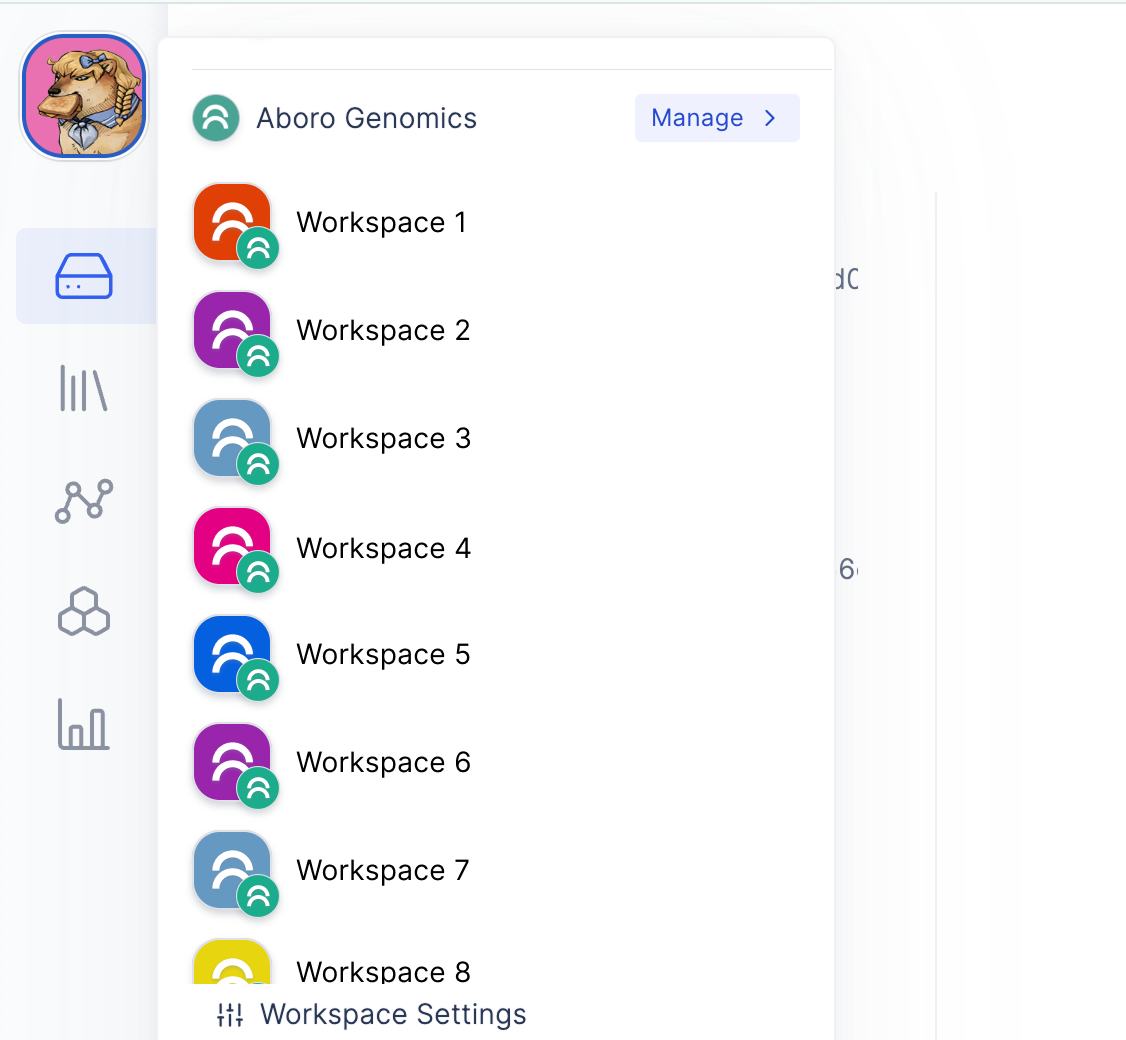 Click on the **Customer Packages** tab
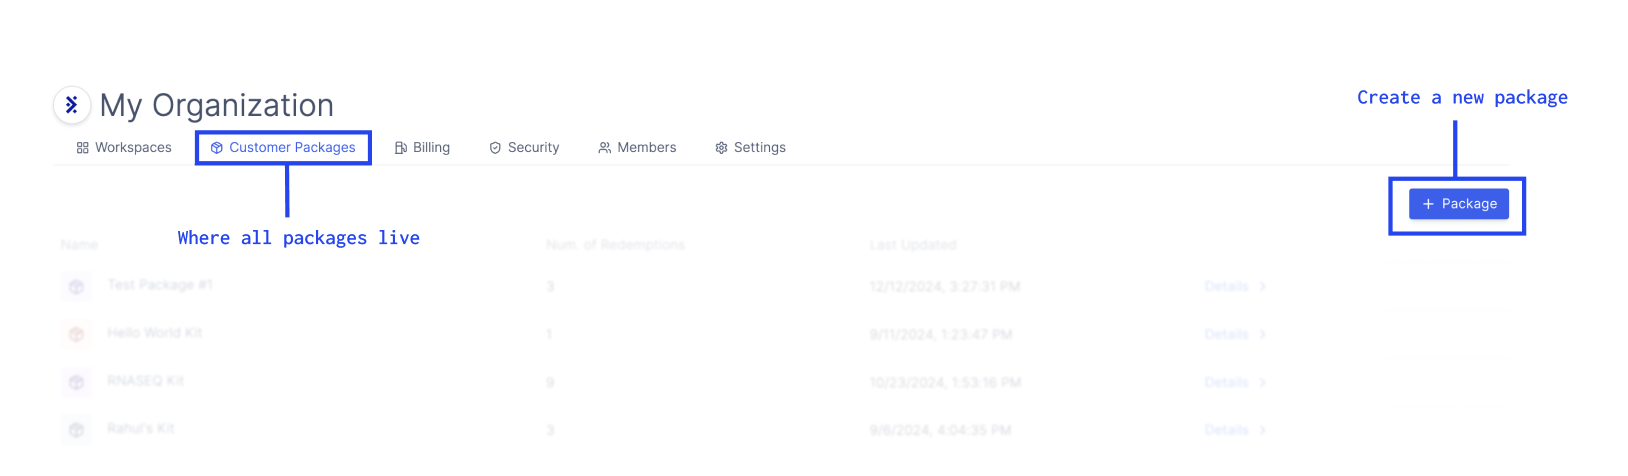 Click **+ Package** to create a new package, then enter a name and description. You will be directed to the **Create Analysis Package** page, where you can include data, workflows, pod templates, and plot templates from *any* workspaces owned by the Organization in the package.
Once a package is created, it will show up under the **Customer Packages** page in your Organization.
## Step 2: Create redemption codes for the package
After you've created your Analysis Package, the next step is to create redemption codes for customers.
There are two types of codes that you can create: single-use codes and multi-use codes.
| Feature | Single-use Codes | Multi-use Codes |
| -------------------- | --------------------------------------------------------------------------------- | ------------------------------------------------------------------------------------------- |
| **Redemption limit** | Can only be redeemed once per code. | Can be redeemed multiple times until deactivated for the package within the Organization. |
| **Creation** | One or more codes can be manually generated for each package. | Each package has a single, unique multi-use code, which is turned off by default. |
| **Credits** | Credits can be included for single-use codes | Does not include any credits. |
| **Usage** | Ideal for offering customers starter credits to use on workflows, pods, and more. | Ideal for demos or onboarding multiple customers at once without providing starter credits. |
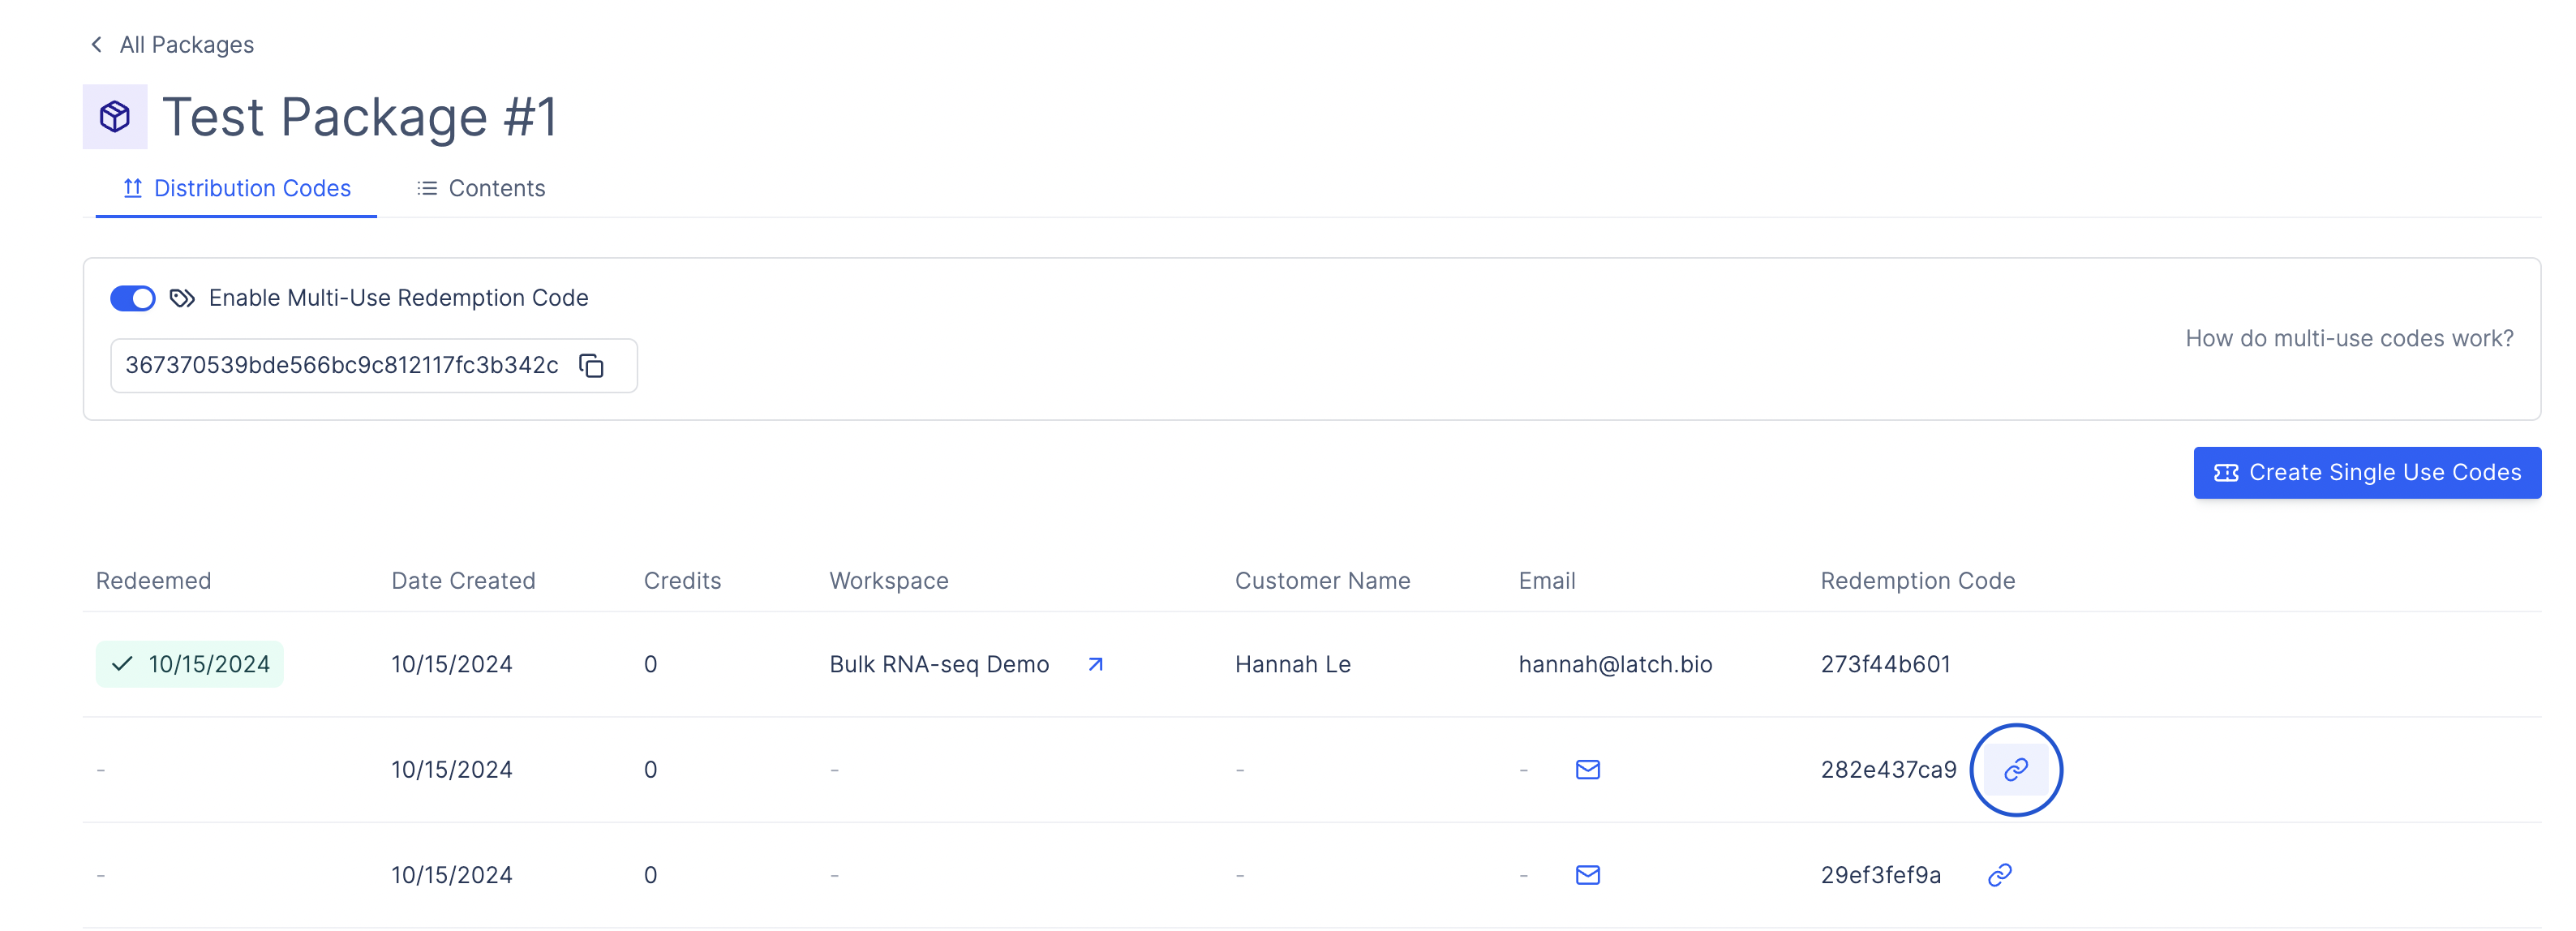
To create a single-use codes, navigate to your package of interest and click **Create Single Use Codes**. Here, you can also specify the number of single-use codes you want to generate.
Multi-use codes can be redeemed multiple times. Each Analysis Package includes just one multi-use code, which is turned off by default. When activated, the multi-use code can be redeemed repeatedly until you deactivate it. Unlike single-use codes, packages redeemed using multi-use codes do not include credits.
## Step 3: Distribute your Analysis Package
Single-use code packages can be distributed in two ways: via email or a link.
To share a package via email, click the email icon and enter the recipient's email address.
Click **+ Package** to create a new package, then enter a name and description. You will be directed to the **Create Analysis Package** page, where you can include data, workflows, pod templates, and plot templates from *any* workspaces owned by the Organization in the package.
Once a package is created, it will show up under the **Customer Packages** page in your Organization.
## Step 2: Create redemption codes for the package
After you've created your Analysis Package, the next step is to create redemption codes for customers.
There are two types of codes that you can create: single-use codes and multi-use codes.
| Feature | Single-use Codes | Multi-use Codes |
| -------------------- | --------------------------------------------------------------------------------- | ------------------------------------------------------------------------------------------- |
| **Redemption limit** | Can only be redeemed once per code. | Can be redeemed multiple times until deactivated for the package within the Organization. |
| **Creation** | One or more codes can be manually generated for each package. | Each package has a single, unique multi-use code, which is turned off by default. |
| **Credits** | Credits can be included for single-use codes | Does not include any credits. |
| **Usage** | Ideal for offering customers starter credits to use on workflows, pods, and more. | Ideal for demos or onboarding multiple customers at once without providing starter credits. |
To create a single-use codes, navigate to your package of interest and click **Create Single Use Codes**. Here, you can also specify the number of single-use codes you want to generate.
Multi-use codes can be redeemed multiple times. Each Analysis Package includes just one multi-use code, which is turned off by default. When activated, the multi-use code can be redeemed repeatedly until you deactivate it. Unlike single-use codes, packages redeemed using multi-use codes do not include credits.
## Step 3: Distribute your Analysis Package
Single-use code packages can be distributed in two ways: via email or a link.
To share a package via email, click the email icon and enter the recipient's email address.
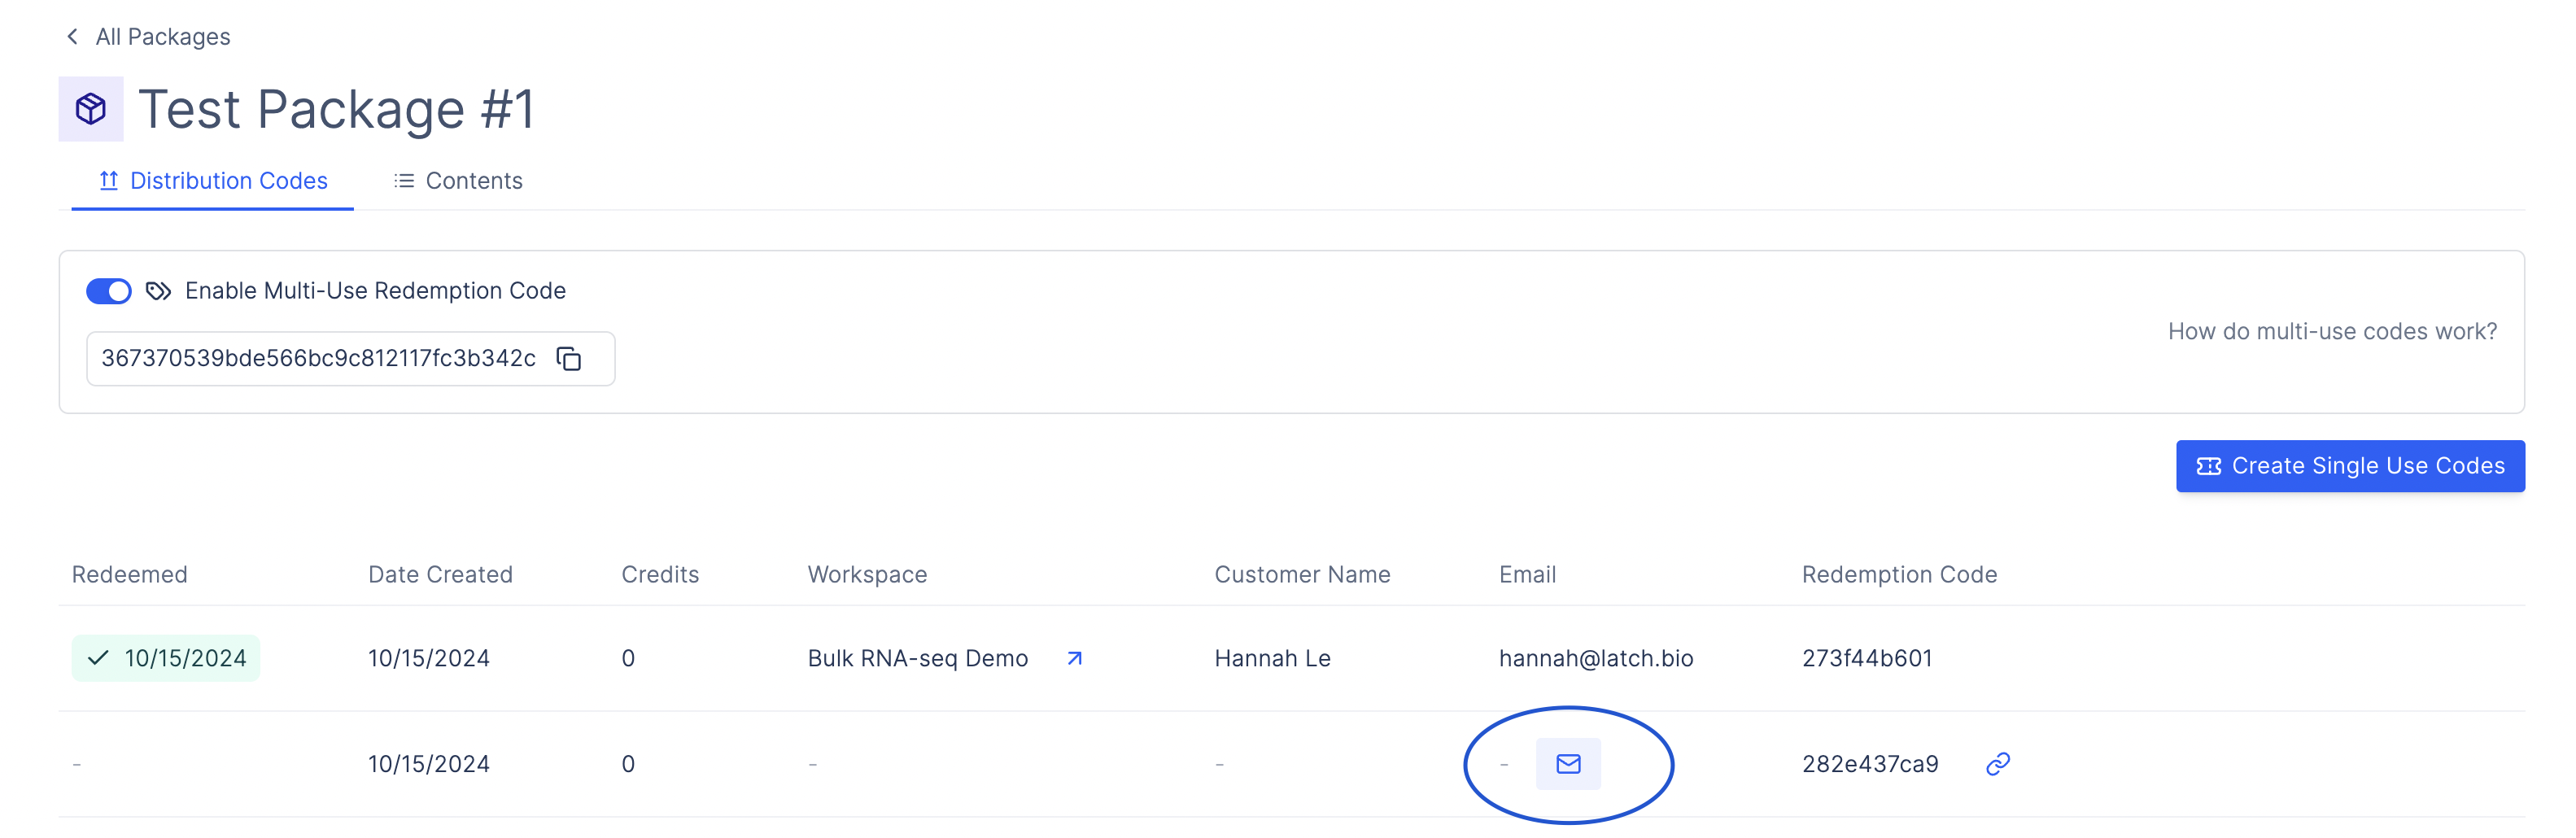 The customer will receive an email in their inbox, which will take them to a sign-up or log-in page. If they use Latch previously and are already logged in, a modal will pop up which asks them the workspace they want to redeem the package in.
Click on the link icon to retrieve a URL for sharing:
The customer will receive an email in their inbox, which will take them to a sign-up or log-in page. If they use Latch previously and are already logged in, a modal will pop up which asks them the workspace they want to redeem the package in.
Click on the link icon to retrieve a URL for sharing:
 Here's what the experience looks like from a customer's perspective:
For a multi-use code, click the link icon to generate a shareable link that customers can use to redeem the analysis package.
## What the Customer Experience Looks Like After Receiving your Package
At Latch, we collaborate closely with each kit provider to customize and white-label the Latch platform so it fully aligns with their brand identity. This tailored approach means every element—from the color schemes and logos to the overall look and feel—matches the provider's unique brand.
As a result, when a customer purchases a kit and logs in for analysis, they step into a branded, intuitive, and visually consistent portal that feels like a natural extension of the kit provider's own offerings.
This step only applies if you sent customer single-use codes via email.
Customers receive an email with a unique redemption code link.
Here's what the experience looks like from a customer's perspective:
For a multi-use code, click the link icon to generate a shareable link that customers can use to redeem the analysis package.
## What the Customer Experience Looks Like After Receiving your Package
At Latch, we collaborate closely with each kit provider to customize and white-label the Latch platform so it fully aligns with their brand identity. This tailored approach means every element—from the color schemes and logos to the overall look and feel—matches the provider's unique brand.
As a result, when a customer purchases a kit and logs in for analysis, they step into a branded, intuitive, and visually consistent portal that feels like a natural extension of the kit provider's own offerings.
This step only applies if you sent customer single-use codes via email.
Customers receive an email with a unique redemption code link.
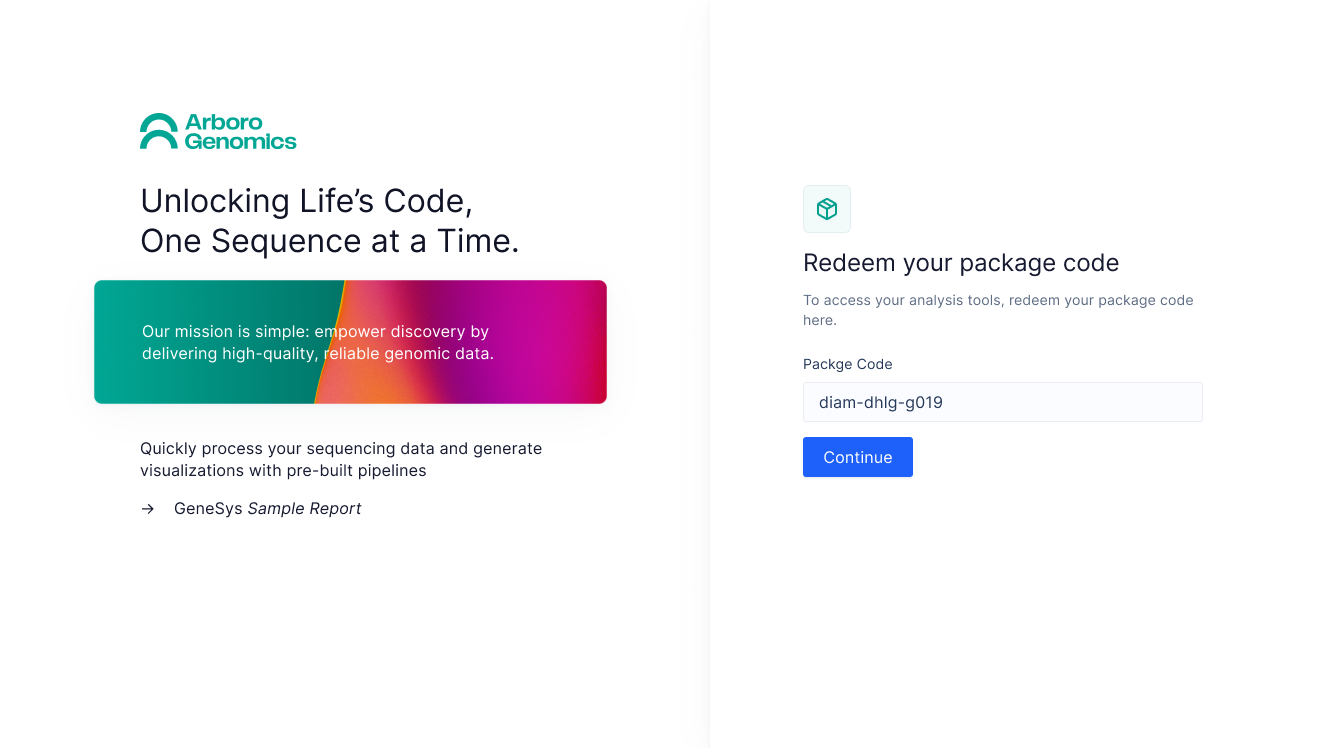
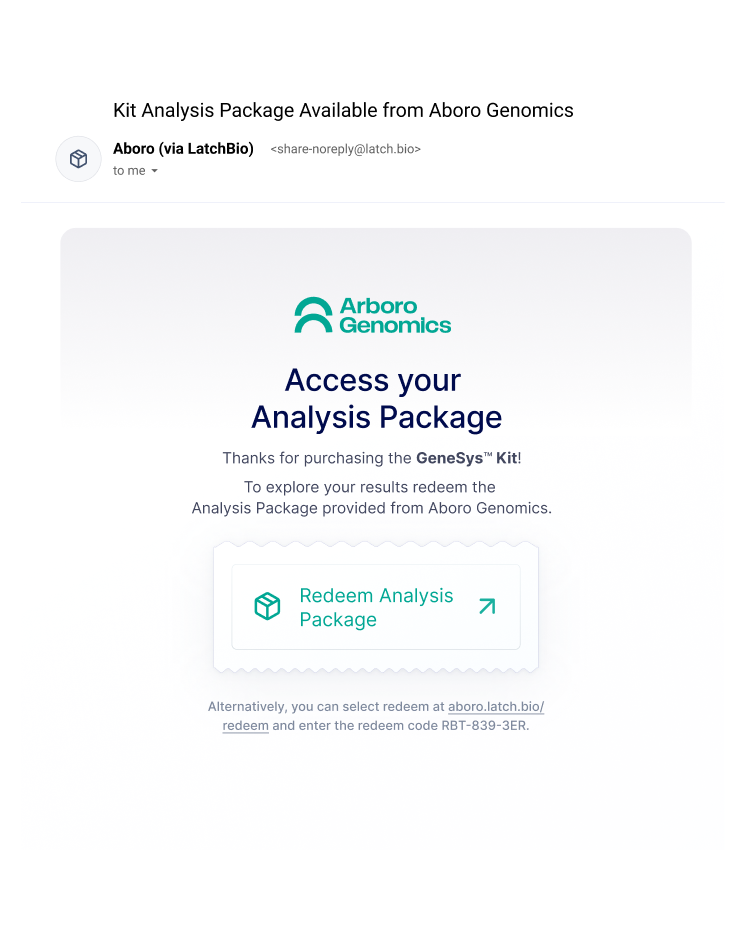 Customers then see a welcome page tailored to the kit provider’s brand, featuring their taglines, logos, and colors.
 Next, customers can choose to either sign up or log in, depending on whether they already have a Latch account.
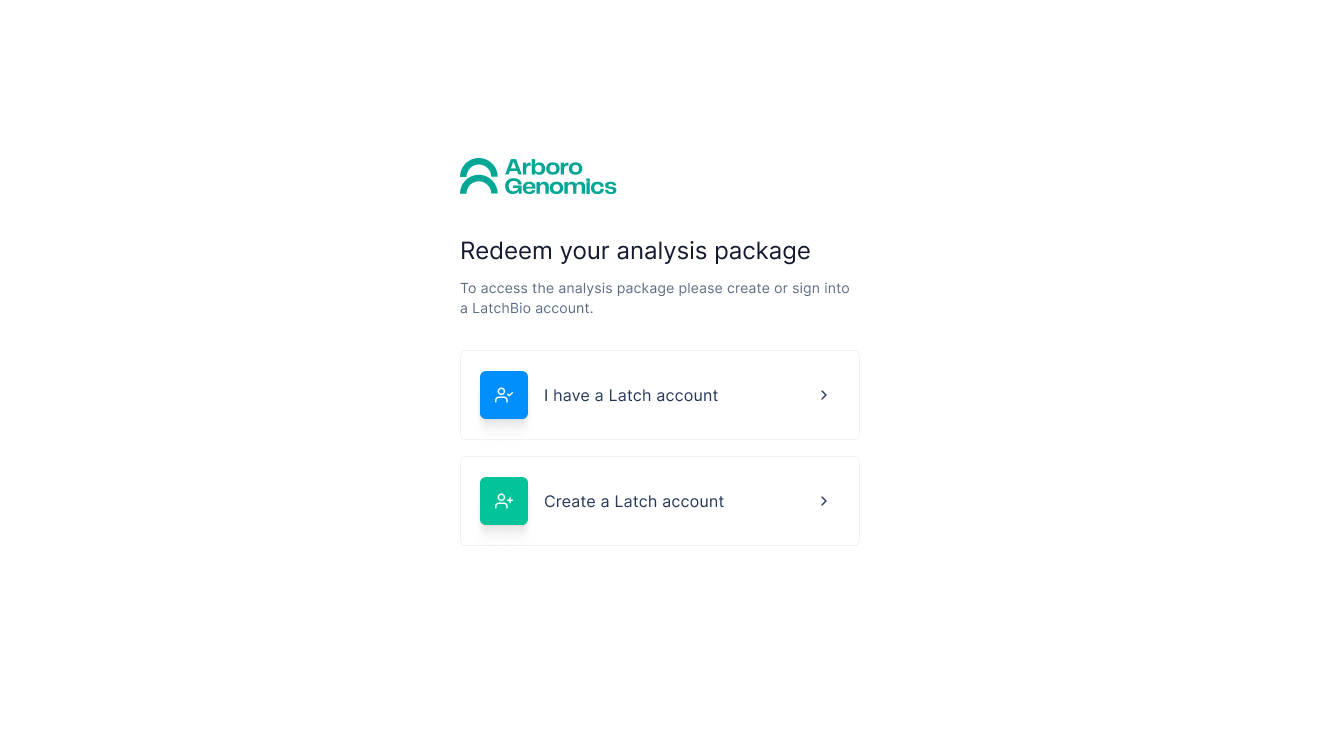 If this is their first time redeeming a kit and they have never previously interacted with Latch, they can click **Create a new Latch account** to sign up. If they are redeeming another kit or have previously created a Latch account, they can select **I have a Latch account** and log in.
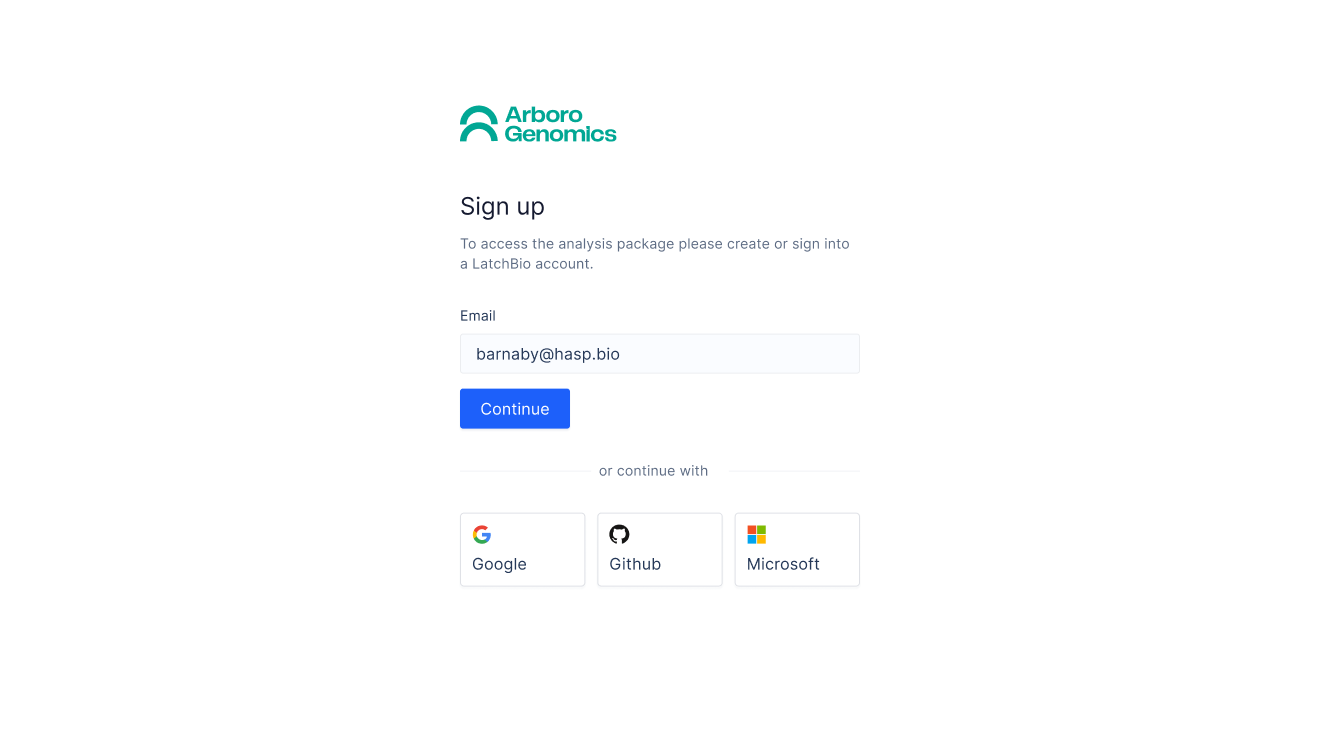 After logging in, users will see an overview of the kit’s contents that will be unpacked into their workspace. They can choose to enable Share Usage Analytics, which gives the kit provider permission to view their activities within the workspace. These activities may include opening files, launching workflows, using a certain number of credits on a Pod or workflow, and more. By default, this option is disabled.
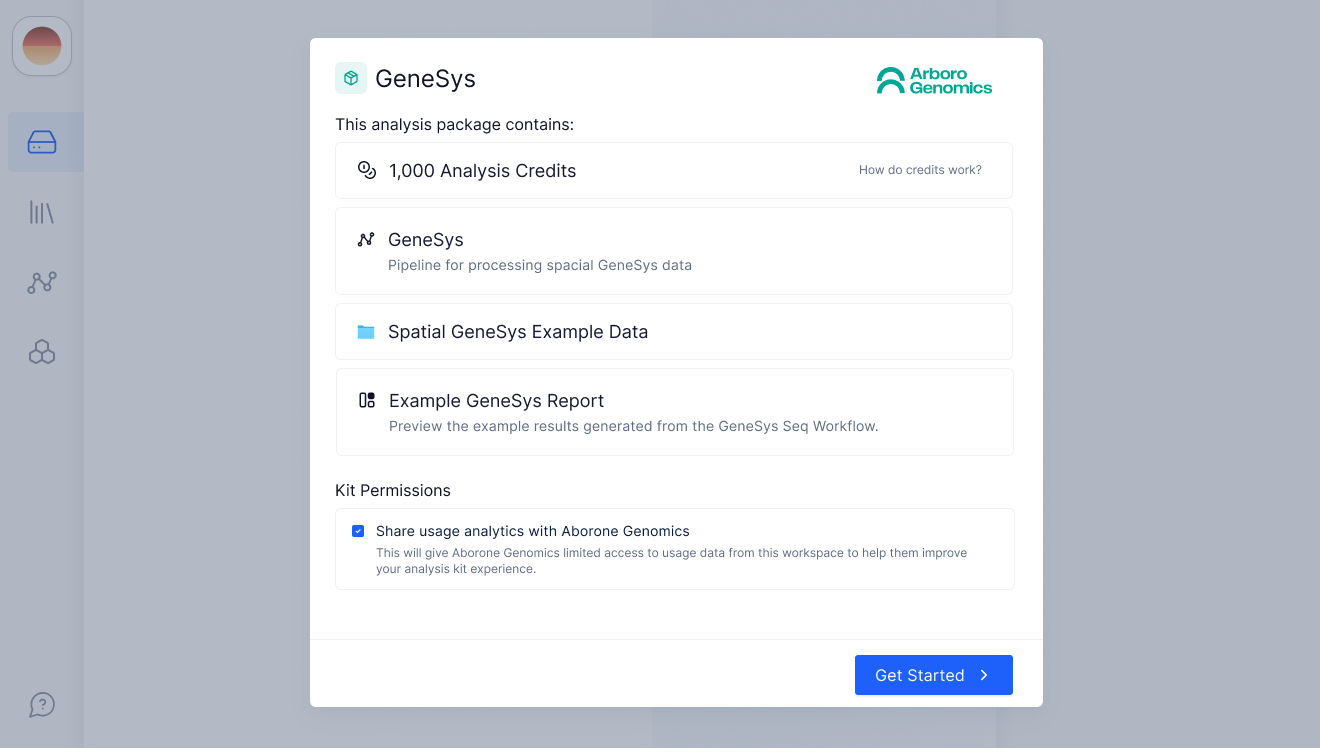 The first tab customers see in the workspace is **Latch Data**.
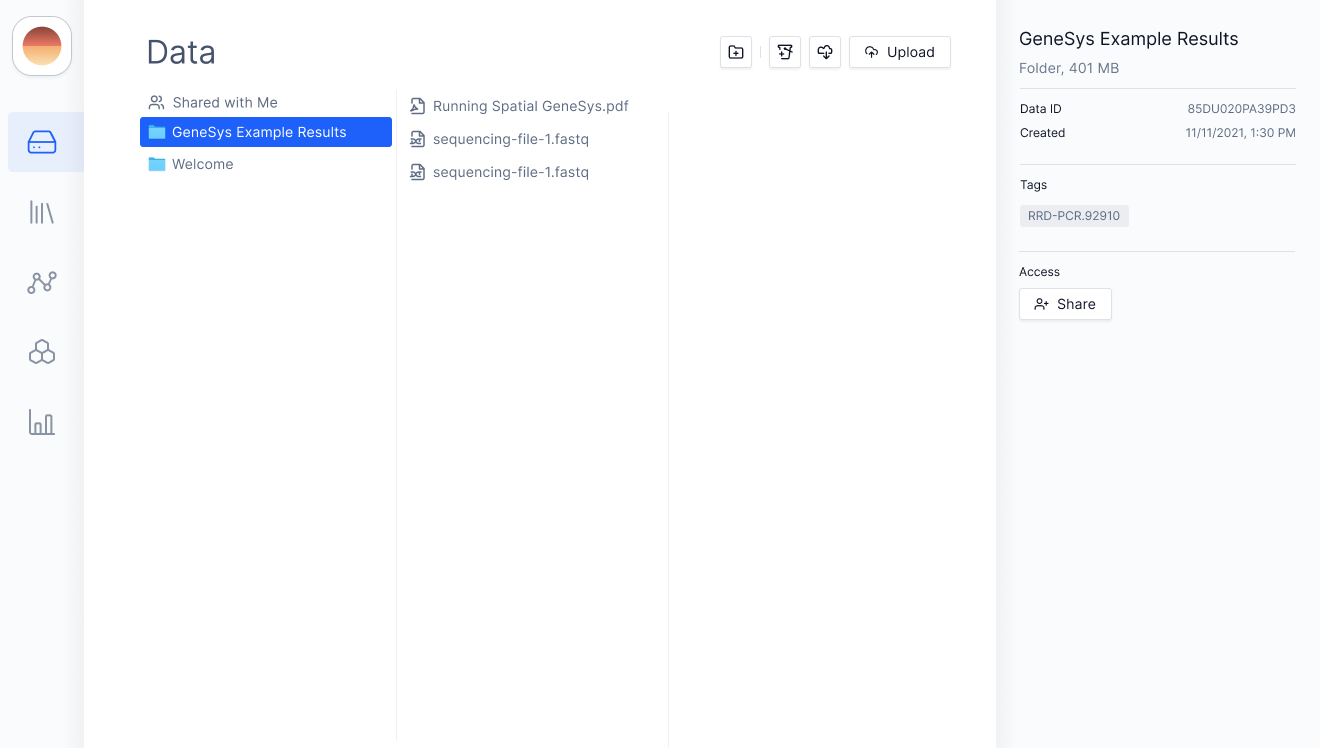 They can also navigate to the **Workflows** tab to view and launch the kit provider’s workflows.
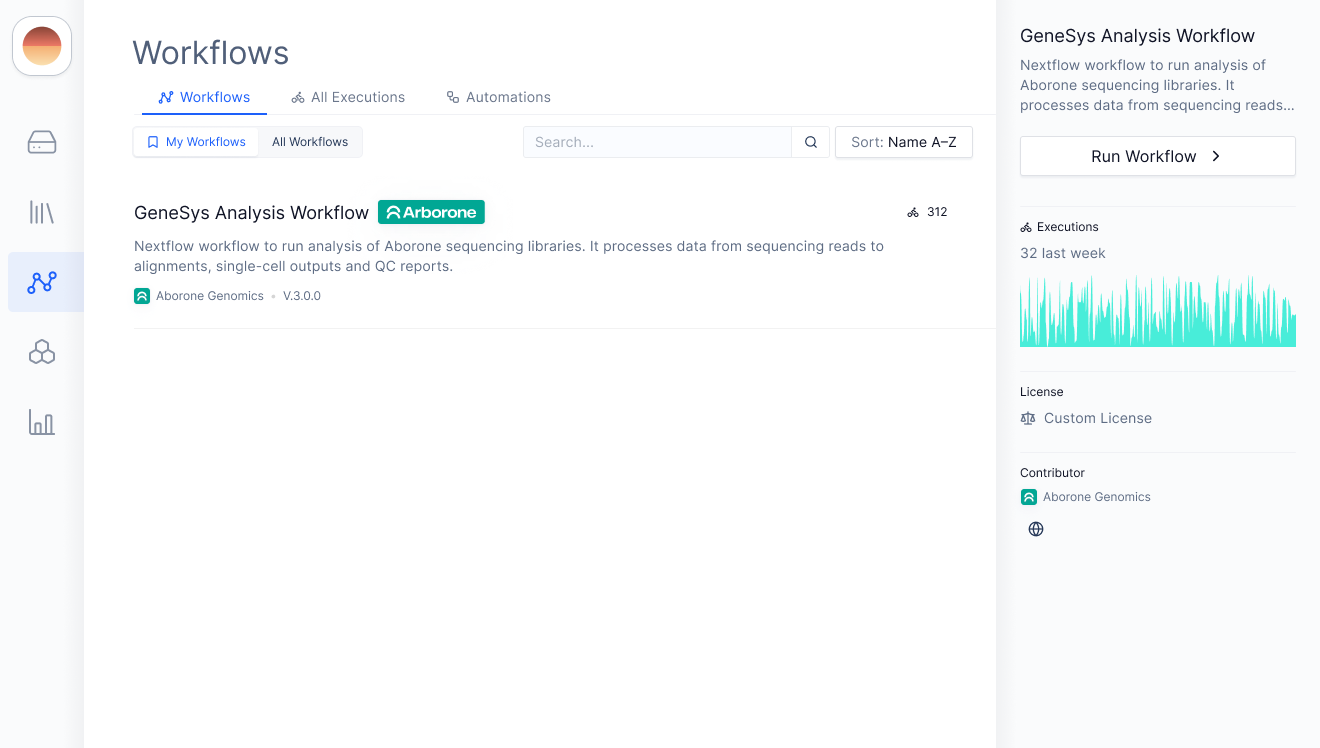 Additionally, they can visit the **Plots** tab for interactive, downstream visualizations.
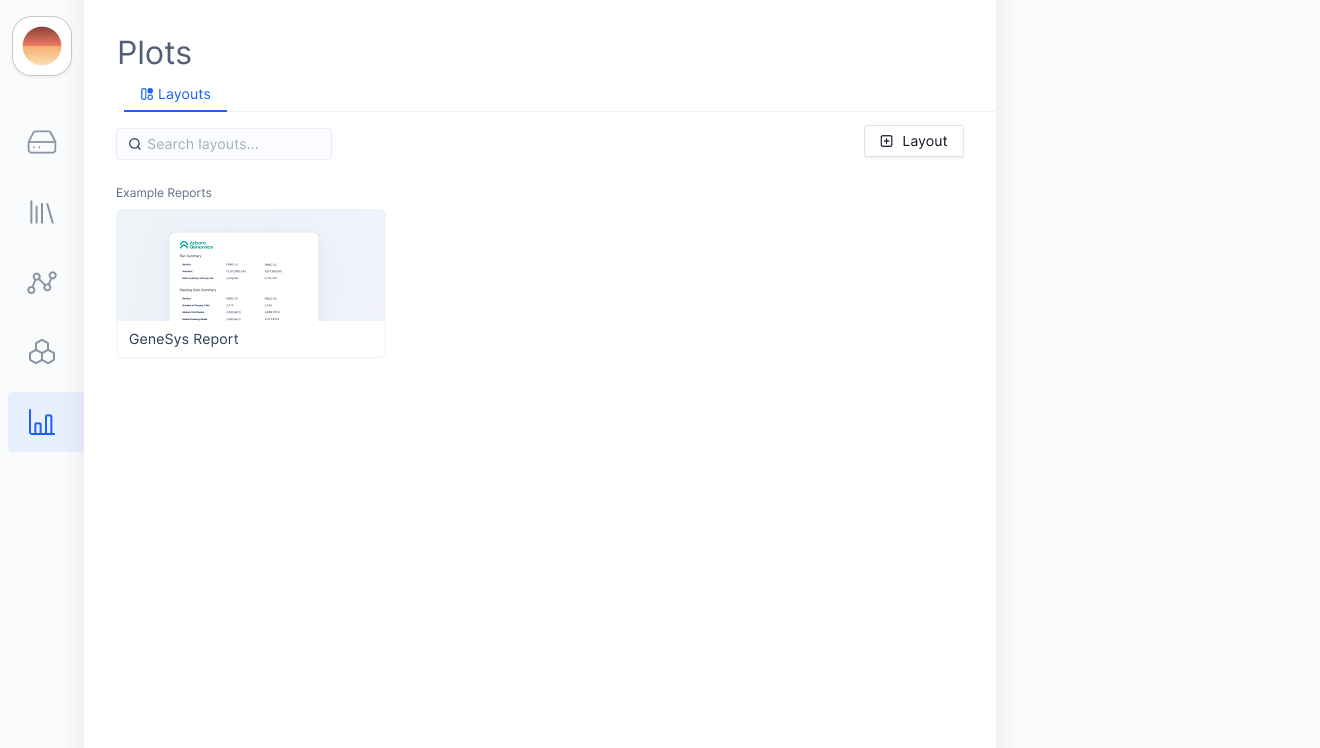 Once again, each workflow, data folder, and Pod or Plot template can be fully customized by the kit provider in the **Customers Packages** section of their Organization. This flexibility makes it easy to create a complete end-to-end analysis experience for their customers.
## How Customers Request Support for Analysis Packages
Latch makes it easy for customers to grant temporary workspace access to kit providers for debugging. Providers can enter, diagnose issues, and offer support while customers retain control over access levels and duration.
**IMPORTANT**: Because the customer is granting workspace access, the individual submitting the support request must be an **Admin** within the customer workspace.
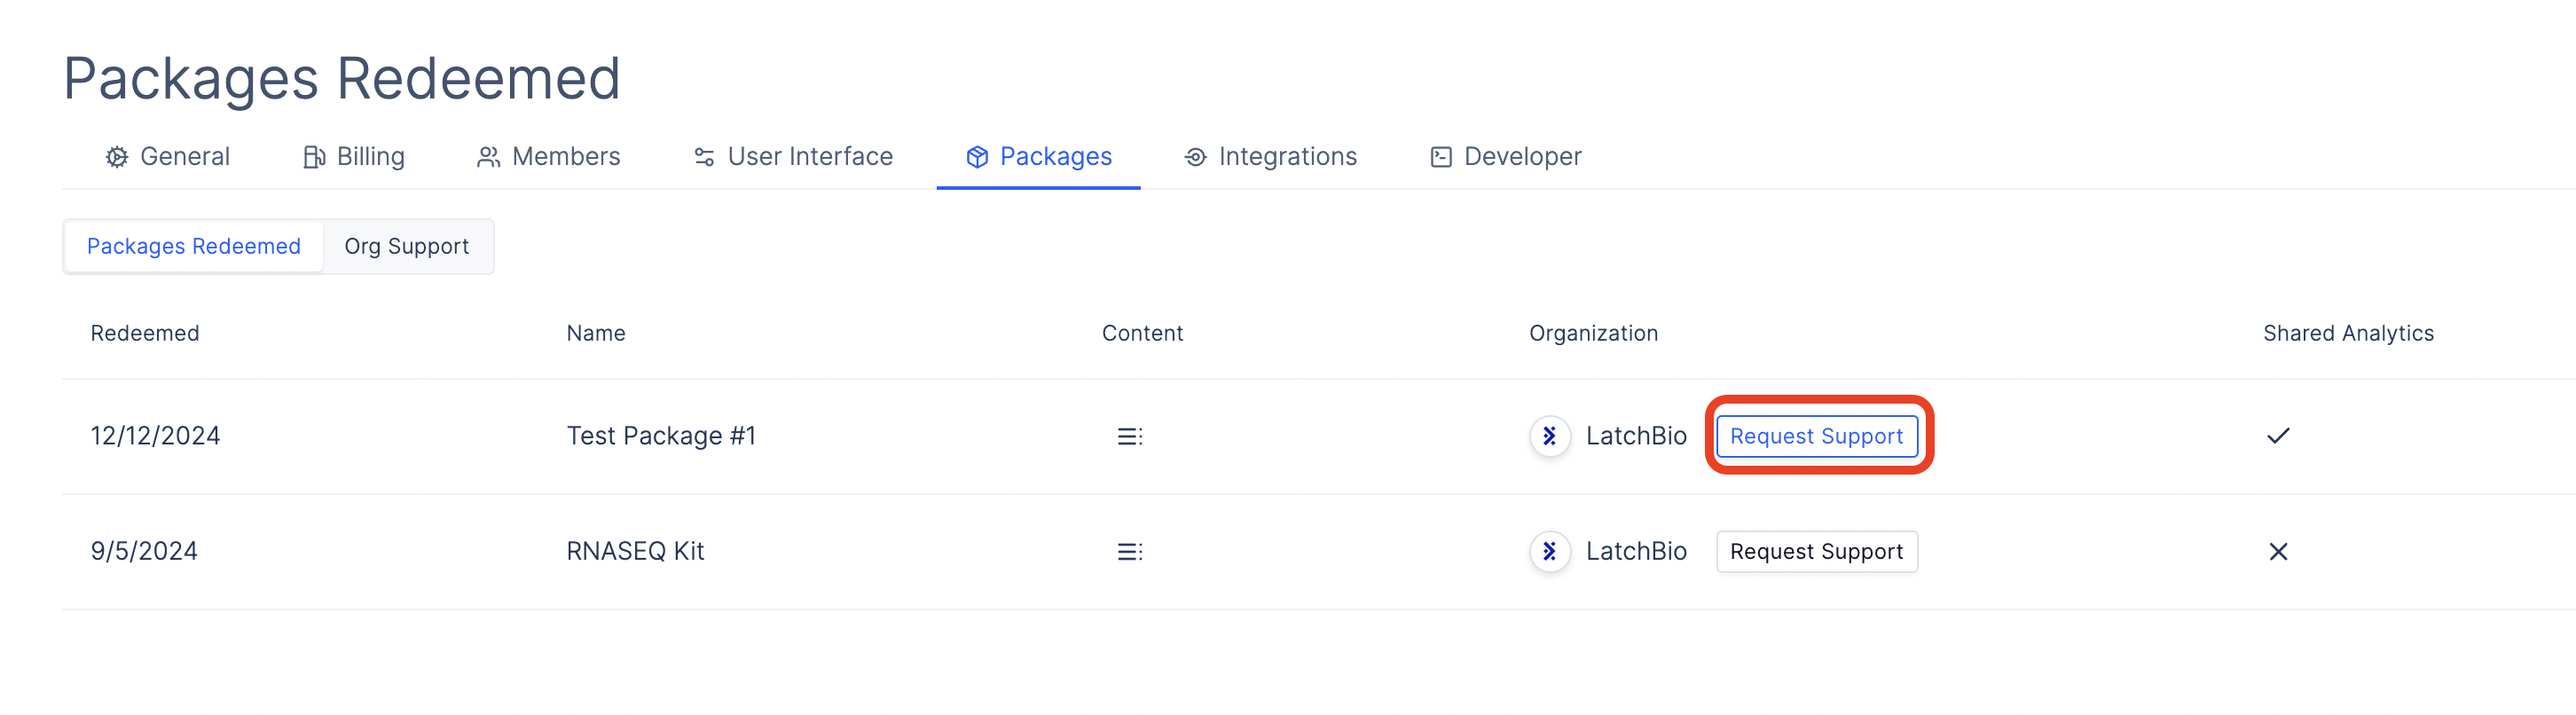
Once a customer has redeemed a package in their workspace, they can request support by navigating to your current workspace > **Workspace Settings** > [**Packages**](https://console.latch.bio/settings/packages), and click on the **Request Support** button.
Once again, each workflow, data folder, and Pod or Plot template can be fully customized by the kit provider in the **Customers Packages** section of their Organization. This flexibility makes it easy to create a complete end-to-end analysis experience for their customers.
## How Customers Request Support for Analysis Packages
Latch makes it easy for customers to grant temporary workspace access to kit providers for debugging. Providers can enter, diagnose issues, and offer support while customers retain control over access levels and duration.
**IMPORTANT**: Because the customer is granting workspace access, the individual submitting the support request must be an **Admin** within the customer workspace.
Once a customer has redeemed a package in their workspace, they can request support by navigating to your current workspace > **Workspace Settings** > [**Packages**](https://console.latch.bio/settings/packages), and click on the **Request Support** button.
 When requesting access for a kit provider organization (the organization that created the analysis packages), users will be prompted to complete the following fields:
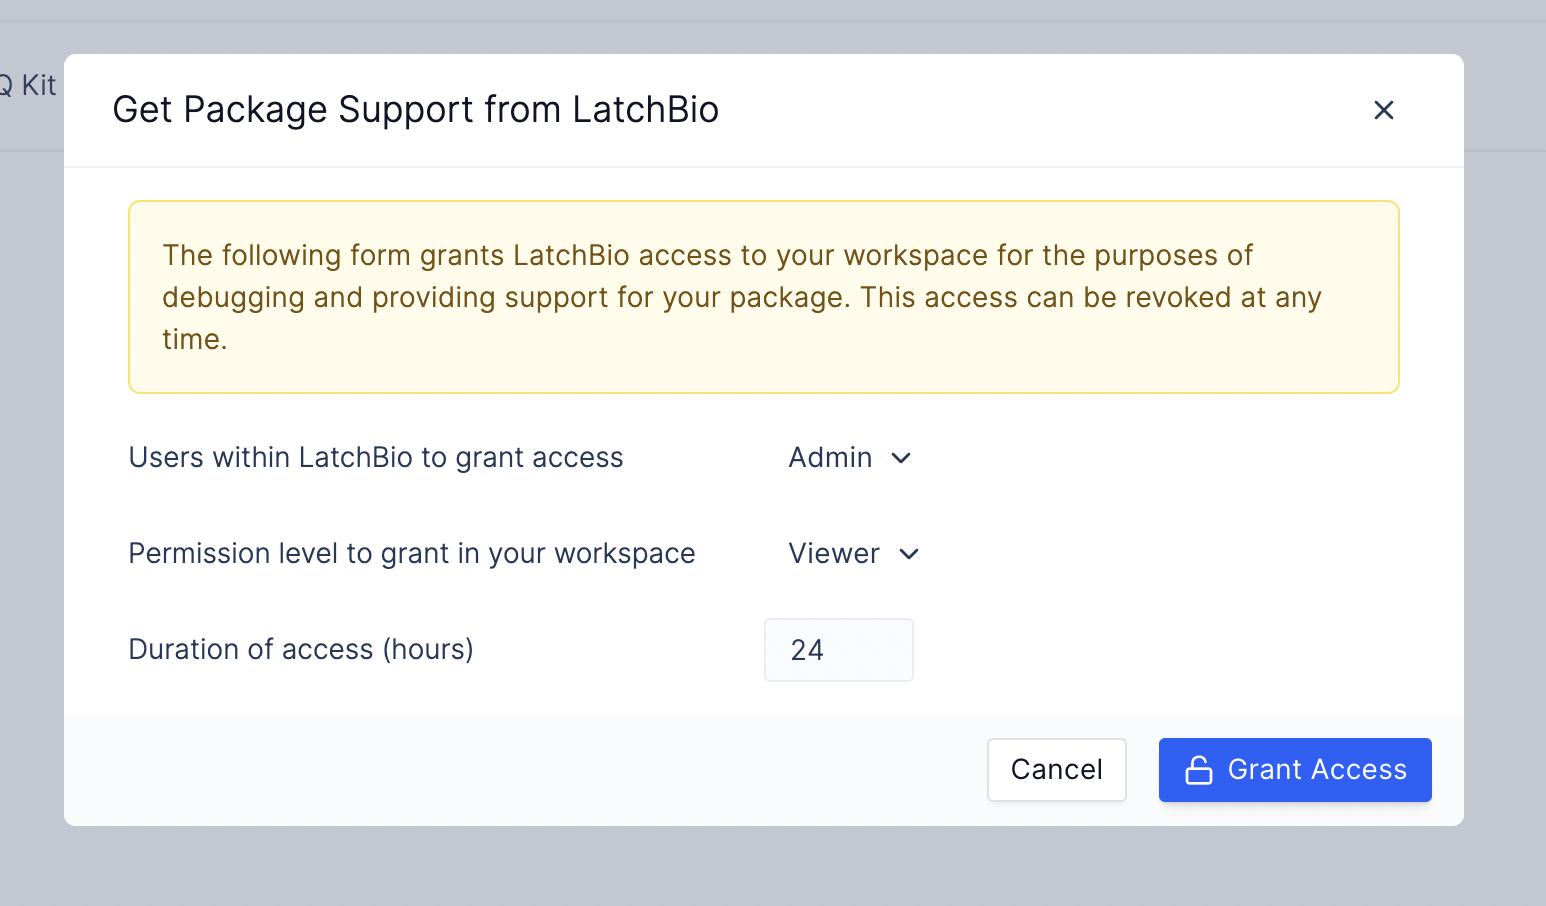 1. **Users Within {organization_name} to Grant Access**
* The kit provider's organization can have users with different roles (e.g., Admin, Member, Viewer).
* Select which roles should be granted access.
* Default: Only organization admins will be granted access.
2. **Permission Level to Grant in Your Workspace**
* Choose whether to grant Admin, Member, or Viewer access to the selected users.
Default: Viewer access only.
* If users need need the kit provider to relaunch or debug workflows, consider assigning Admin or Member permissions.
3. **Duration of Access (Hours)**:
* Specify how long the kit provider's users should have access to the workspace.
After the specified duration, their access to your workspace will automatically end.
### Viewing Customer Requests for Support
As a kit provider, first go to your Organization. Navigate to the **Workspaces** tab and click on the **Support** tab. You will see list of workspaces that requested support.
1. **Users Within {organization_name} to Grant Access**
* The kit provider's organization can have users with different roles (e.g., Admin, Member, Viewer).
* Select which roles should be granted access.
* Default: Only organization admins will be granted access.
2. **Permission Level to Grant in Your Workspace**
* Choose whether to grant Admin, Member, or Viewer access to the selected users.
Default: Viewer access only.
* If users need need the kit provider to relaunch or debug workflows, consider assigning Admin or Member permissions.
3. **Duration of Access (Hours)**:
* Specify how long the kit provider's users should have access to the workspace.
After the specified duration, their access to your workspace will automatically end.
### Viewing Customer Requests for Support
As a kit provider, first go to your Organization. Navigate to the **Workspaces** tab and click on the **Support** tab. You will see list of workspaces that requested support.
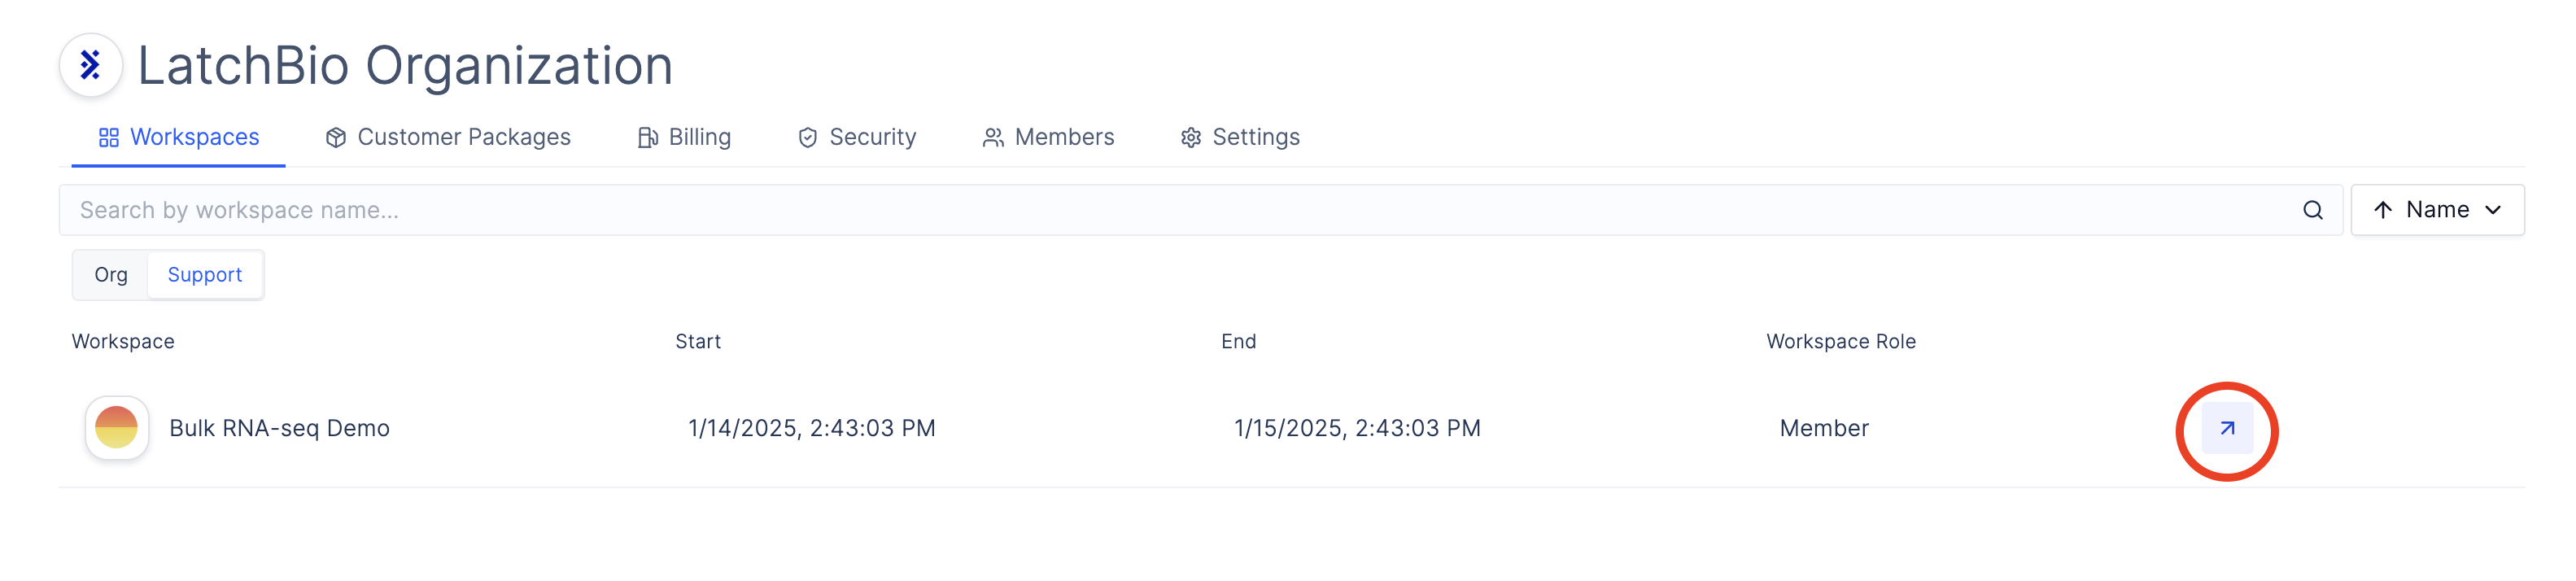 Click on the arrow icon to enter the workspace.