> ## Documentation Index
> Fetch the complete documentation index at: https://wiki.latch.bio/llms.txt
> Use this file to discover all available pages before exploring further.
# Adding Workspaces to an Organization
> Learn how to add and transfer workspaces to an organization on Latch
## Prerequisites
* You must have **Admin** permission in the organization.
* You must be an **Owner** of the workspace to transfer it to the organization.
## Transferring Existing Workspaces to the Organization
If you have existing workspaces that you would like to include in your organization, follow these steps:
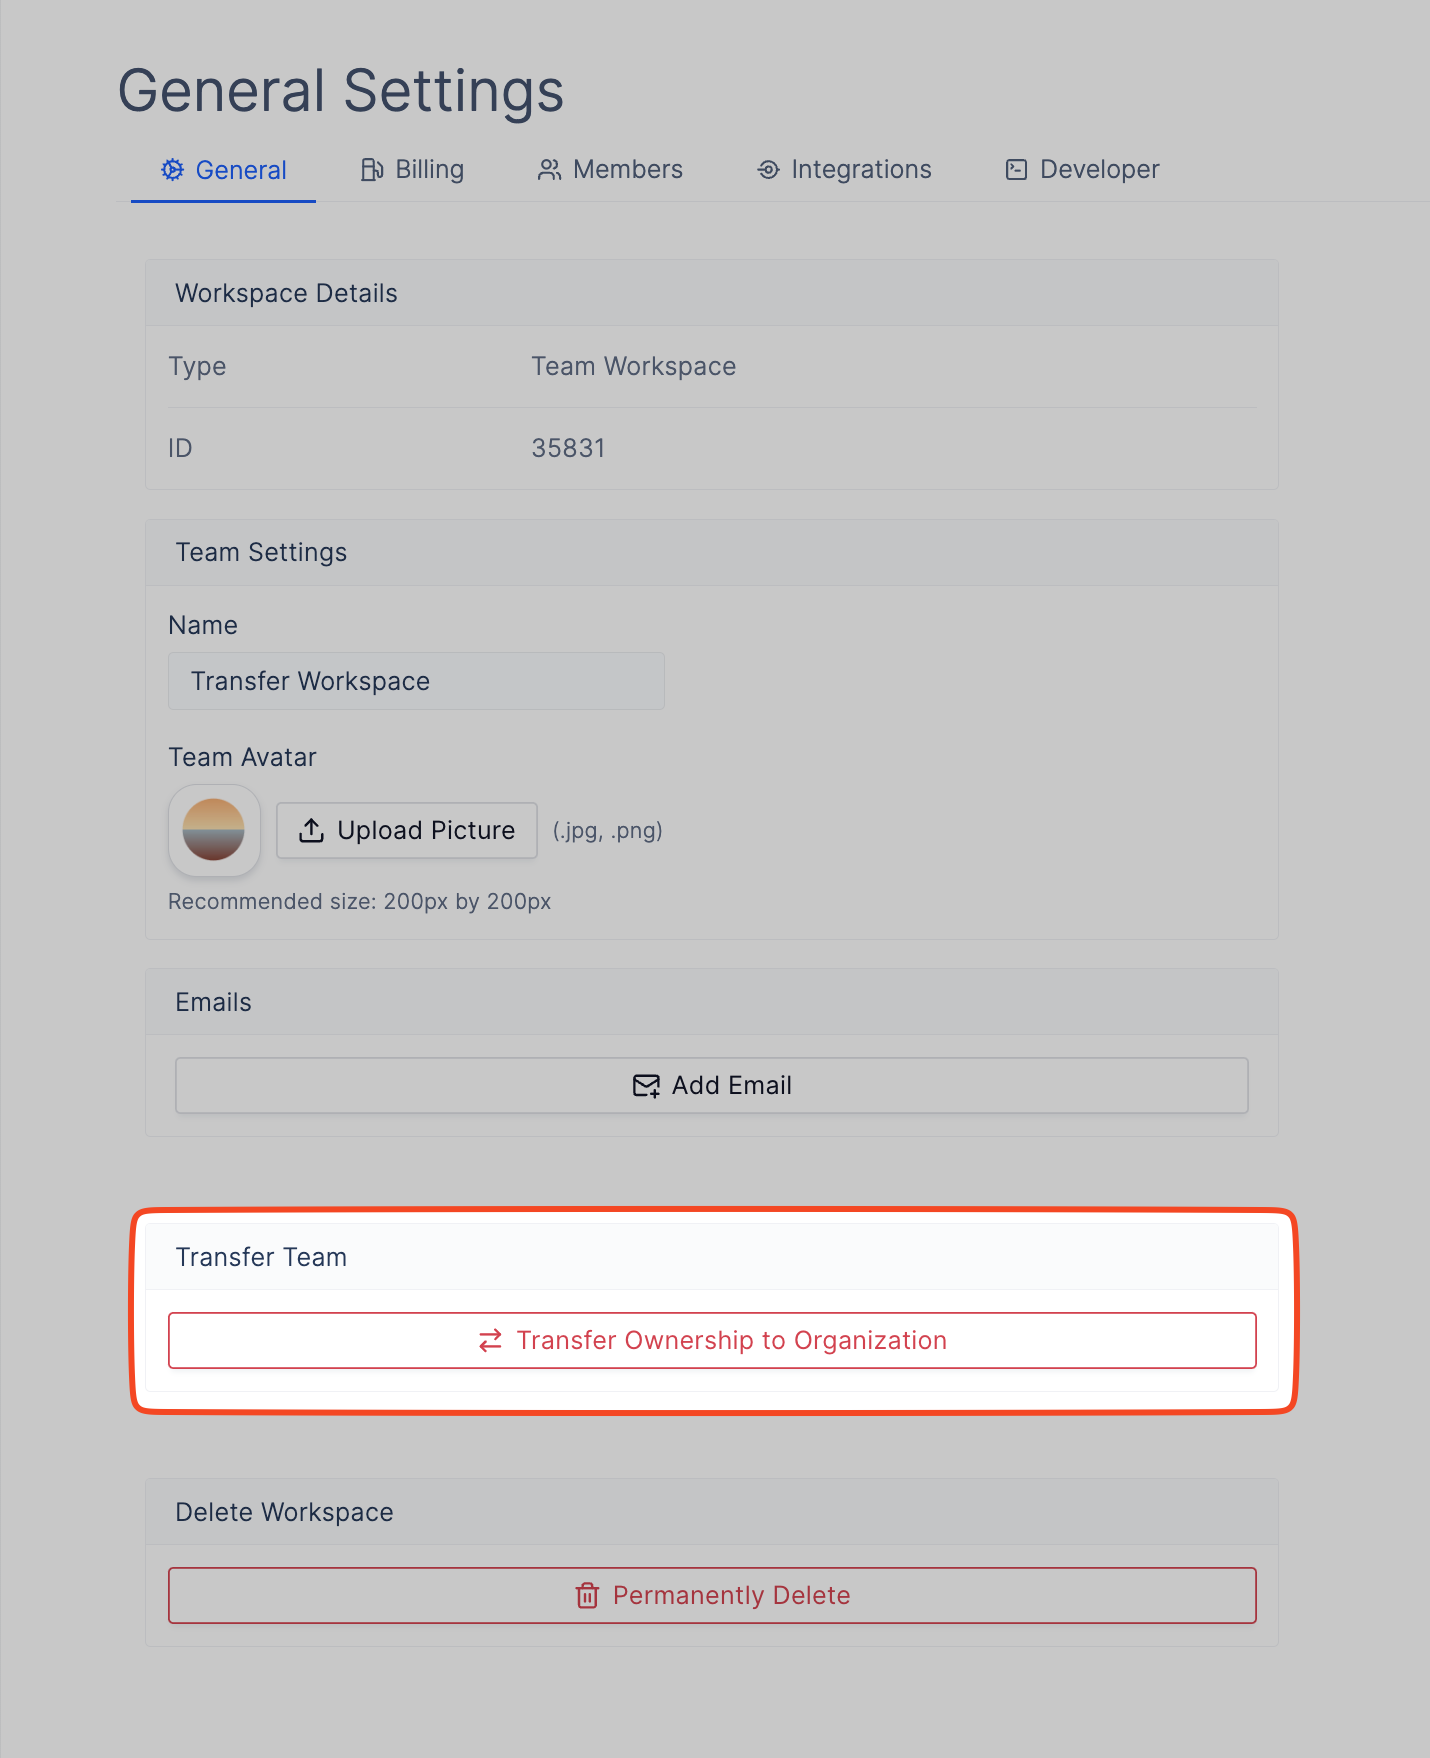
1. Navigate to the workspace that you want to transfer and go to "Workspace Settings".
2. Go to General Settings
3. Click on "Transfer Ownership to Organization".
* The button will only be visible if you are an owner of the workspace and are an admin in an organization.
 4. From the dropdown select the organization you want to transfer the workspace to.
5. Click "Transfer Ownership".
4. From the dropdown select the organization you want to transfer the workspace to.
5. Click "Transfer Ownership".
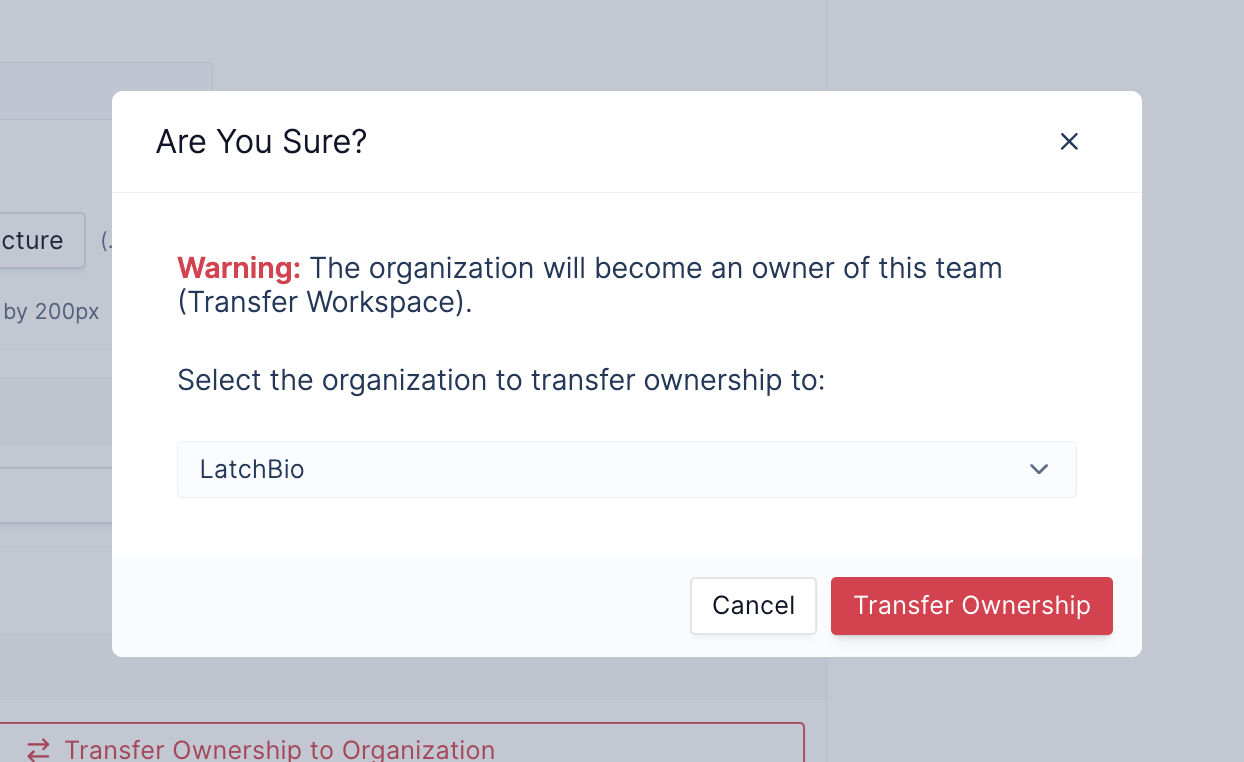 The workspace will now be managed under the selected organization.
## Adding New Workspaces to the Organization
To add new workspaces directly under an organization:
1. Click on your user Avatar in the top left corner of the screen
2. Then click on the Square Plus icon in the top right of the Workspace Selector Dropdown.
3. This will open the Create New Workspace modal
The workspace will now be managed under the selected organization.
## Adding New Workspaces to the Organization
To add new workspaces directly under an organization:
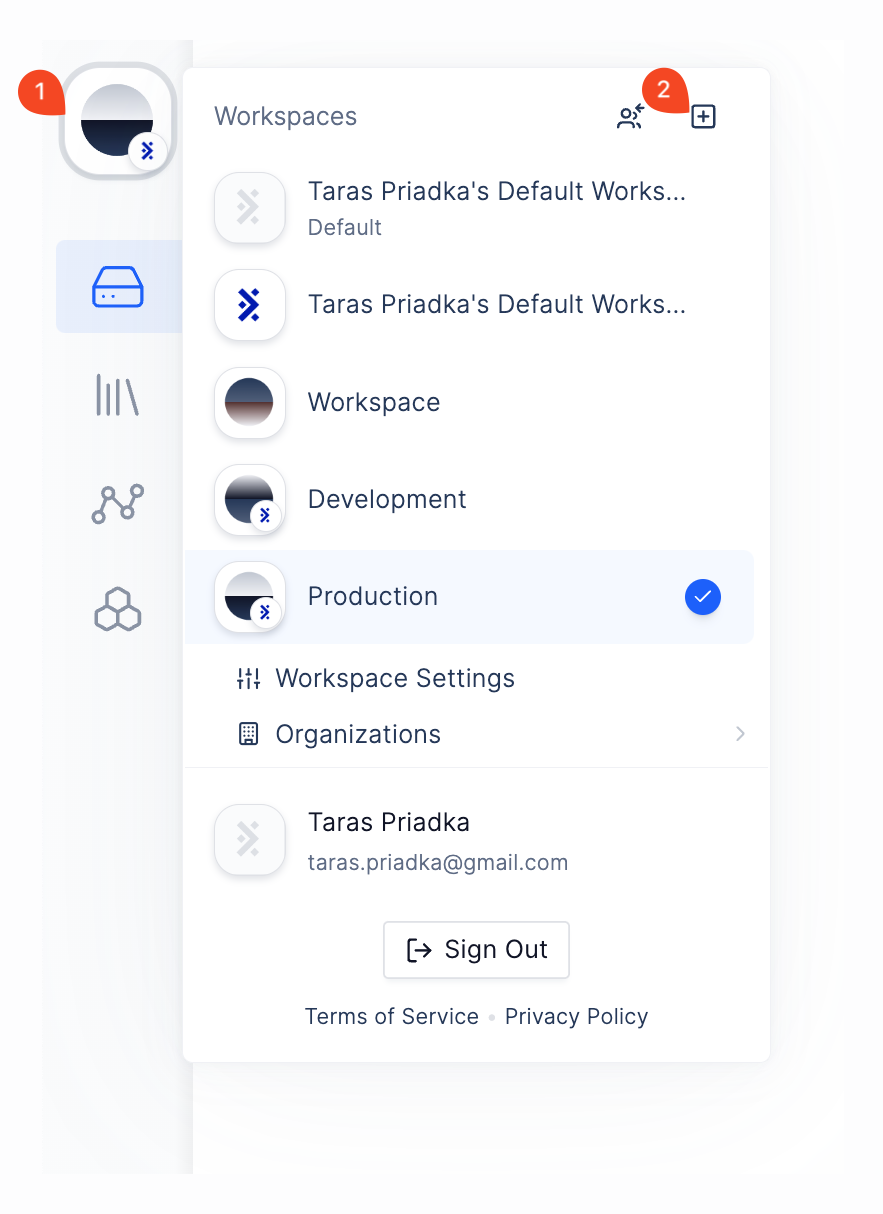
1. Click on your user Avatar in the top left corner of the screen
2. Then click on the Square Plus icon in the top right of the Workspace Selector Dropdown.
3. This will open the Create New Workspace modal
 4. Fill out the workspace name.
5. If you are an admin in an organization, you will see an "Organization" dropdown.
6. Select an organization from the dropdown
7. Click "Create Team"
4. Fill out the workspace name.
5. If you are an admin in an organization, you will see an "Organization" dropdown.
6. Select an organization from the dropdown
7. Click "Create Team"
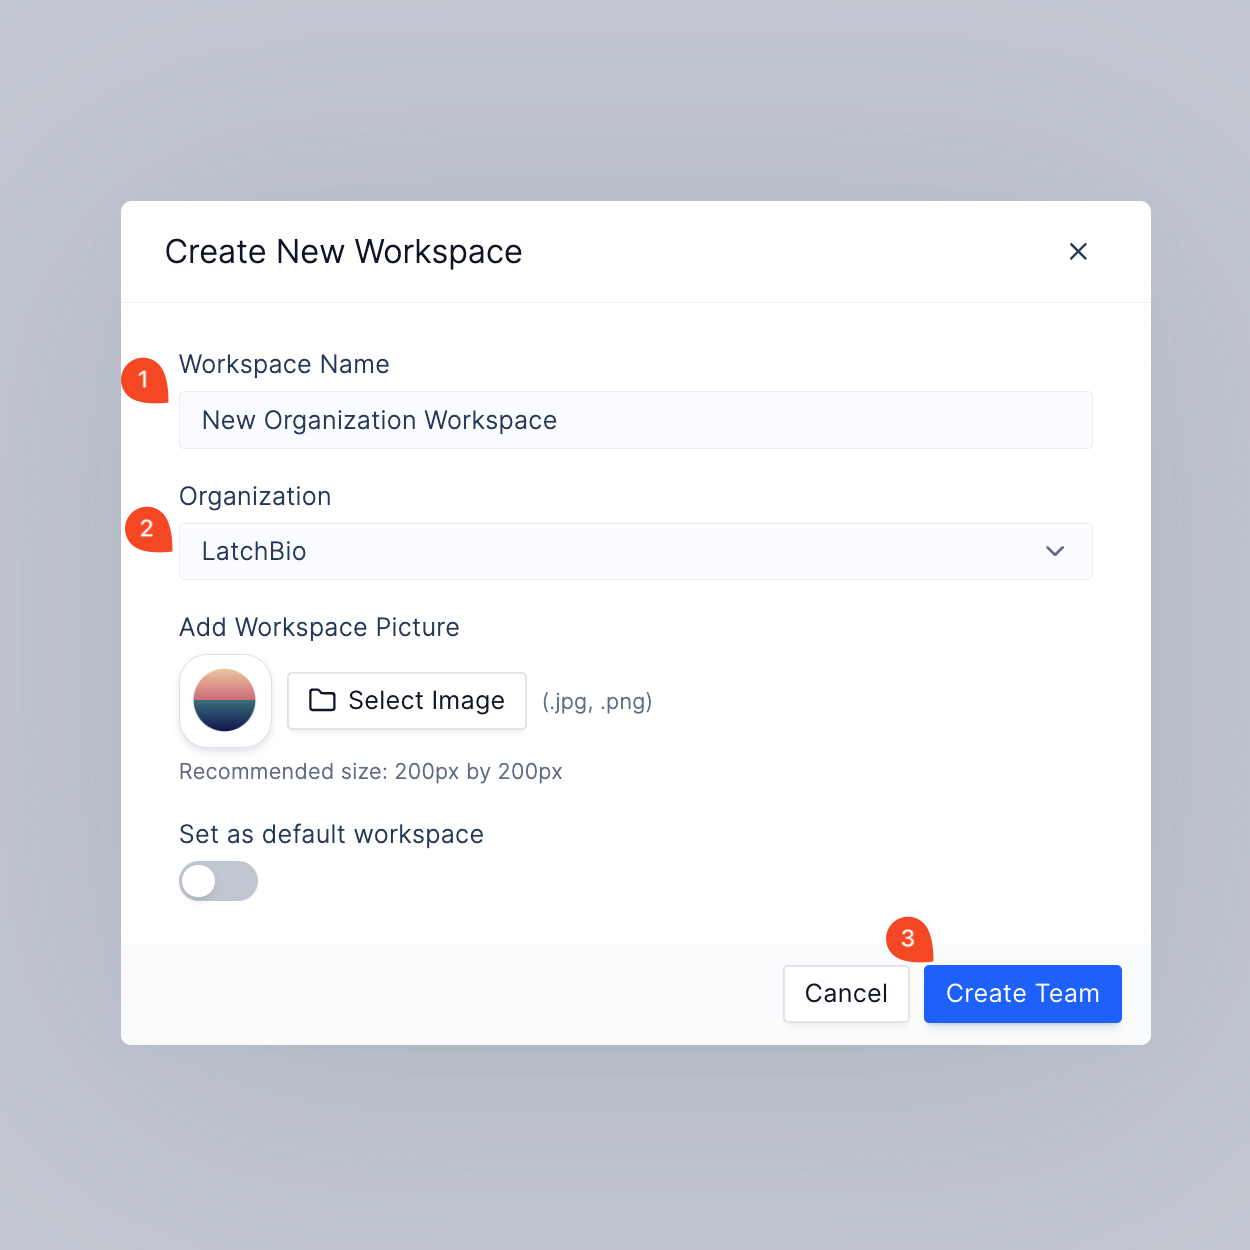
The new workspace will now be part of the selected organization and can be managed from the organization's dashboard.